Today we have the first installment of a two-part series from Joanne Fulton. Joanne is here on an 8-week internship funded by the John R. Murray Charitable Trust to help with the conservation of the collection of Sir Charles Lyell (1797 – 1875).
It is a privilege to handle objects that have been worked on by people in the past, to experience the connection and witness their working and learning processes. Therefore, it has been a fascinating opportunity to work on the rehousing of the Lyell Geological Specimen Collection which consists of various specimens from flint implements and axe heads, to shells and raindrop traces.
As previously outlined in these blogs, Sir Charles Lyell (1797-1875) was a hugely significant scientific figure in the 19th century. Amongst others, Lyell corresponded and was a close friend of another well known figure, Charles Darwin, a name closely linked to a number of the shell specimens within the collection I’m rehousing.
These specimens were collected or given to Charles Lyell on his many geological excursions. They were then used to inform his geological research, and they continue to inform learning and research within the University of Edinburgh today. When observing the many documents in the Lyell collection, I’ve found drawings of the same specimens I’m rehousing, illustrated by Lyell in his papers and notebooks.
In the first week I calculated I should be aiming to complete at least 5 objects per day to finish within the 8 weeks of my internship, as I had to bear in mind that within the 168 objects to be rehoused there are groups of items – here I’m largely referring to the shells – that make up a single object. However, as I reach the end of week 4, I’ve found I’m now completing over 10 a day due to more efficient preparation.
The materials I have been using to rehouse the specimens includes card tray compartments and plastazote, a type of foam used in archival repackaging. I have several sizes of trays, however there are 6 specimens which are too large for the largest of trays and need their own custom boxes. I’ve made these myself with card and corrugated card.
My process for rehousing a specimen begins having prepared the tray and two layers of plastazote to fit within. I then cut into the plastazote as appropriate to the rock. Using a white pencil I mark out where I need to cut through the top layer of plastazote, and then using a sharp scalpel, I carve into the thicker bottom layer. This carving is continued until the specimen sits tight and will continue to do so in the future when the specimens are returned to their storage.
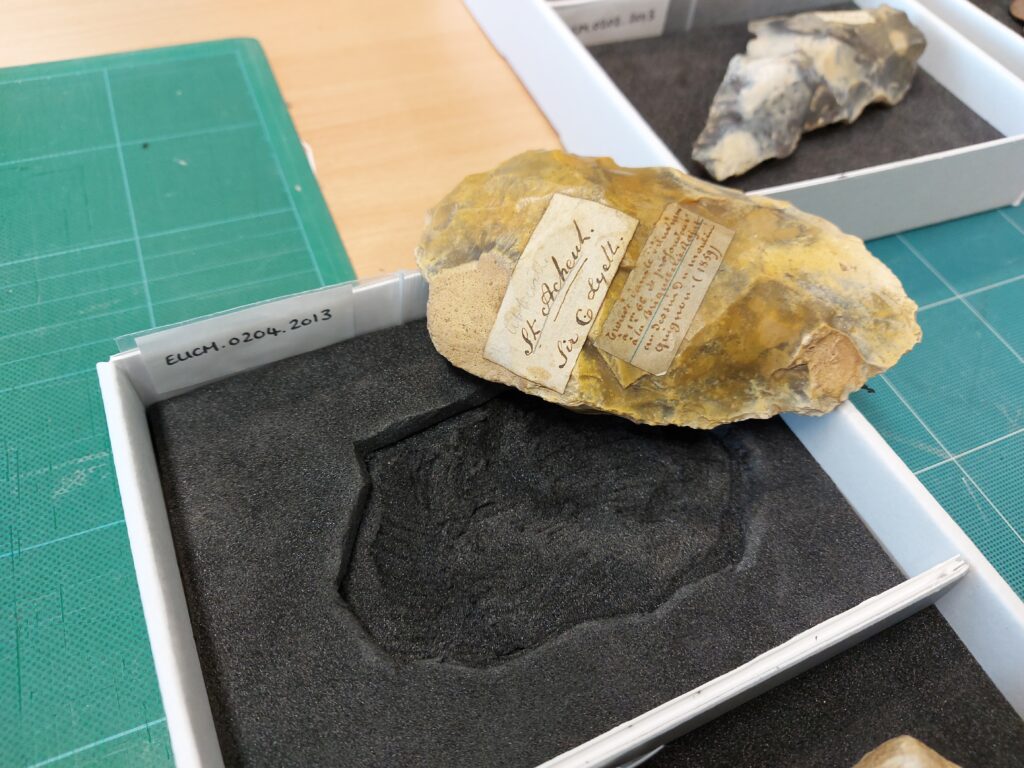
A sharp scalpel is needed to create a neatly cut support for each specimen (EUCM.0204.2013)
All this cutting creates a lot of off-cuts from the plastazote. Rather than wasting them, I shall be reusing them as padding for a Tyvek book cushion in order to make my project more sustainable.
Previous to my rehousing, some of the rocks were held in small green trays of a standard size, often not suited to the actual size of the specimens and offering no added protection. The shells, which I shall be rehousing next week, are in small red boxes.
Included with many of the specimens are extra notes and labels of various origins – some of Lyell’s own handwriting – which also need to be housed with the object as part of their history. When this is the case, I create a third layer of plastazote to house this paper note slipped in a melinex sleeve, carving a little recess for it to sit flat. I then attach cotton tape to the middle layer so the user can lift the object to see the paper note when needed.
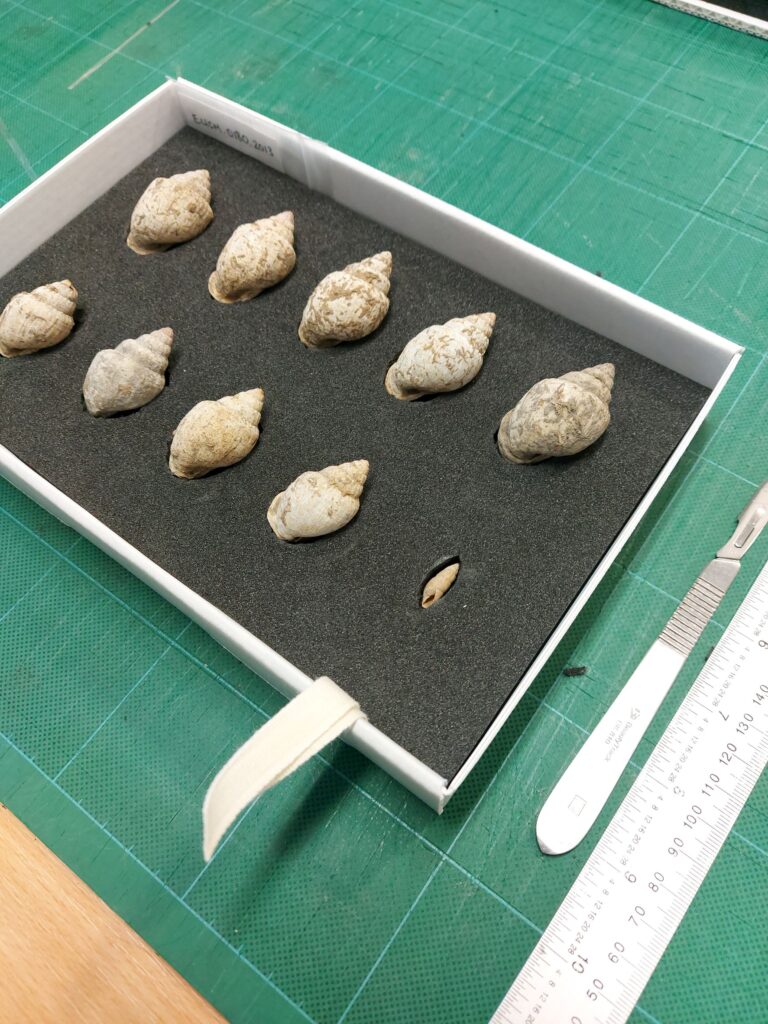
Shells after rehousing: A note stating these shells were collected by Darwin is stored underneath (EUCM.0180.2013)
The majority of these specimens are in good condition – they are rocks and so robust by their composition- the labels, many handwritten by Lyell, and other attachments to the object are less so. Many are in need of repair having suffered losses, crumpling, and have become detached from the specimen. This is a problem I shall be tackling in the second half of my internship; repairing the tears and losses, as well as reattaching the labels with an adhesive.
There have also been a few messy surprises and oddities in the collection, with one rock having a large amount of white tack attached, unfortunately this was also stuck to the rock’s labels. This white tack was removed, and the same tack was used to remove the tiny amounts left in the small crevices on the rock surface. I carefully removed the labels from the rock and the tack, removing the unwanted and potentially damaging tack mechanically from the paper labels.
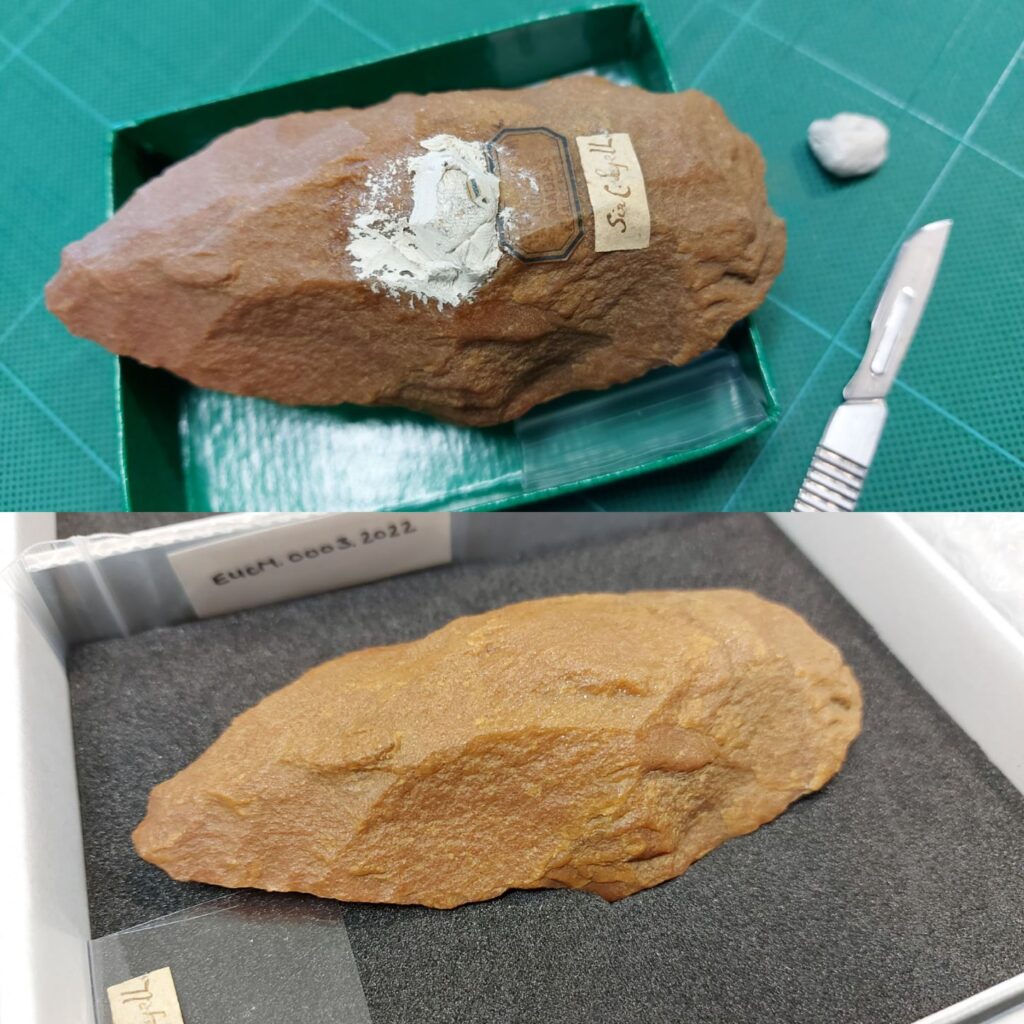
Photo during and after removing white tack from one of the specimens (EUCM.0003.2013)
Having recently graduated from the paper conservation course at Northumbria University, its been a rich learning curve working with objects such as the geological specimens. In my second blog, I plan to examine the method of reattaching the loose labels to the specimens as well as the finalisation of the rehousing within the second half of my internship.
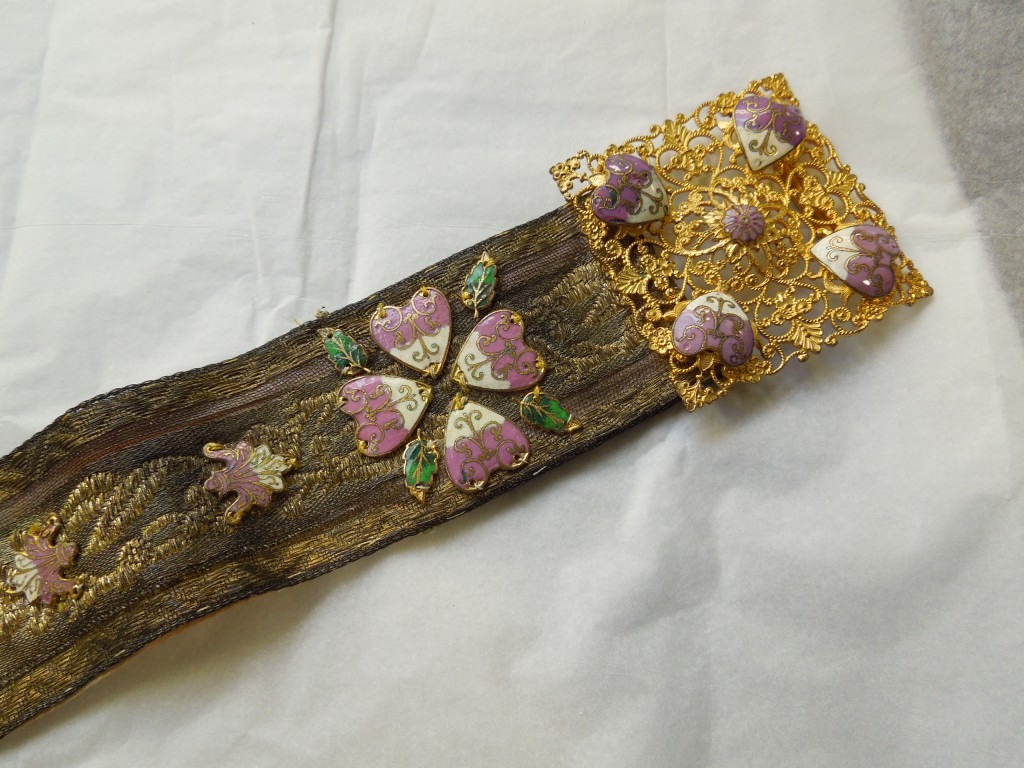
 The slide show below shows the stages of taking the belt out of the box.
 An example of a dusty book before surface cleaning
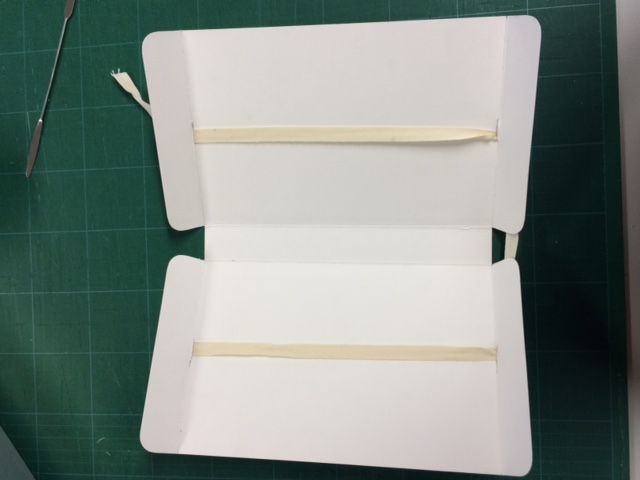
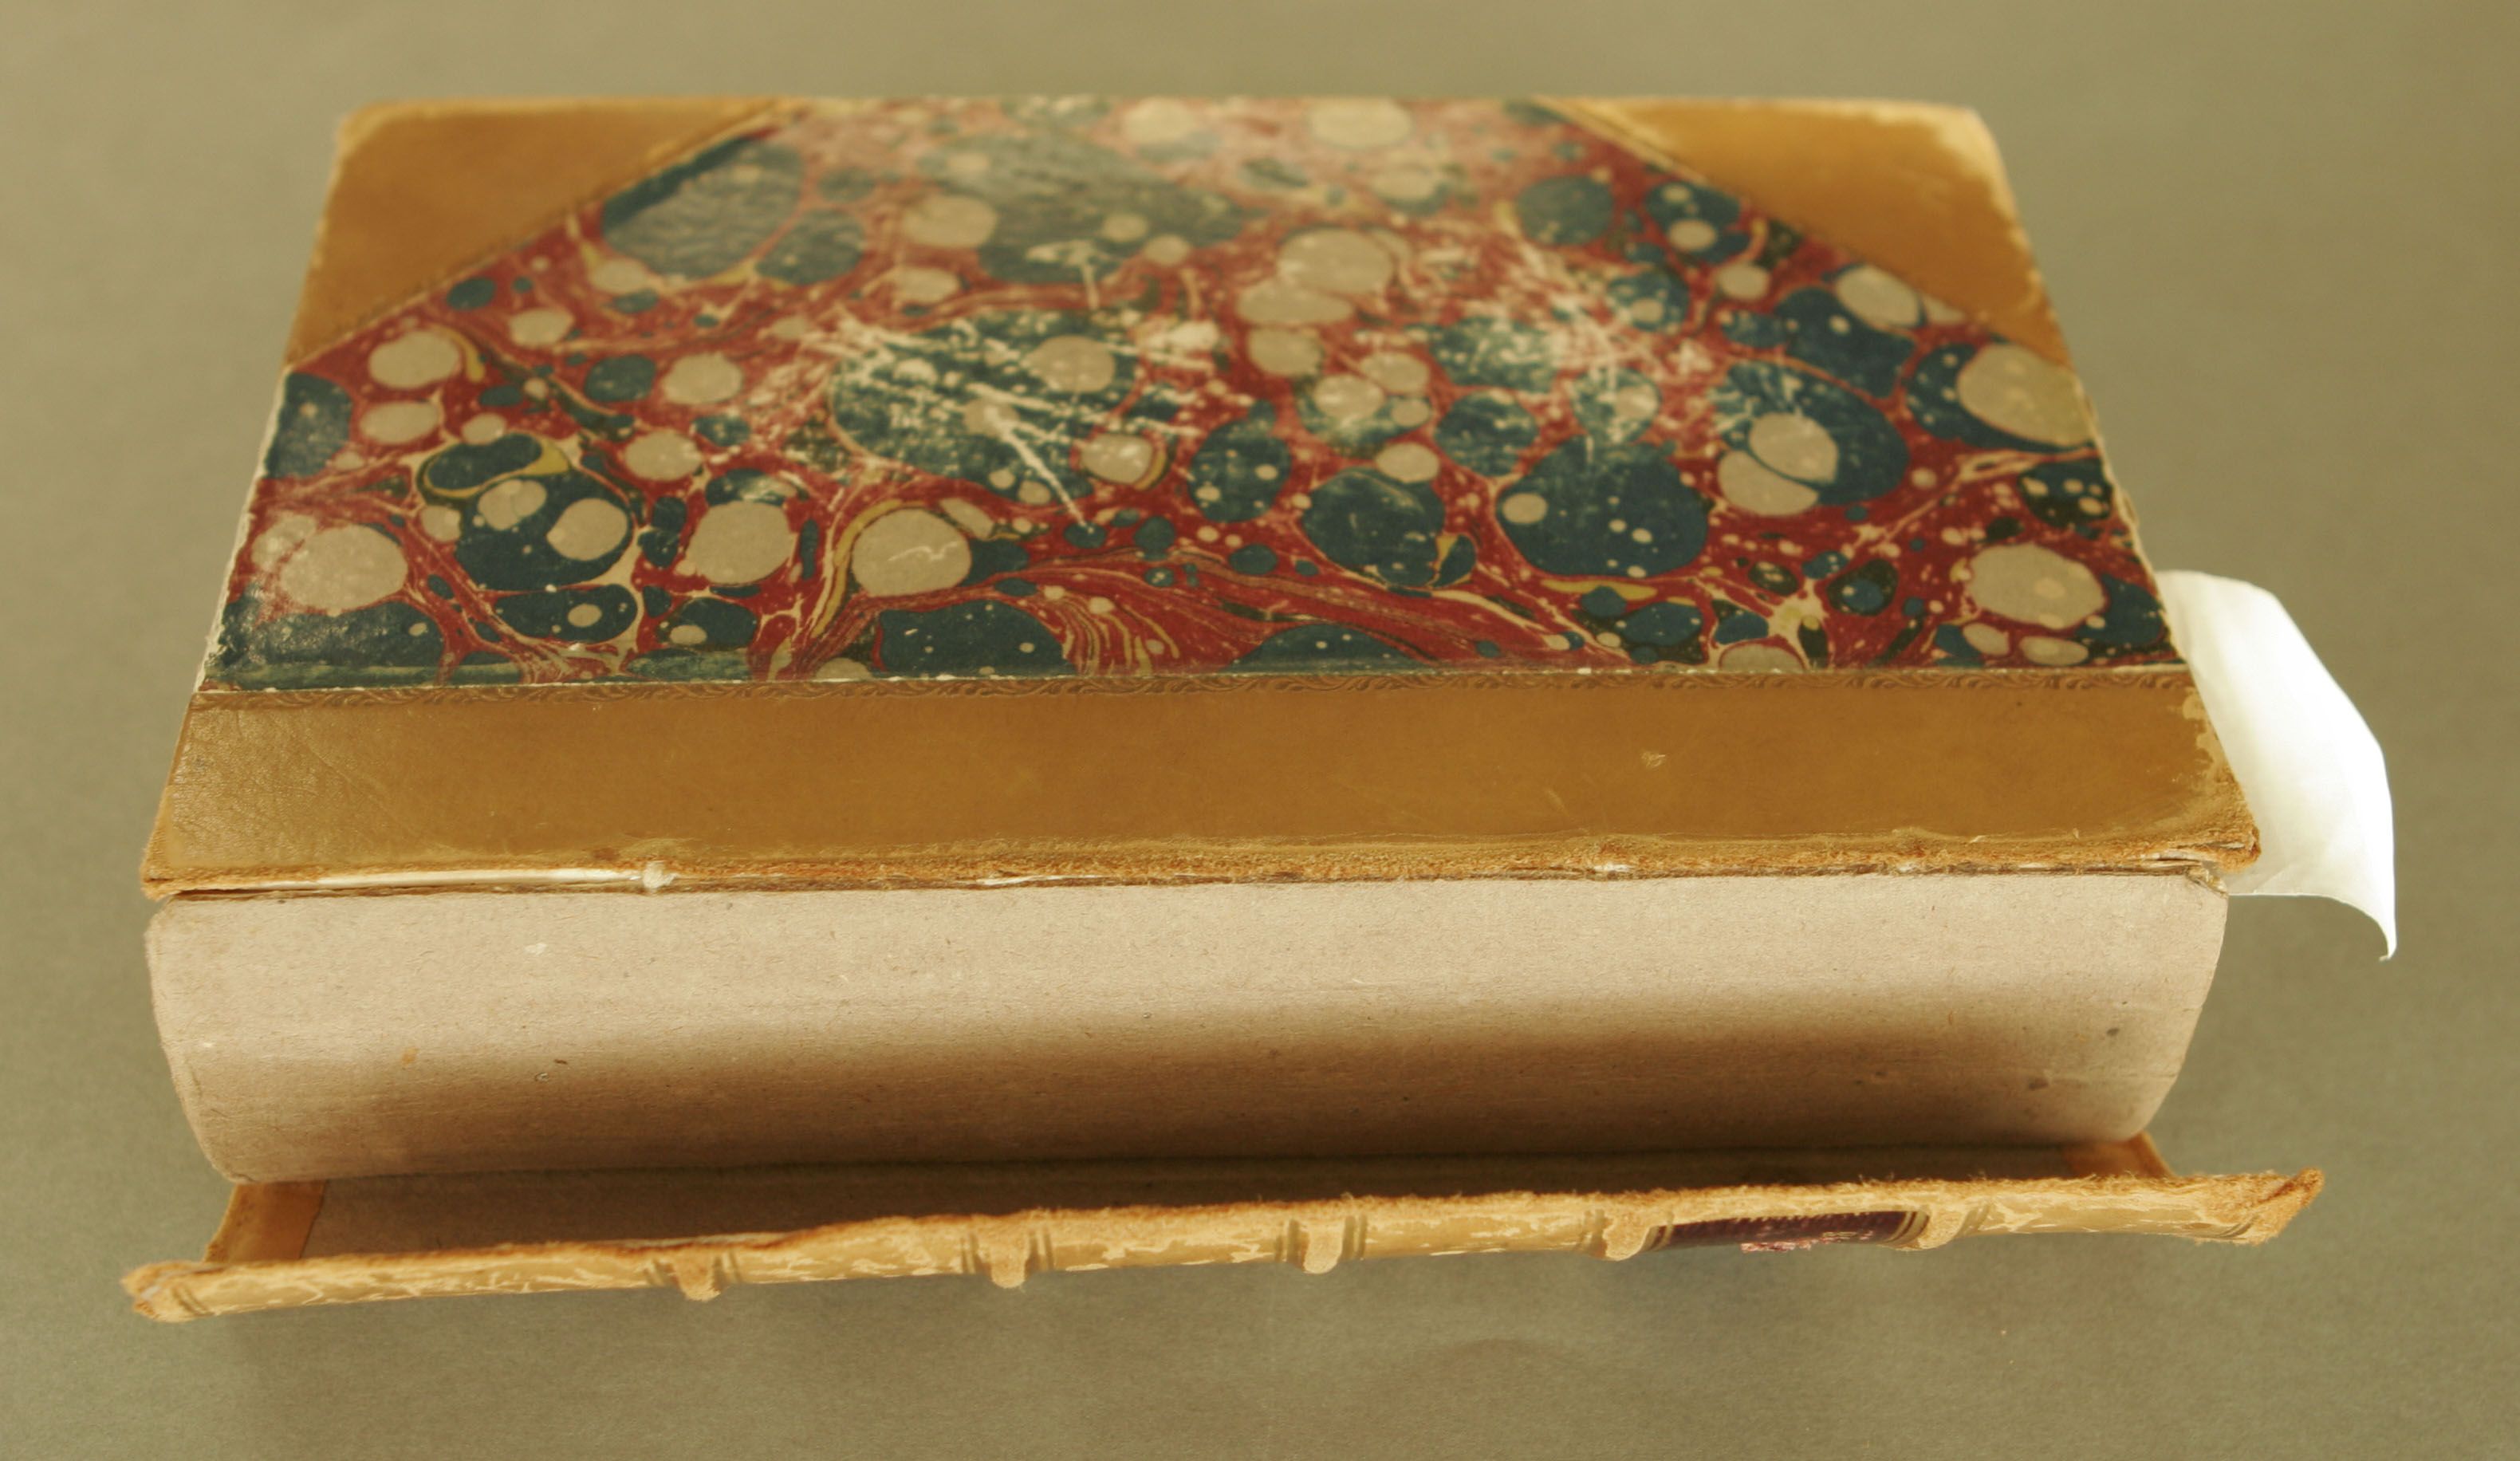
 Finished book enclosure
  Books looking happy in their new enclosures