Today’s blog post concludes Lyell Intern Joanne Fulton’s two-part series on the Lyell Project. Joanne discusses the variety of work she carried out over the last few weeks of her internship at the CRC.
As my internship at the CRC draws to a close, I can reflect on the many exciting opportunities I’ve had to experience all aspects of the work involved in conserving the Lyell Collection. As I shall discuss further in this second blog, my responsibilities have not solely covered the rehousing of the specimens in the geological collection which was explained in my first blog.
In my last blog, I spoke of the labels on the Lyell Geological specimens, some of which were more fragile than others. In twelve cases, these labels needed to be conserved and re-attached. To do so, I needed an adhesive. While I tested both gelatine mousse and EVA, a co-polymer adhesive commonly used in bookbinding. I chose to use gelatine mousse as I found it to have the strength required and was more historically appropriate than EVA, as the labels had previously been attached with an animal glue.
The labels offered a few different challenges and solutions. Following the discovery that white tack was attached to one of the rocks previously, upon closer look at the labels I found one of these labels had used blue tack to be secured to the specimen. Once I had carefully removed both the blue tack from the specimen and label, I made the decision not to reattach the label but to slip it into a Melinex pocket, which I then housed with the specimen in its box.
A specimen of grey and red laminated sandstone had an awkward placement of its label, meaning the label had suffered more damage than others being only half attached to the specimen. Here, I had to piece together the small parts of paper broken from the label, not dissimilar to a jigsaw, then use a lining to attach this with the remaining half of the label still on the specimen using a thin Japanese paper and the gelatine mousse. As this still meant half the label was not attached to the specimen, as originally intended, I created a little Melinex protective box, so the label could not be accidentally torn in the future.
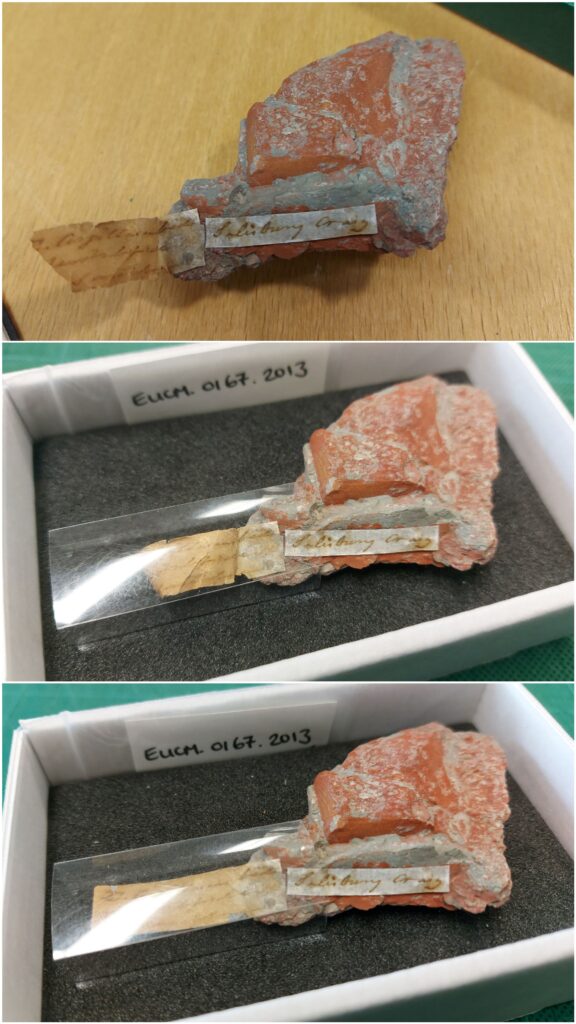
Before, During and After rehousing and conservation of specimen EUCM.0167.2013
On two other occasions I used a lining to reassemble torn and broken pieces of the labels back together. Some were harder to correctly position together due to the nature of each piece and/or some parts being missing.
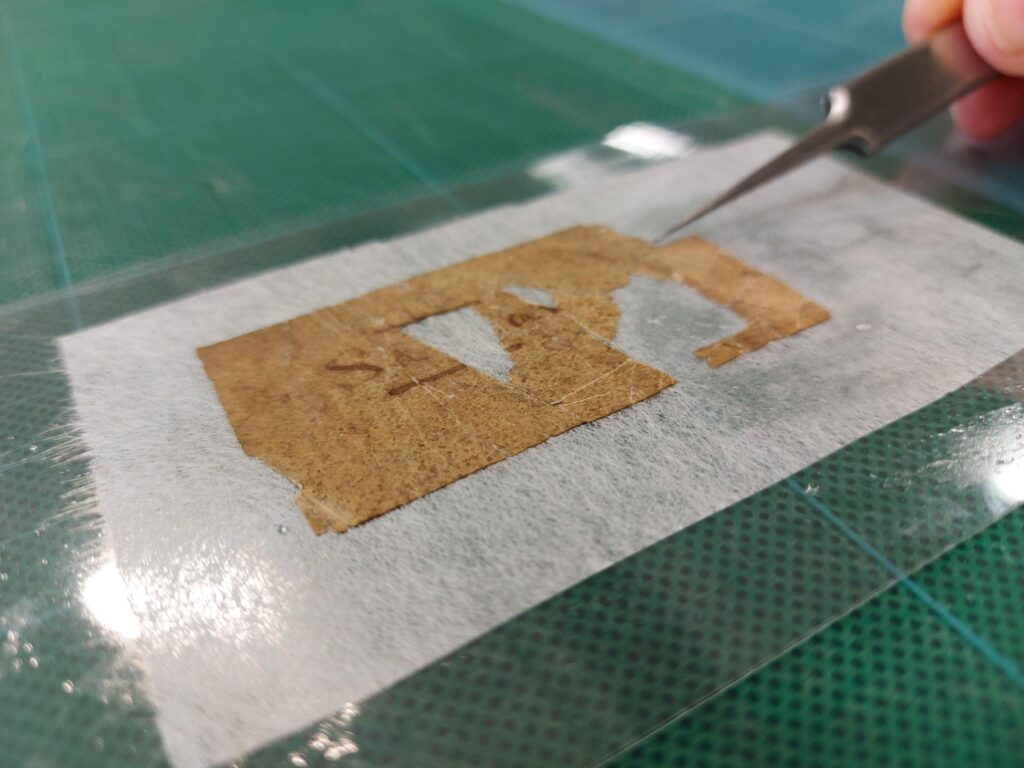
Applying the jigsaw-like pieces of a label to a lining
The rehousing and conservation of the Lyell Geological specimens was finished by the end of week six of my internship. With the rehousing finished, I hand-made two book cushions with Tyvek and the excess Plastazote scraps and offcuts. This created a sustainable solution with the waste material, all I needed was a needle and thread.
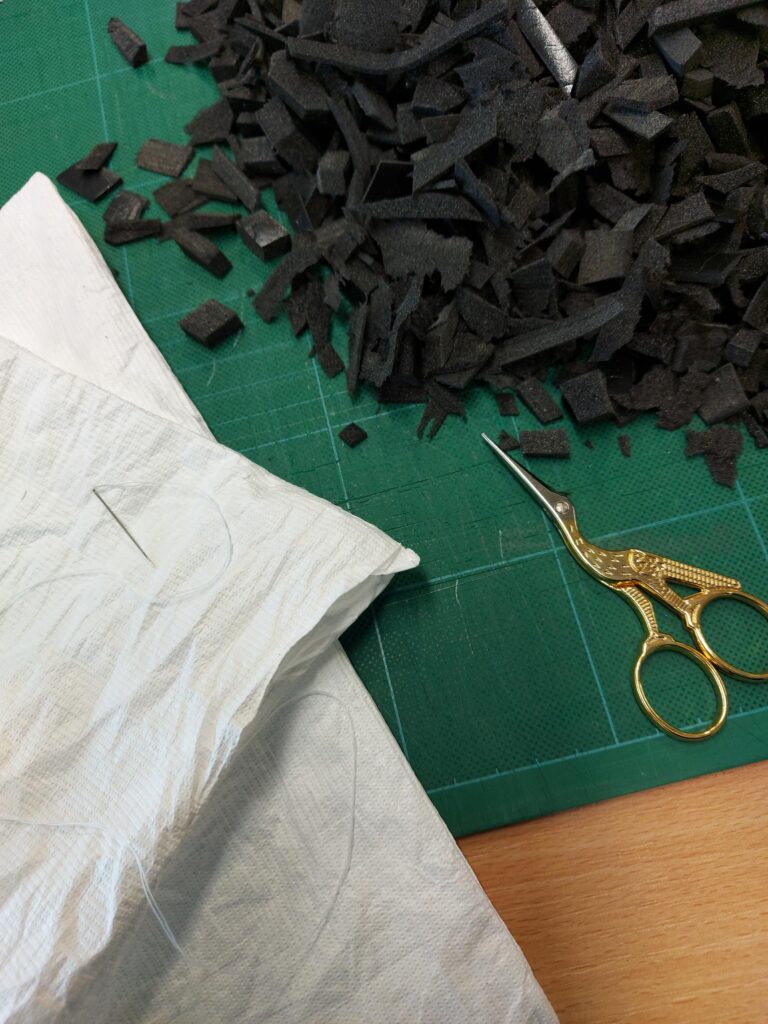
Book cushions proved to be a simple and sustainable solution to all the waste Plastazote offcuts
My attention then turned to Lyell’s personal notebooks and volumes. Here my aim was to rehouse them whilst gaining new skills in book conservation, skills I was very eager and grateful to learn.
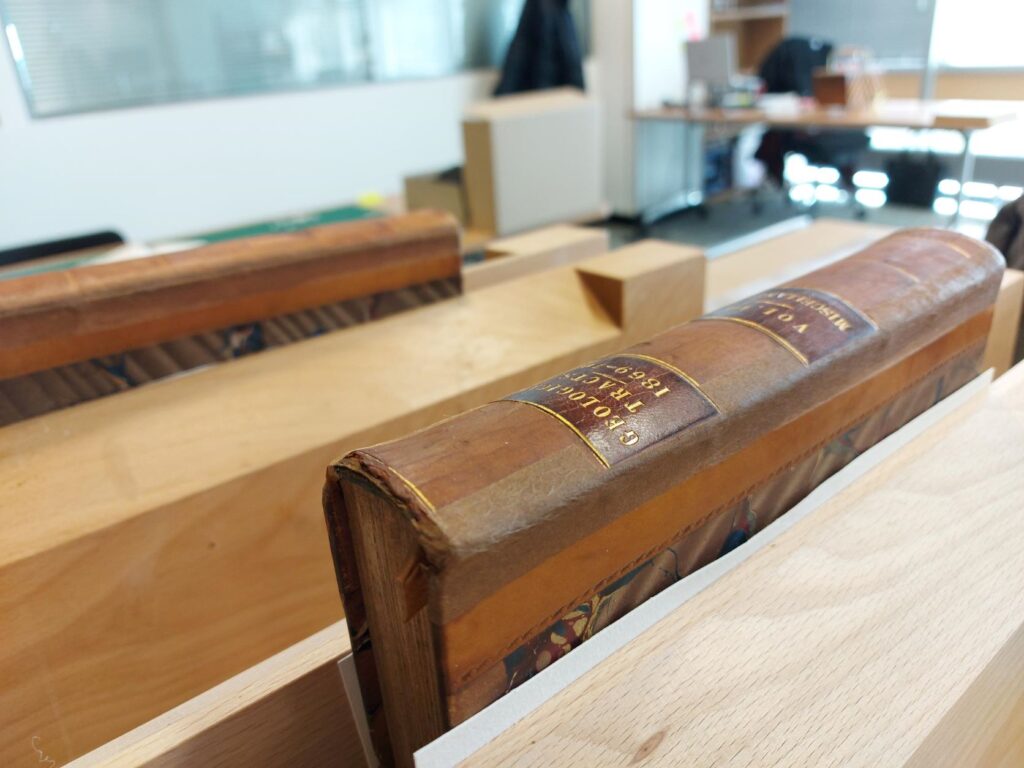
The main aim with the notebooks was to finish their rehousing, not a small feat as 294 book shoes needed to be made in total. However, as this was a task completed progressively throughout the project by all those involved, all book shoes were made by the end of my week seven. As well as this rehousing, I conserved three of Lyell’s notebooks. This consisted of surface cleaning, consolidation of red rot (a degradation process found in vegetable-tanned leather), label repair, corner repair, and repairing inner joints.
Finally, the volumes needed new housing in the form of phase boxes, which provide an additional layer of support and protection to the series. Then, depending on each volume, I surface cleaned, consolidated red rot, and repaired the outer joints. For the outer joints, I used a lightweight paper which I had toned using acrylic paints to match the colour of the volume. Unfortunately, the spine and the leather on the covers were different shades, so I matched my repair paper to a mid-tone. The darker spine is unusual, as usually you see the spine is lighter because of light damage. However, in this case, I believe the spine had previously been consolidated or brushed with a substance that has darkened over time.
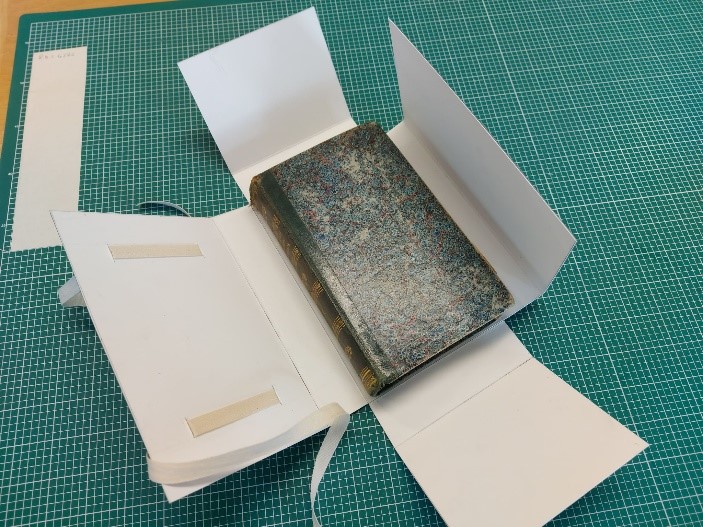
Example of a phase box
Having applied the repair paper to the outer joints with EVA, they were left to dry before being trimmed.
My experience at the CRC has improved my skills as a conservator immeasurably, and, boosted my confidence. The highlight for me has been rehousing the Geological collection which was a new experience and challenge, and I leave happy in the knowledge that each specimen is now preserved for the future in its own uniquely carved housing.