In this blog, Project Conservator Mhairi Boyle her second day of in-situ book conservation training she has undertaken with Book Conservator Caroline Scharfenberg (ACR). Mhairi previously undertook a Maternity Cover contract at the CRC within the Conservation Department.
In the previous blog, the examination and initial steps in spine repair and board reattachment of two volumes from the Royal (Dick) School of Veterinary Studies (R(D)SVS) were described. The first blog in this series can be found here.
After my first session with Caroline, I sat down and pored over all my notes and the millions of photos I had taken. The amount of thought, precision and care that goes into book spine linings and repairs that will eventually be hidden and concealed shows how complex even in-situ book conservation steps can be. After jotting down my notes into a coherent order and cross-referencing everything with Caroline, I came back to the studio a few weeks later refreshed and ready for a full day of training and collaboration.
In this session, Caroline and I focused on making spine pieces and hollows, and examined how to reattach cracked book boards in different ways. One of the things I like most about working in Conservation is that we are constantly adapting and evolving techniques, tailoring them to the objects we are currently working on. This is exactly what Caroline demonstrated to me: informed by our initial examinations of both volumes, we tailored the treatment steps for each book based on its size, weight, and particular areas of weakness.
Today we have the first instalment of a two-part series from Collections Care Assistant, Sarah Partington. In this post, she talks about rehousing a collection of ceramics made by the artist Emma Gillies. Sarah is working at the CRC on a government-funded Kickstart placement and will be sharing two of the projects that she has completed during her time with us.
This year, I have had the absolute joy of working with an exciting collection of ceramics by Emma Gillies. Previously, Emma Gillies was thought of largely in relation to her brother, the renowned painter and past Edinburgh College of Art Director, William Gillies. However, due to a discovery of a large body of her work, we are now able to gain fresh insights into her practice as a prolific artist in her own right.
A significant amount of work has already been done to catalogue and house the collection since its rediscovery in 2013. My role in this project built upon this foundation of existing collections management and care work, and was focused on two main tasks: checking and updating the existing inventory, and rehousing the ceramics in such a way that they could be accessible visually, whilst also being secure and stable.
Today we have the first installment of a two-part series from Joanne Fulton. Joanne is here on an 8-week internship funded by the John R. Murray Charitable Trust to help with the conservation of the collection of Sir Charles Lyell (1797 – 1875).
It is a privilege to handle objects that have been worked on by people in the past, to experience the connection and witness their working and learning processes. Therefore, it has been a fascinating opportunity to work on the rehousing of the Lyell Geological Specimen Collection which consists of various specimens from flint implements and axe heads, to shells and raindrop traces.
As previously outlined in these blogs, Sir Charles Lyell (1797-1875) was a hugely significant scientific figure in the 19th century. Amongst others, Lyell corresponded and was a close friend of another well known figure, Charles Darwin, a name closely linked to a number of the shell specimens within the collection I’m rehousing.
These specimens were collected or given to Charles Lyell on his many geological excursions. They were then used to inform his geological research, and they continue to inform learning and research within the University of Edinburgh today. When observing the many documents in the Lyell collection, I’ve found drawings of the same specimens I’m rehousing, illustrated by Lyell in his papers and notebooks.
In the first week I calculated I should be aiming to complete at least 5 objects per day to finish within the 8 weeks of my internship, as I had to bear in mind that within the 168 objects to be rehoused there are groups of items – here I’m largely referring to the shells – that make up a single object. However, as I reach the end of week 4, I’ve found I’m now completing over 10 a day due to more efficient preparation.
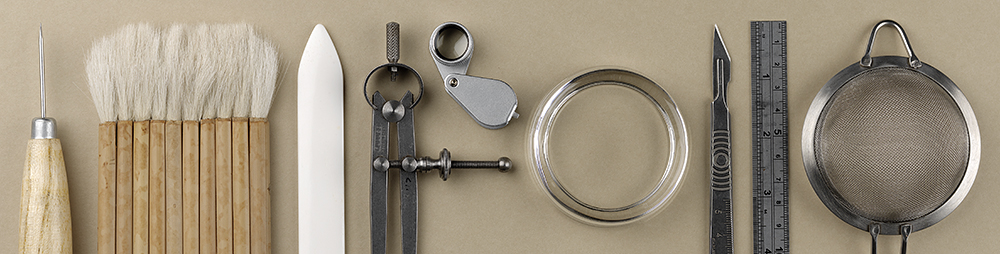
The materials I have been using to rehouse the specimens includes card tray compartments and plastazote, a type of foam used in archival repackaging. I have several sizes of trays, however there are 6 specimens which are too large for the largest of trays and need their own custom boxes. I’ve made these myself with card and corrugated card.
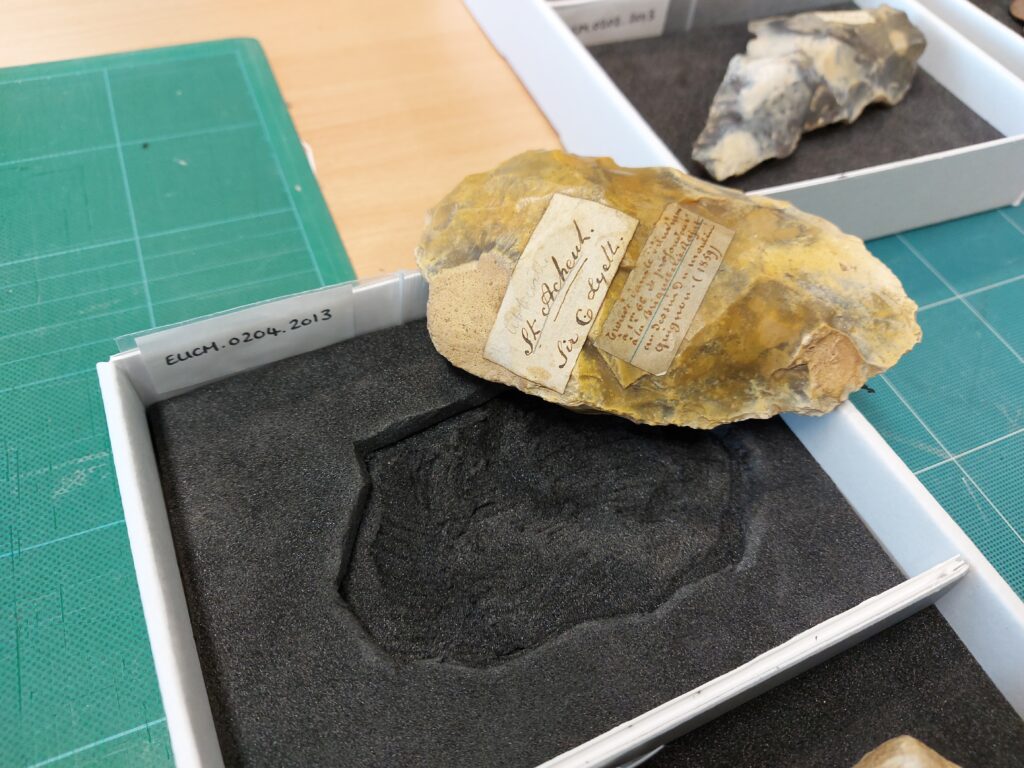
My process for rehousing a specimen begins having prepared the tray and two layers of plastazote to fit within. I then cut into the plastazote as appropriate to the rock. Using a white pencil I mark out where I need to cut through the top layer of plastazote, and then using a sharp scalpel, I carve into the thicker bottom layer. This carving is continued until the specimen sits tight and will continue to do so in the future when the specimens are returned to their storage.
A sharp scalpel is needed to create a neatly cut support for each specimen (EUCM.0204.2013)
All this cutting creates a lot of off-cuts from the plastazote. Rather than wasting them, I shall be reusing them as padding for a Tyvek book cushion in order to make my project more sustainable.
Previous to my rehousing, some of the rocks were held in small green trays of a standard size, often not suited to the actual size of the specimens and offering no added protection. The shells, which I shall be rehousing next week, are in small red boxes.
Included with many of the specimens are extra notes and labels of various origins – some of Lyell’s own handwriting – which also need to be housed with the object as part of their history. When this is the case, I create a third layer of plastazote to house this paper note slipped in a melinex sleeve, carving a little recess for it to sit flat. I then attach cotton tape to the middle layer so the user can lift the object to see the paper note when needed.
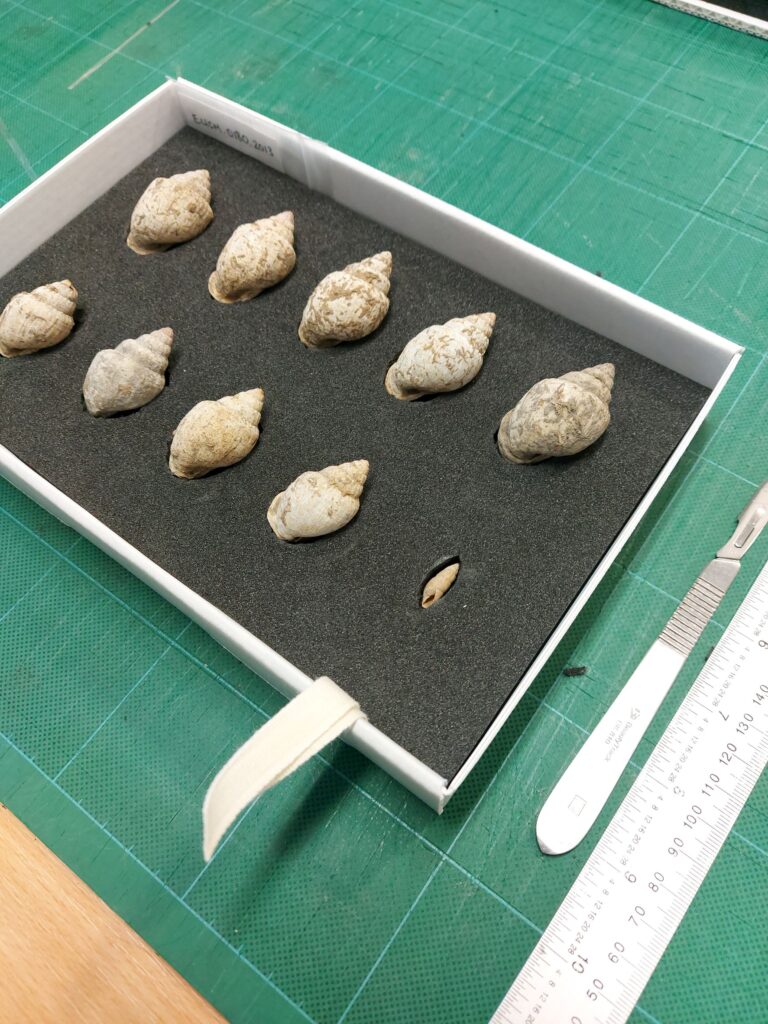
Shells after rehousing: A note stating these shells were collected by Darwin is stored underneath (EUCM.0180.2013)
The majority of these specimens are in good condition – they are rocks and so robust by their composition- the labels, many handwritten by Lyell, and other attachments to the object are less so. Many are in need of repair having suffered losses, crumpling, and have become detached from the specimen. This is a problem I shall be tackling in the second half of my internship; repairing the tears and losses, as well as reattaching the labels with an adhesive.
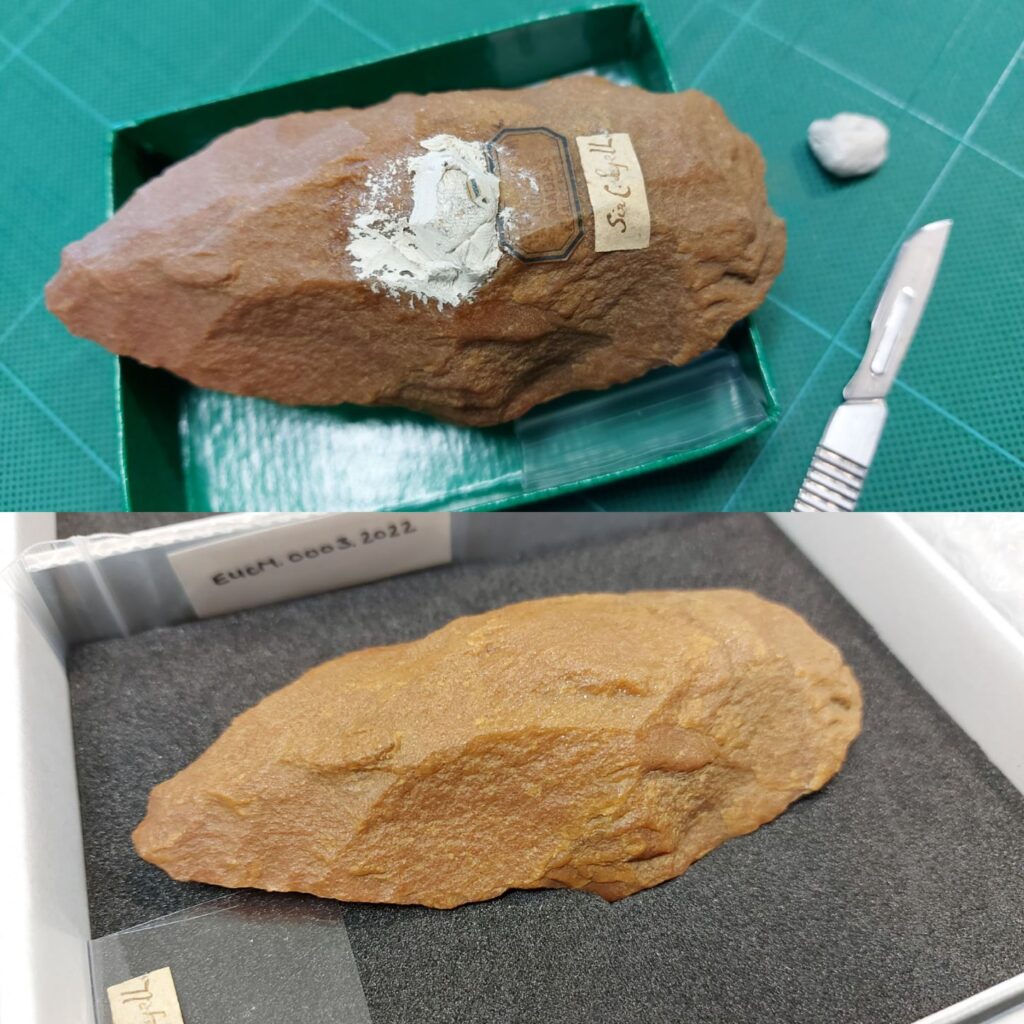
There have also been a few messy surprises and oddities in the collection, with one rock having a large amount of white tack attached, unfortunately this was also stuck to the rock’s labels. This white tack was removed, and the same tack was used to remove the tiny amounts left in the small crevices on the rock surface. I carefully removed the labels from the rock and the tack, removing the unwanted and potentially damaging tack mechanically from the paper labels.
Photo during and after removing white tack from one of the specimens (EUCM.0003.2013)
Having recently graduated from the paper conservation course at Northumbria University, its been a rich learning curve working with objects such as the geological specimens. In my second blog, I plan to examine the method of reattaching the loose labels to the specimens as well as the finalisation of the rehousing within the second half of my internship.
Due to the success of last year’s ‘Crowdsourcing Conservation’ event, we are repeating the session on 19 and 20 February 2018! You can read more about last year’s event here.
This year, we will continue to work with the Laing collection, this time rehousing section IV. Over the two-day period we aim to rehouse 96 boxes, completing the boxing of the Laing manuscript material.
Boxes from the Laing II collections, before (left) and after (right) rehousing
Damage has been caused to these collections due to the current storage in vertical boxes. Folders have slumped in under-filled boxes, and caused planar distortion of the papers. Tearing and creasing has occurred due to the lack of internal protection. To solve this problem, we want to rehouse the collection in acid-free folders and boxes.
This week’s blog comes from Special Collections Conservator, Emily, who recently took part in a training event in London on the conservation of parchment. This is the first in a two-part blog. It focuses on the introductory section of the workshop, consisting of a series of lectures to develop understanding of the material. The second post will look at practical techniques for the conservation of parchment…
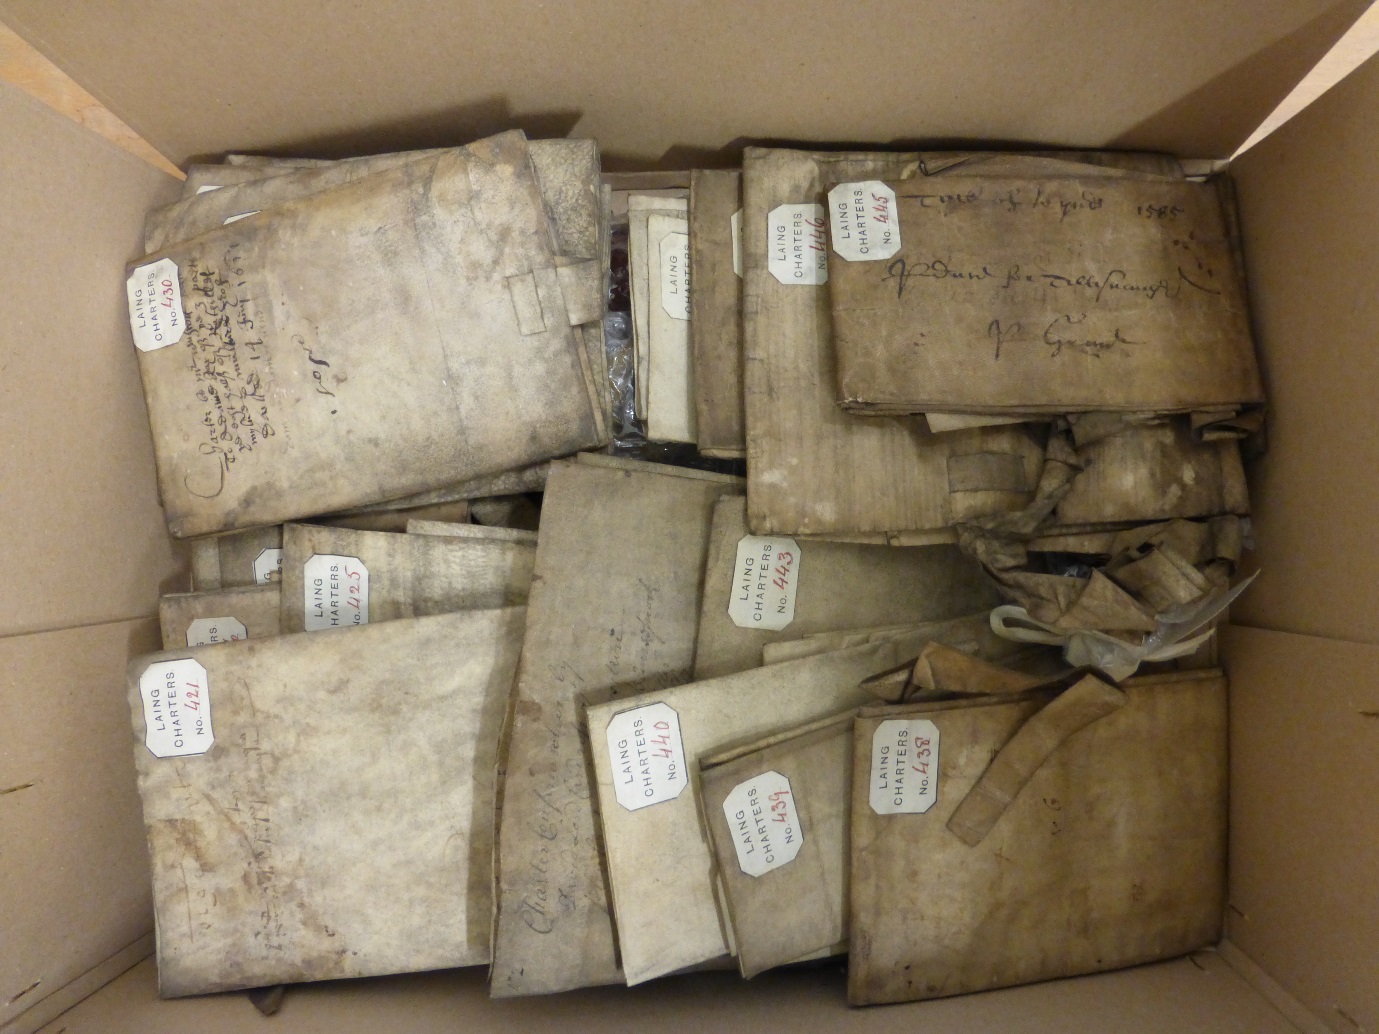
From 19 to 22 October, I attended a four-day training event on the conservation of parchment at the National Archives in Kew. Parchment can be a problematic material to work with as it highly sensitive to moisture. Since many of the treatments we use in paper conservation utilise water, we have to employ methods that use the smallest amount possible to avoid irreparable damage. We have a large amount of parchment in our collections at the CRC, including approximately 3000 parchment charters in the Laing collection, so I was keen to find out more about this material and learn the very latest techniques for its conservation and preservation.
Parchment charters in the Laing collection
The event consisted of two days of lectures, followed by a two-day practical session. The lectures were open to a large number of people, whereas the practical workshop was limited to a maximum of 15 attendees.
The talks during the first two days focused on the making and analysis of parchment. The first talk was by Theresa Lupi, freelance Book and Paper Conservator in Malta, who discussed aspects of codicology and how it can be helpful to conservators. By studying different elements of the manuscript, we can learn how the parchment was made, what tools and techniques were used to prepare it and how this might affect its longevity and the treatments we can use. Following this, Theresa also gave lecture on fragments of manuscripts. Parchment documents were often recycled and reused in the past, and fragments can be found in the bindings of later books or used a wrappers for other items. These fragments can give clues to the how manuscripts were historically used.
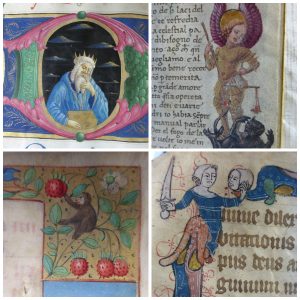
Drawings in manuscripts in the CRC collections
Next, Dr Fiona Brock, Lecturer in Applied Analytical Techniques at the Cranfield Forensic Institute presented a paper on the radiocarbon dating of parchment. Fiona first described the method of radiocarbon dating and discussed the advantages and disadvantages of using this method to estimated when the parchment was made.
After this, Professor Matthew Collins from the University of York presented his research which focuses on the identification of skins in our archive, and how this can tell us about the history of livestock management and craft. Matthew uses small eraser slithers which are gently rubbed against the parchment to remove a minute amount of material from the parchment. These tiny samples are analysed and the type of animal used to make the document can be identified. This service is offered for free and you can obtain a sample kit by emailing matthew@palaeome.org.
The day ended with a presentation by Jiří Vnouček, Conservator of Parchment and Paper at the Royal Library of Copenhagen. Jiří discussed the methods of parchment making and how it has changed over the centuries. Studying the production techniques can give conservators clues which help date and give provenance to the manuscript.
The next day began with another talk from Jiří, which followed on from his presentation the previous afternoon. He first focused on the methods of parchment making in the UK, and showed the below video of the methodologies used in Britain in 1939. He also discussed parchment making in Iceland and how the preparation can affect the final result.
The following talk by Angelica Bartoletti, Researcher in Conservation Science at the Tate, examined parchment on a nano-scale. Angelica states that not all damage to parchment is visible and by scrutinising the material on a micro-scale, we can detect damage before we can see it with the naked eye, and develop conservation techniques to reduce the effects of that damage.
The penultimate talk of the day was by Dr. David Mills, Microtomography Facilities Manager at Queen Mary University of London. The main focus of this talk was on the Apocalypto Project, a collaborative effort between conservators, scientists and computer vision experts to investigate how x-rays can be used to reveal obscured writing or text on parchment. David and his team used a CT scanner to take a 3D x-ray of a tightly rolled piece of parchment. Using a computer programme, they were able to digitally unravel the scroll and decipher the handwriting, without causing any detectable damage to the document. This technique has also been successfully used to view previously inaccessible archives, including glass plate negatives which have been stuck together, and a roll of film that was severely degraded by vinegar syndrome, which can be viewed in the video below. Amazingly, this service is offered for free! Email David (D.mills@quml.ac.uk) for more information.
The final talk of the day was by Edward Cheese, Conservator of Manuscripts and Printed Books at the Fitzwilliam Museum Cambridge. He gave a talk on the repair and binding of parchment manuscripts. Edward evaluated the balance between the risks of conservation treatment, against the benefits to collection items when they have been conserved. For example, Edward argued that although treatments such as humidification may have negative effects on the substrate, this is preferable to leaving the document unusable, or leaving the item in a state which encourages repeated stress on certain areas when handled. For example, a parchment charter that is difficult to open should be humidified and flattened, rather than repeatedly opened and closed which will eventually cause a split, even though the humidity may cause damage on a micro level.
Overall, I found the first two days of the event informative and inspiring, and it provided a great base for the practical session that followed. Read the second part of this blog to find out more about historic conservation of parchment, and up-to-date methods conservators use today – coming soon!
Today we hear from Sophie, our first ever Employ.ed student in the conservation studio…
Hi, my name is Sophie Lawson and I am currently the Conservation E-learning intern at the Centre for Research Collections at the University of Edinburgh. During my time of ten weeks here in the Conservation Department I will be creating an electronic learning resource on the subject of Integrated Pest Management (IPM). My internship is part of the Employ.ed programme, which is a University run scheme that supports students’ career development, providing work experience whilst working towards attaining the Edinburgh Award. I am currently going into my third year of my undergraduate degree in History and have an interest in special collections, particularly in digitisation and use of technologies in the heritage sector.
The University’s IPM plan is integral to the storage of rare and unique collections, being a tested method to monitor and control insect pests and mould activity in collections that, if left unmonitored or untreated, could cause irreversible and expensive damage to collection items. As part of a preventive conservation programme, IPM is an effective way to reduce damage and cost, and to minimise intervention with special collection items. An effective IPM plan will enable institutions to have greater control over and knowledge of pest activity in their facility, making pest prevention and treatment much more effective. One of my goals through creating this e-learning resource is to aid this accumulation of knowledge of pest activity throughout the department, with the hope that the resource will be used for internal staff training for a basic overview of our IPM plan, how it works and why it is so important.
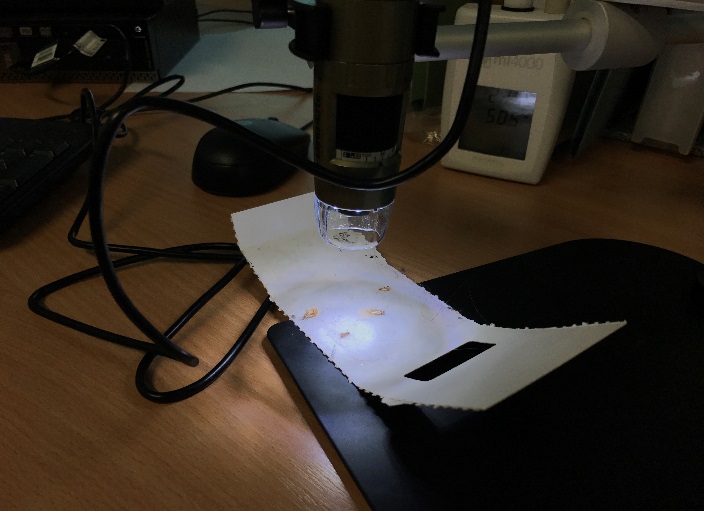
Using a microscope to identify pests
So far in my internship I have been able to gain invaluable insight into the field of Conservation, having spent some time in the Historic Environment Scotland’s Conservation Studio, as well as our own in the CRC, and even being able to try my hand at some surface cleaning and making boxes for rehousing books! More specifically I have gained a great deal of knowledge about Preventive Conservation, having researched Integrated Pest Management and the theory behind it for the content of my e-learning resource. In addition to this, I have been able to shadow my supervisor, Katharine Richardson, as she carried out pest trap inspections as part of our IPM Plan – and was even able to get a closer look at the kind of pests we found!
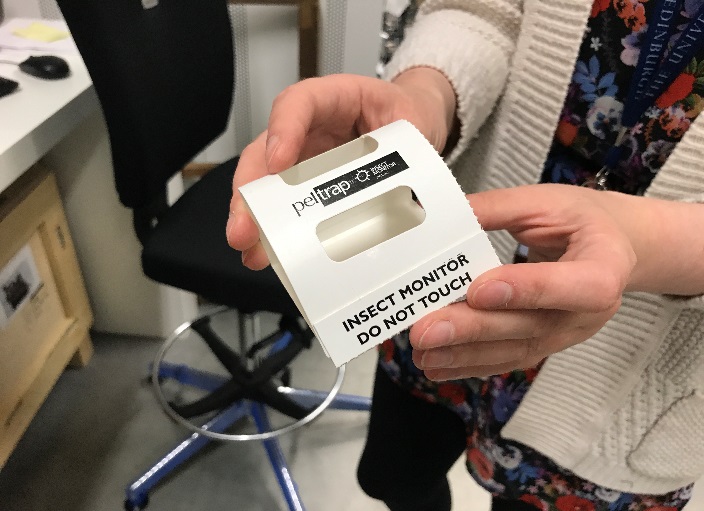
Trap used to monitor for pest activity
For the remainder of my internship I aim to create a user directed, interactive program, and experiment with implementing different types of media such as games and video tutorials to create an engaging and educational resource. I hope that through the completion of this project we are able to generate a broader knowledge of IPM and its importance amongst the University’s Centre for Research Collections staff, as well as introduce new methods of e-learning and training styles to be used in the department in future projects.
This week’s blog post comes from Special Collections Conservator, Emily, who recently attended a conservation training workshop in Edinburgh…
Earlier this year in September, I attended a two-day course organised by Helen Creasy from the Scottish Paper Conservation Studio and hosted by the National Library of Scotland entitled ‘Paper and Water: Conservation Principles’. The course was based on the book “Paper and Water: a Guide for Conservators” (Banik and Brückle), which has become an essential text for conservators since its publication in 2011, and provided by Doris Müller-Hess and Hildegard Homburger, private conservators from Vienna and Berlin, respectively.
This course examined the interaction between cellulose and water and the effect this has during conservation treatments. Paper conservators frequently use treatments that employ water, from simple treatments repairing a document using wheat starch paste, and using a poultice to remove historic repairs, to more complex treatments such as washing paper to reduce discolouration and acidity in the paper, so it is vital to understand this complex relationship.
This week’s blog post comes from Projects Conservator, Katharine Richardson, who recently attended a workshop to learn basic book conservation techniques….
Last month I attended a two day workshop, Book Conservation Skills for Paper Conservators, at the National Library Scotland. The course aimed to teach paper conservators basic practical book conservation skills. It was led by our friend and colleague, Caroline Scharfenberg, who is an accredited, freelance book conservator based at the University of Edinburgh Conservation Studio. I was very excited to learn a bit more about Caroline’s practice, and it was a great opportunity for me to get away from my desk for a bit and learn some new interventive conservation skills.
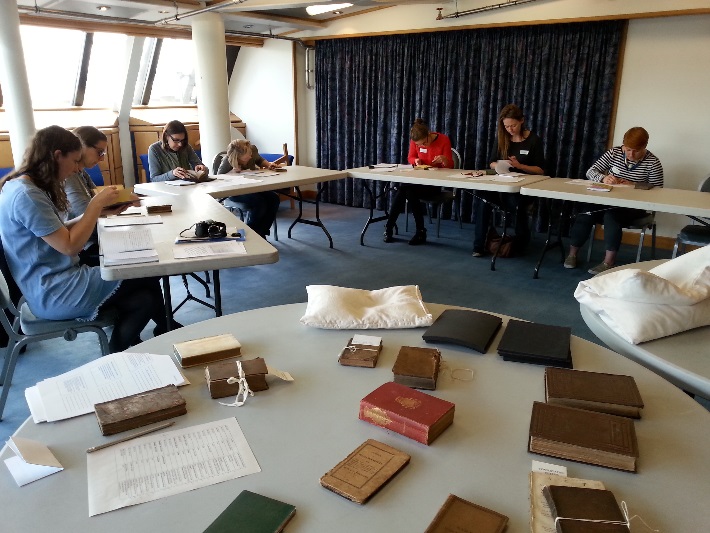
On the first day Caroline gave a series of lectures on the theory and ethics involved in book conservation as well as a brief history of book binding. We were then able to put some of the theory into practice through a practical exercise preparing a condition assessment and treatment proposal for some of the National Library’s book collections.
Class preparing their condition assessment and treatment proposals
In this week’s blog we hear from Musical Instrument Museums Edinburgh (MIMEd) Conservator, Jonathan Santa Maria Bouquet, who recently attended a training workshop on wood identification in Norway.
In this week’s blog we hear from Anna O’Regan, who recently attended a Conservation Taster Day at the CRC. Anna discusses why she wanted to take part, and what she learnt during the day…
My educational background is in Museum Studies and Cultural Heritage. While I enjoyed studying this masters degree, I found it to be a little too broad, and although I did choose to narrow the focus to cataloguing and gained voluntary experience in this area, I felt like this wasn’t the right path for me to follow. Then I stumbled upon conservation and figured out which direction I want to proceed in. When I learned about the Conservation Taster Day at Edinburgh University I was thrilled to be invited to take part and learn more about what branches of conservation there are, so I could get the information I needed and make a decision about what precisely I want to specialise in. Having completed the day I can say with certainty that paper conservation is for me and I couldn’t be more excited for what the future holds.