Clean up your sax

I am a Preventive Conservation Masters student at Northumbria University, and as part of my course, I am fortunate to be able to put theory into practice for six weeks at The University of Edinburgh. Being a musician, and wanting to work with interesting composite objects, I was hankering after a chance to work with musical instruments. Having studied at Edinburgh Uni for the last 5 years, I knew it housed an amazing musical instrument collection and I relished an opportunity to go back! I have spent most of my first two weeks working with Jonathan Santa Maria Bouquet, the musical instruments conservator, and have had the task of cleaning a beautiful silver plated saxophone by Selmer for the upcoming Out of the Blue exhibition in the Main Library.

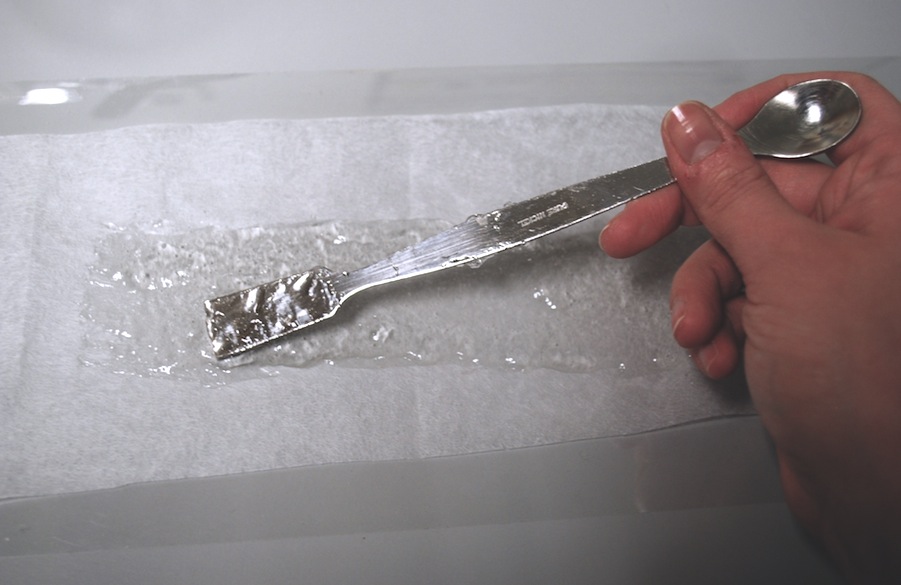
Having been taught repeatedly the reasons why metals and water should not mix, I was surprised when I was shown that the preliminary cleaning phase was water-based. However, I soon learnt that as long as each small area is dried carefully after the wet treatment, the water poses little threat. The abrasive agent used is calcium carbonate (precipitated chalk), which is mixed into water, and applied as a fine dispersion in theHarriet 1 
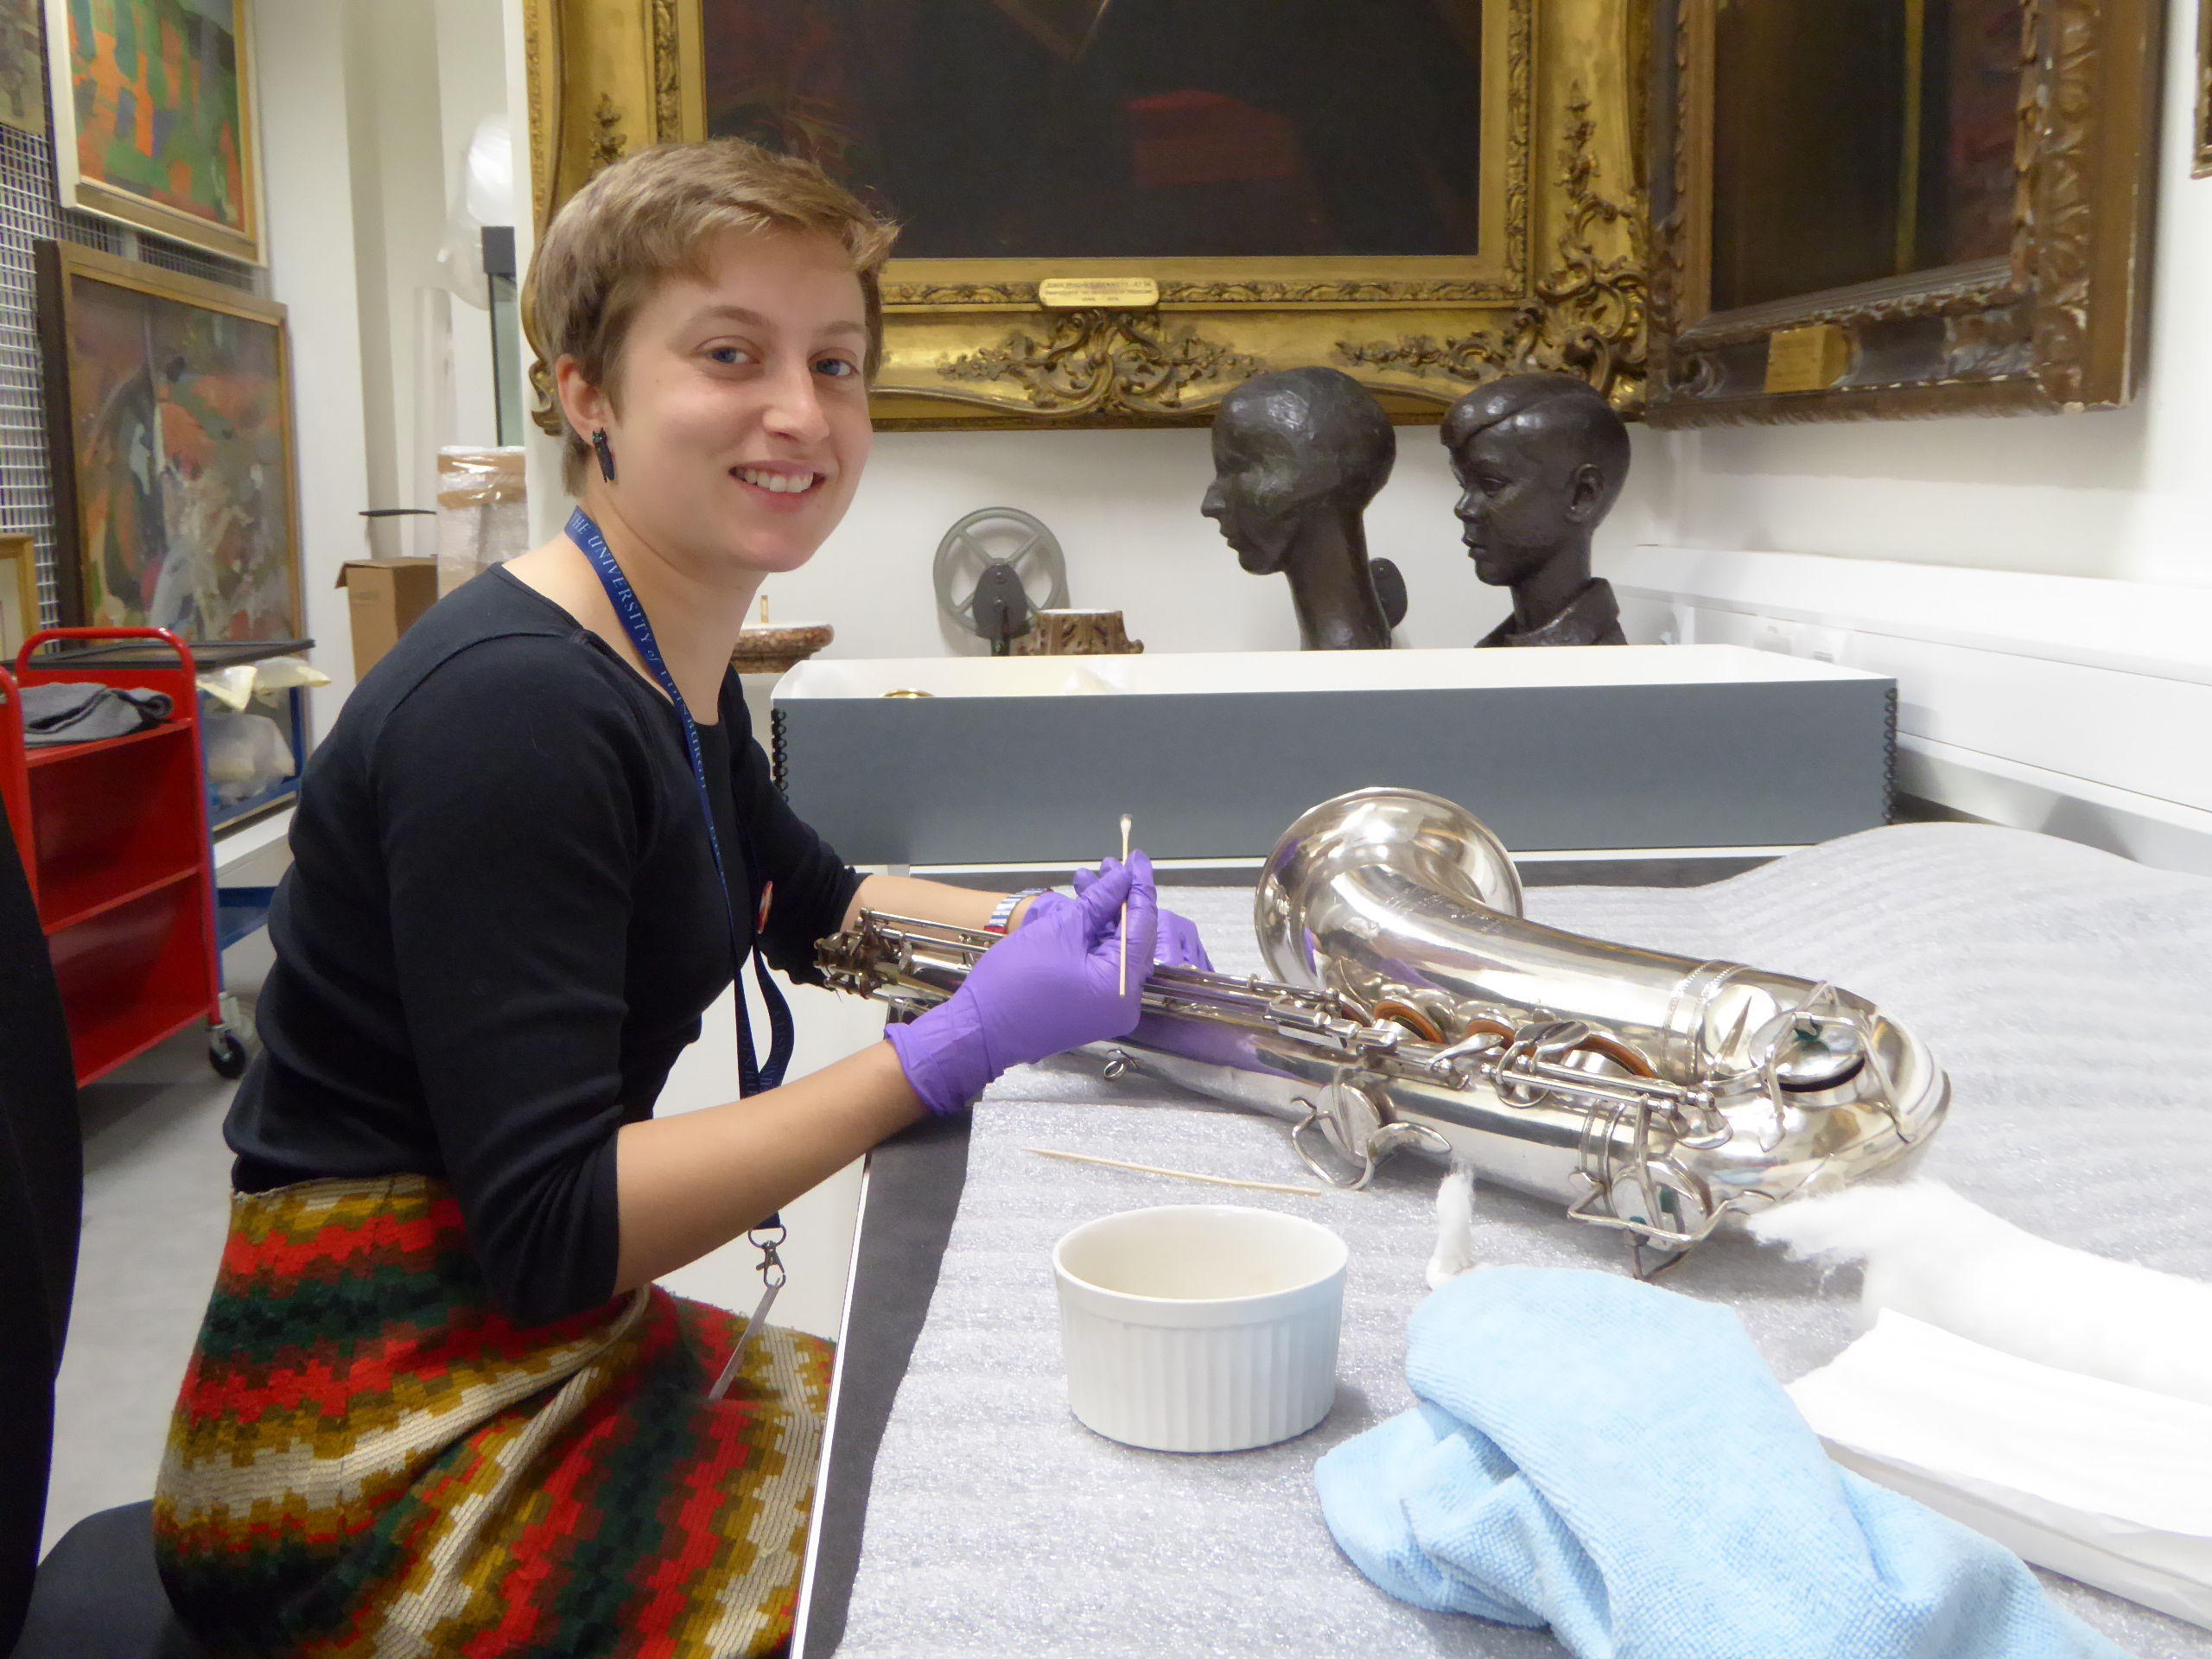
water – not as a paste – using cotton wool swabs and cotton rags. The idea is that the calcium carbonate is harder than the tarnish yet softer than the metal. It is still possible to scratch the silver so it is important to be gentle, and to use plenty of water, which seems counter-intuitive but really works.

After working over the entire metal surface using this wet method, drying as I went, I used a microfibre cloth to remove any chalky residue and lastly a silver polishing cloth (which is impregnated with a sulphur scavenger which breaks down the tarnish chemically rather than physically) to get the hard-to-reach and stubborn areas clear of tarnish. The reason for such a thorough clean is that the last stage of the cleaning plan is a coat of microcrystalline wax for protection from re-tarnishing, under which you do not want to trap any dirt or tarnish. These treatments should mean that not only will the saxophone look fabulous on display, but that it will not need cleaning again (if kept in the right conditions) for a long time.

Harriet 2

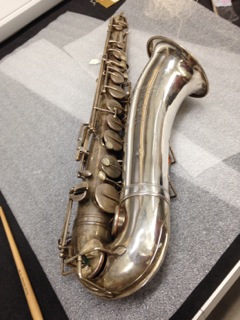
The Saxophone mid-way through cleaning

Other tasks so far have included wrapping musical instruments for long term storage, and starting out on an Integrated Pest Management system project with Emma Davey, which has involved visiting the National Trust Scotland offices to hear Preventive Conservator Mel Houston’s approaches to the challenges of monitoring insect pests over their numerous collection sites.

All in all a varied and exciting couple of weeks. Exactly what I came here for! More to come later in my placement, when I’ll be dealing with strings…

Post by Harriet Braine, Preventive Conservator Student Placement

An Exhibition in a Day

As part of the University of Edinburgh’s Innovative Learning Week, the Centre for Research Collections ran a joint event between Conservation, Exhibitions and Archives entitled ‘An Exhibition in a Day’. The aim of this event was to provide the participants with the basic skills required for curating and displaying an exhibition. Despite all our preparation, we entered the day with some sense of trepidation – was it even possible to create an exhibition in a day? We were certainly about to find out…

Using the fascinating and diverse archive collection from the University’s Moray House School of Education as inspiration and source material, the participants received a ‘behind-the-scenes’ experience of what goes in to creating an exhibition. This was as varied as learning how to curate, interpret, design, display and promote their own exhibition (with the aid of the CRC twitter page!), all of which was topped off by an exhibition opening in which we were able to present our day’s work. The day itself was led by Rachel Hosker (Archives Manager), Emma Smith (Exhibitions Officer) and Emma Davey (Conservation Officer), who all shared their own individual expertise and knowledge in this particular field.

The ethos behind the proposed event was to not only to demonstrate the tools and skills required in preparing for an exhibition, but also to provide an interesting and engaging way for participants to interact with the University’s rare and unique collections. The event aimed to engender a greater sense of ownership by students and staff alike of the University collections, and to encourage them to learn more about how these collections can inform or be incorporated into their own work and studies.

ILW 1

The Moray House Archive Collection

ILW 2

Choosing exhibition exhibits

As one of our attendees, Heather McFarlane, writes ” An Exhibition in a Day was a fascinating insight into the collections and a great way to learn how you can make objects and displays engaging. As Education Coordinator in the School of Chemistry I often visits schools, and trainee teachers so it was great to explore the Moray House historical collections and learn about teacher training and nursery care over the last 100 years. As well as exploring the collection, it gave me the chance to think about using exhibitions more. I am always looking for new ways to engage young people and adults in science and so getting experience of putting on exhibition has given me lots of ideas of what can be done using collections and how to make appealing displays. I look at the chemistry museum in a new light now!”

Also participating in the day’s events was our very own conservation Intern, Samantha, who discusses her experience of the day. “Before deciding upon a career in conservation I was working mainly as an artist and curator concerned with the interpretation and exploration of objects with a passion for community engagement. I was thrilled to be able to discover the Moray House School of Education archival collection and help others to appreciate and handle it correctly. The collection has some wonderfully insightful information regarding education in Edinburgh during the early 20th century with so many stories waiting to be discovered. My main role of the day was to assist CRC staff and those taking part, however I became just as absorbed with the collection as our innovative learners! Because we had to sift through such a large number of interesting documents it was very difficult to know what to include within the exhibition, and how to best tell the story of the nursery school. Nevertheless by the end of the day we had all became familiar with our chosen assortment of documents and objects giving us the confidence to forge ahead with how we wanted others to view them. It was great to see so many people engaging with the collection in this way and learning from it too!”

ILW 3

Video Corner!

ILW 4

A display from the exhibition

ILW 5

A display from the exhibition including children’s toys

Overall, the experience was tiring but very rewarding for everyone involved. And, as it turns out, it is possible to create an exhibition in a day…

Post by Emma Davey, Conservation Officer and Samantha Cawson, Conservation Intern

Getting to the Heart of the Matter

This blog post starts where I left off last time (with another pun!) and details my efforts on the Thomson-Walker medical print collection thus far, describing the first phase of the project.

After I had spent a few days surveying the boxes of prints I began to get a better idea of how to best approach treating the entire collection and started to investigate various rehousing ideas, as well as experimenting with numerous adhesive removal techniques. The main requirement for the adhesive removal was to be able to lift a range of adhesives, at various stages of degradation on differing primary supports allowing for the safe and quick removal of carrier and adhesive for the majority of the 2500 prints. It was decided quite early on during the survey that a poultice would work best for such a task. A poultice is a swelling agent commonly made with a viscous substance used to slowly and controllably release moisture. This would permit a number of objects to be treated simultaneously and, if the correct poultice method was adopted, to remove an adhesive easily and equally – such a technique would not only be beneficial for the wellbeing of the prints, but would also be time and cost effective.

I began my experimentation with the Albertina poultice, a ready for use amylase poultice that removes un-swellable starch pastes. I was sent a sample kit, which comprised of two interleaving silk tissue papers, an amylase poultice, and a small piece of blotter. I experimented with this system on a variety of prints from the collection, however whilst the poultice worked wonderfully on some adhesives and carriers (presumably starch based) the poultice failed on others. Because of this I believed that despite the Albertina poultice working well on certain adhesives, and with the added benefit of reusability (the Albertina poultice can be stored and reused for at least 12 months) it was not a suitable option considering the varied adhesives present within the collection.

Next, I experimented with high viscosity carboxymethyl cellulose sodium salt poultice strips, a method devised at the Book and Paper Conservation Studio at the University of Dundee. To be efficient and economical the CMC is wrapped in Japanese tissue to create individual poultice strips that are then placed directly onto the carrier of the adhesive and left to take action. I discovered that to easily remove the adhesive and carrier the poultice strip only needed to be in place for about 20 minutes and thereafter the adhesive/carrier could be gently lifted and removed. This particular poultice worked on a variety of tape and adhesives and the reusable strips were easy to handle and manipulate according to shape and size of the adhesive layer. So far the poultice has been successful on a range of tapes and adhesives including starch based adhesives, animal glue, and masking and glassine tape.

And so, there you have it, the Carboxymethyl Cellulose strips created perfect and painless poulticing – a swift operation, if I do say so myself…

SC 1

Albertina Poultice sample at work

SC 2

Making CMC poultice

SC 3

CMC poultice at work

SC 4

Adhesive and carrier removal after using the CMC poultice

Post by Samantha Cawson, Conservation Intern

Capturing the Moment on Glass Plate Negatives

I recently attended a one-day workshop at the RCAHMS conservation studio regarding the preservation and conservation of glass plate negatives. The day was split roughly into two parts, with the first half of the day dedicated to lectures in digitising glass plate negative collections, preservation, identification of damage and the conservation and stabilisation techniques available for broken negatives. Practical sessions were conducted by ICON intern, Marta Garcia-Celma during the second part of the day when the group were given a practical demonstration of the cleaning procedures of glass plate negatives, gelatine consolidation, and a stabilisation technique for cracked and broken negatives called the sink mount with pressure binding technique. This system of encapsulation uses blotter to create a tight fitting frame-mount and two pieces of clean glass to sandwich the broken glass plate negative within, allowing the plate to be safely handled, digitised and stored. I shall discuss how to make this enclosure in more detail during this blog post as I had never undertaken such a procedure before, finding the experience insightful, rewarding, and very fiddly! First of all though, chaps, you need to find yourself a broken glass plate negative. Here’s one I prepared earlier! Cue Blue Peter theme tune…

G.P.N. 1

Broken glass plate slide

Once you have completed surface cleaning the glass side of the pieces of broken plate using a very soft squirrel hair brush and dampened cotton wool, you may begin to create your flush repair. You start by wiping the surface of two new pieces of glass with IMS (industrial methylated spirit), which should be cut slightly larger than your glass plate negative. Next, you should place your broken glass plate negative emulsion side down onto a piece of blotter (about 1cm larger than your plate and the same size as your new pieces of glass) and splint the broken pieces back together using filmoplast p90 tape. This is a delicate and time consuming process, however the key thing to remember is to avoid sticking the splints down too much, otherwise you’ll have a real job of pulling them off again later!

G.P.N. 2

Glass plate slide with tape splints

To create a tight fit within the blotter sink mount, you should carefully score around the edge of the negative using a scalpel blade then cut out the centre of the blotter and discard – you only need the outer rim to act as a frame-mount for your glass plate negative. Your glass plate negative should now fit snugly in the newly cut centre of the blotter. This part of the process is probably the trickiest, as it is very important for the mount to fit tightly and perfectly around the glass to avoid movement – a saggy mount will not do! Then once you have placed your newly mounted glass plate negative on to your clean sheet of glass and removed your splints you can begin the procedure of binding your glass sandwich together!

G.P.N. 3

Splints being removed from the glass plate slide within the blotter mount

With your broken glass plate negative snugly within its blotter mount and now sandwiched between two new sheets of glass you can bind the edges together using a pasted out strip of silver safe photographic paper; roll your glass plate along the pasted paper and secure as you go. This part is also fiddly mainly because the pasted out strip is damp and weak. So don’t be namby-pamby about it, you don’t want to lose grip of your sandwich whilst smoothing down the binding paper! Once the whole glass sandwich is bound you can snip and fold the corners to make them neat and pretty.

G.P.N. 4

Enclosed glass plate slide

 And voilà! Your broken glass plate negative is now easy to handle and store, which is quite jolly considering its prior sorry shattered state and always worth a shot if you ask me….

Post by Samantha Cawson, Conservation Intern