In this post, Technician Robyn Rogers discusses her bespoke mounting and rehousing of loose-leaf papers from the University’s decorated paper collection. Robyn’s first post about working through the collection’s bound volumes can be seen here. If you are interested in learning more about the historic uses, production and trade of decorated paper, you can visit the online exhibition on this collection, curated by Elizabeth Quarmby Lawrence here.
In September 2023 I posted about my work caring for the university’s decorated paper collection. I began this rehousing project by making bespoke enclosures for books bound in decorated paper wrappers, and volumes with decorated endpapers. I’ve grown to love these papers, and through the last summer I have been working to rehouse the second largest part of the collection – loose leaf sheets. These full sheets of decorated paper are especially precious as they reveal the whole of a design, but are less likely to have survived than papers that were used in books.
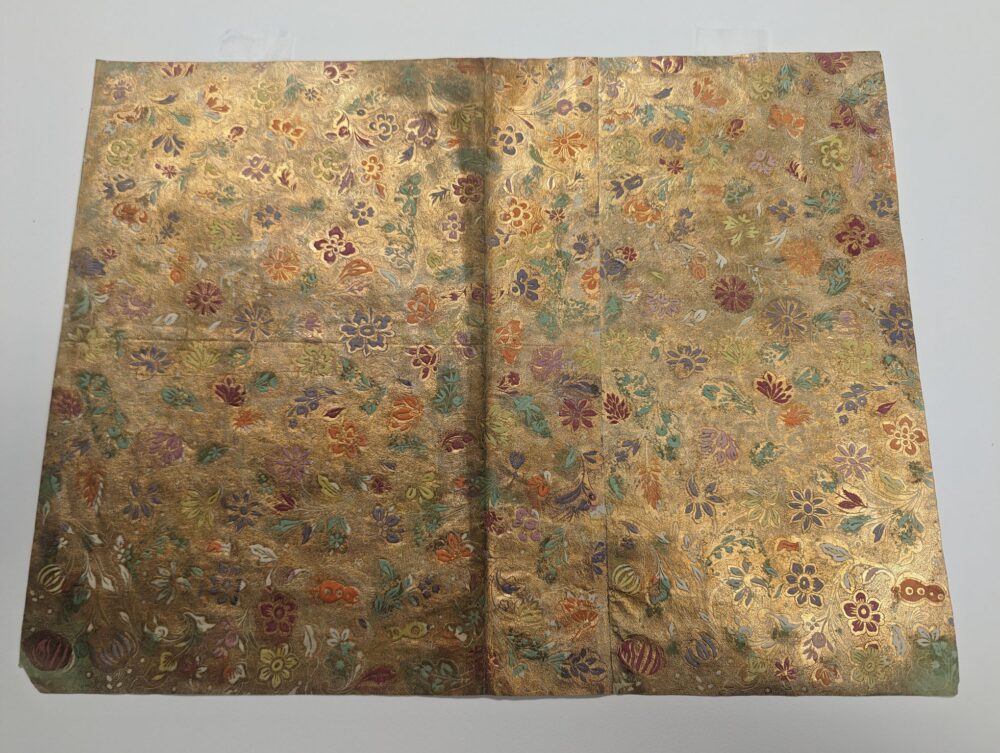
This is an example of one of the loose-leaf sheets in the collection. The vertical crease down the middle and the knocked corners reveal that it was once used as a book wrapper, but it is still in good condition. This is a brocade paper from Southern Germany that has been embossed and stencilled in a variety of colours. This type of paper is known as drap’ d’or paper, meaning ‘sheet of gold’.
I decided to make a traditional sink mount for each sheet, using two thick sheets of mount board for the matt and protective cover, and a thinner window mount between. I hinged the papers into their mounts using Japanese tissue paper V-Hinges and 1:5 wheat starch paste. The result is a mount that can be used in a frame for display, or as a handling tool in teaching. I applied V-Hinges to just one side of each sheet, so that researchers can view both sides of the paper without removing the paper from the mount completely.
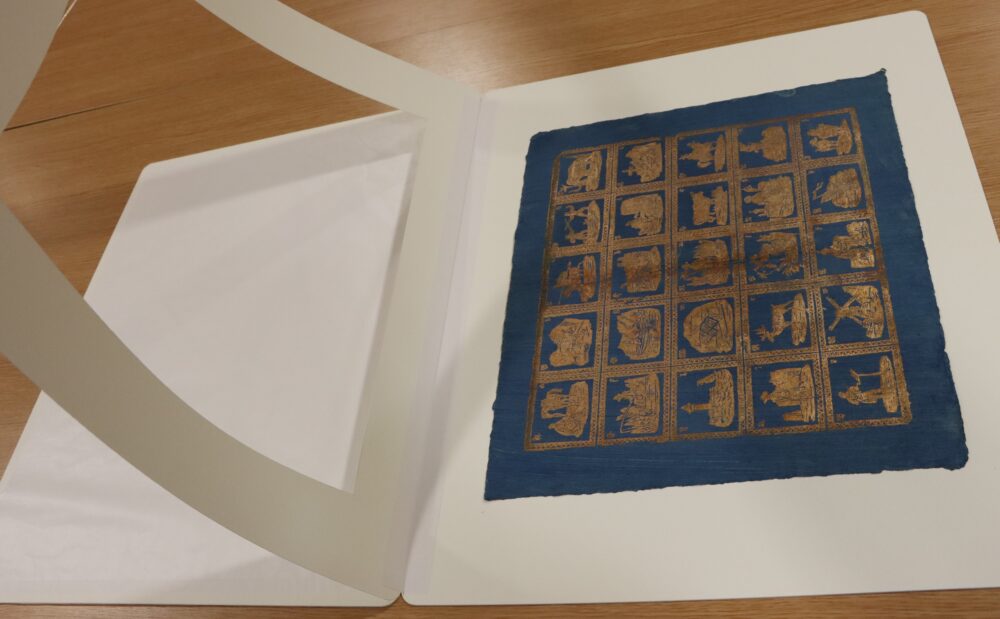
A decorated paper in its finished mount. This Brocade-paper was made in Nuremberg between 1826 and 1850, and features an illustrated alphabet from Araber to Zwerg.
Prep Work
Before I could begin to rehouse the papers, I needed to flatten a few that had developed stubborn curls and undulations. For the majority of these, a long press under weights was sufficient – with each sheet sandwiched between Bondina and blotting paper. The Bondina acts as a soft and slippery interleaving material, while layers of blotting paper help distribute weight evenly across the paper. Some particularly curled papers needed to be humidified before they could be flattened properly. Humidification reintroduces moisture into paper supports with the aim of relaxing the fibres, and aiding flattening. For papers with especially persistent curls, an IMS and water mix was sprayed across the verso, before they were pressed under weights. The addition of IMS (Industrial Methylated Spirits) to the water spray increases the rate of evaporation, decreasing the risk of oversaturating the paper. Once flat, the papers were ready to be hinged into their mounts.
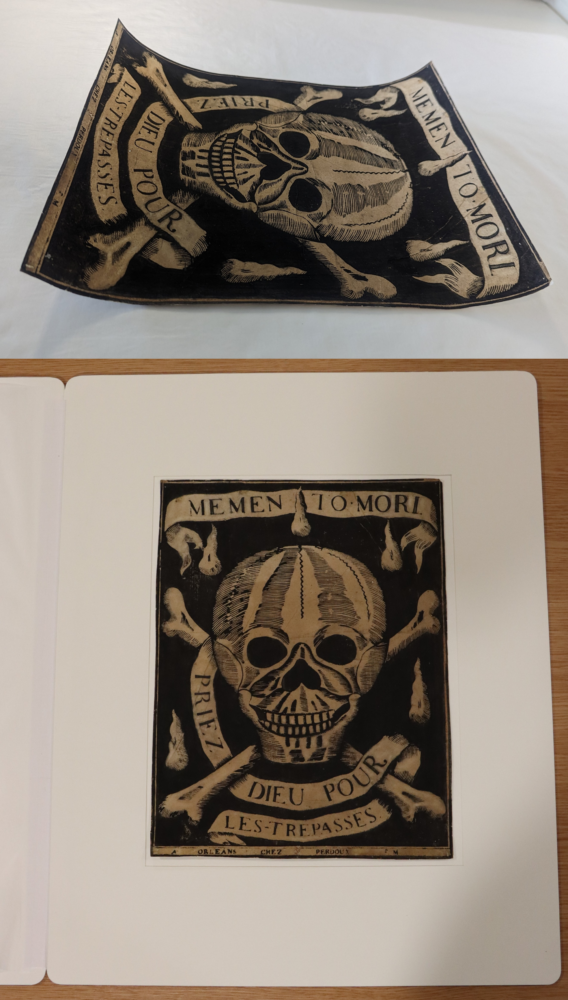
This block printed paper was manufactured in Orléans in the late eighteenth century, and arrived to the university with extreme curls on each end. Here you can see the sheet before and after humidification and flattening.
Making the Mounts
To make the mounts I used Heritage Conservation Board from John Purcell in book white. This board is buffered, meaning that an alkaline buffering agent has been added during production to reduce the PH. Using these buffered materials for paper enclosures limits the potential damage caused by migration of acids, such as matt burn, which is often seen in artworks that have been stored in old, acidic mounts.
For each mount, I cut two sheets of thicker 1650 microns board, and one sheet of 1100 microns board for the window mount and rounded the corners of each sheet. I adhered the two thicker boards together with gummed linen tape, before cutting a bespoke window to accommodate each paper sheet, which was adhered to the back board with the same tape. I then cut a sheet of interleaving Bondina. To prevent the Bondina from wafting around during handling, I used Filmoplast P90 tape to secure it to the protective cover. When cutting the window for each mount, I decided to undermatt the papers, so that the whole sheet of paper, including the deckled edges, could be seen within the window.
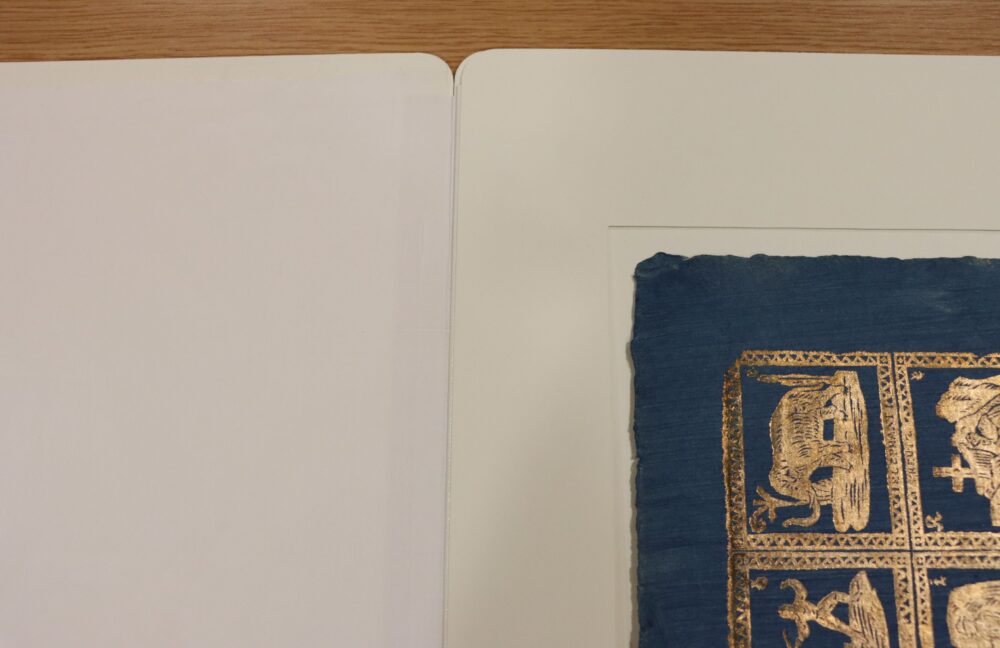
Here you can see the layers of each mount: The back matt, the window mount, and the protective front board covered in Bondina.
V-Hinging with Japanese Paper
To secure each sheet of paper into their mount I used Japanese tissue paper hinges applied in the V-Hinge method. The V-Hinge acts as a join between the paper and the back board, but is hidden underneath the paper or artwork being mounted, which makes it ideal for mounts where it is necessary to see the whole paper support within the window. When a paper support is overmatted, a more traditional T-Hinging method is used, as the hinge is hidden by the window mount.
Japanese tissue paper is used for hinging because of its strength. When used with wheat starch paste these hinges are durable but easy to remove if necessary. Selecting a tissue that is slightly lighter than the paper being mounted ensures that if the paper is pulled away from its mount, the hinge – not the paper, will tear first. For this project, I made hinges with 12.2 gsm 100% Tosa-Kozo paper. To make a hinge the Japanese tissue is cut to size using a water pen, so that the edges are feathered and adhere better to the mountboard when wheat starch paste is applied. Wheat starch paste is made by soaking wheat starch powder in water, cooking the solution into a thick paste, and sieving the paste several times, until smooth and glossy.
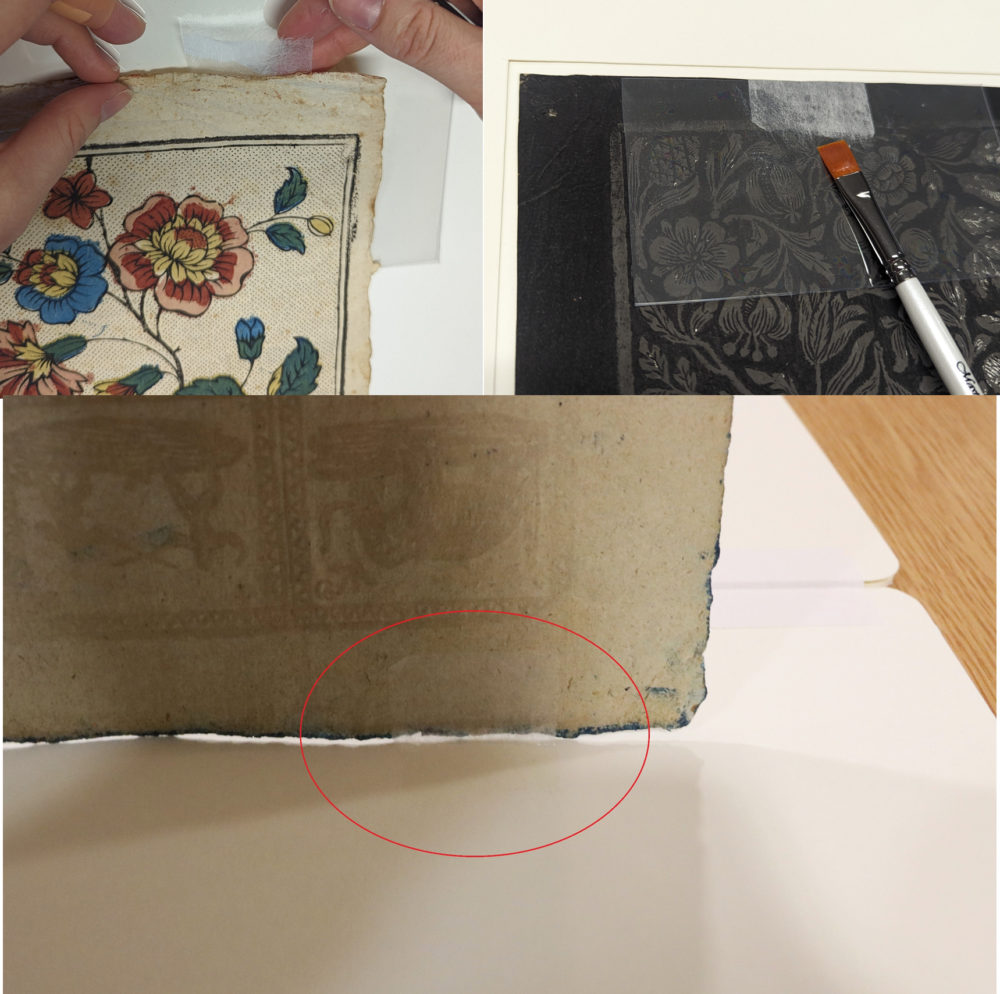
Here you can see the stages of the hinging process – the hinge being applied to the back of a paper, the back of the hinge being covered in wheat starch before being adhered to the backboard, and the final result. The hinge is discreet and almost invisible from the back.
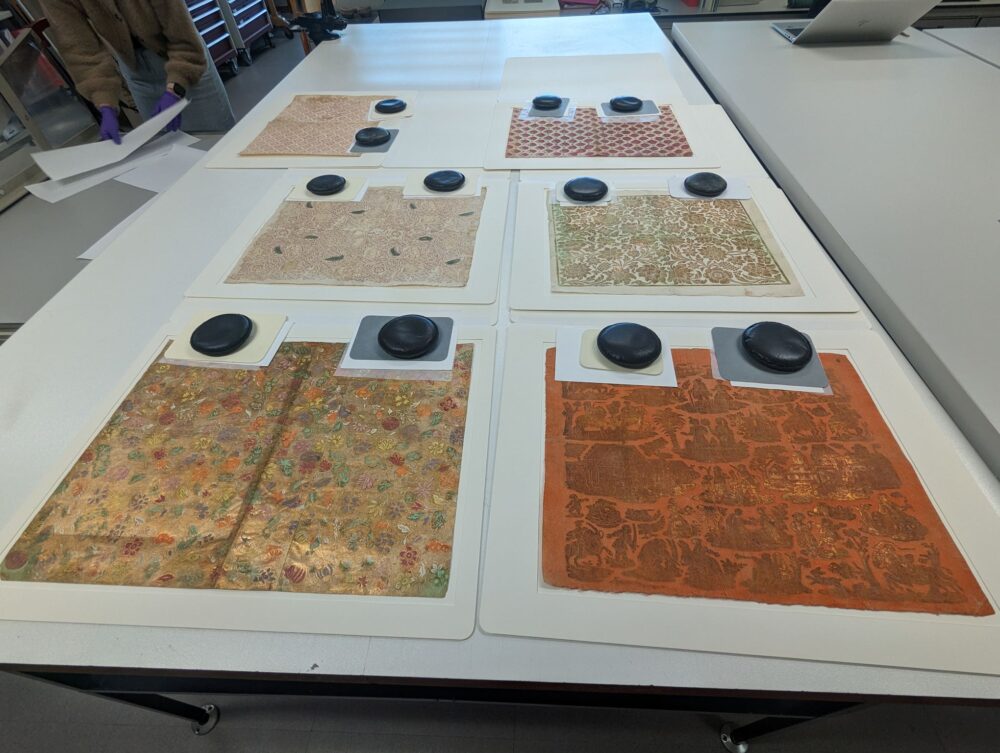
Here are several sheets of decorated paper in the studio. They have just been hinged into their mounts, and the hinges are drying under-weight. Placing Melinex in the grove of the hinge while drying prevents the V from sticking together.
The Final Result
Once hinged into their mounts I gathered the papers into groups, and put these into boxes. Thankfully newspaper archive boxes were a good fit. The mounts allow the papers to be easily handled and viewed – a success!

Here you can see one of the papers being viewed by our Rare Books and Literary Collections Curator. This paper is was made in France in the eighteenth century, and has been block printed and then colour-stencilled by hand.
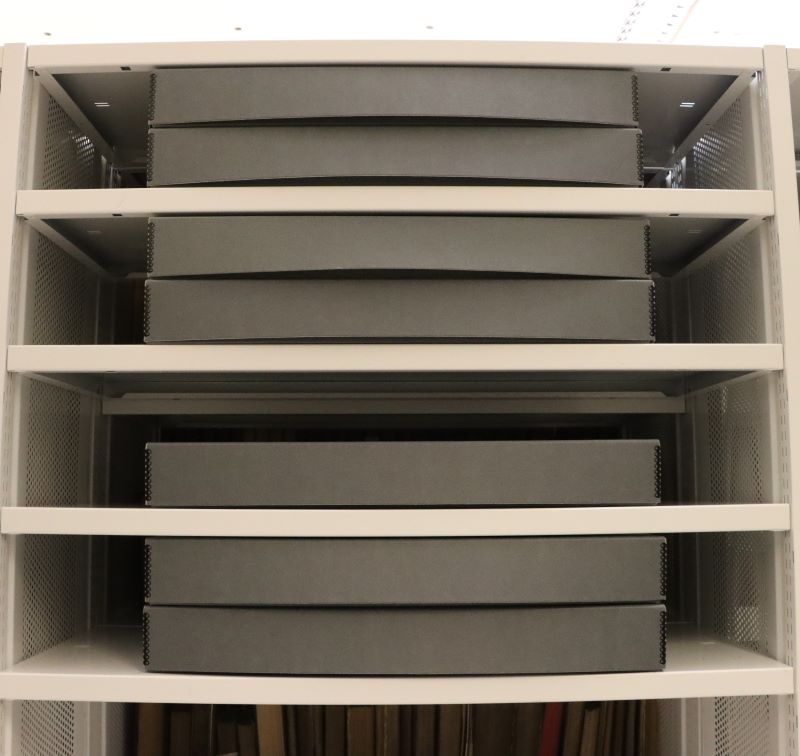
The boxes in our rare books store – the papers inside are ready to be brought out for teaching, research and display.
Onto the next thing …
As the university is still acquiring decorated papers to add to the collection, I will thankfully be able to keep working with these materials, rehousing new accessions as they come in. Up next on my list is a box of miniature military almanacs that are bound in a variety of decorated paper wrappers.

Fascinating insight into the meticulous care and skills employed to best preserve and present these treasures.