In this blog Project Conservator Mhairi Boyle discusses her new role within the One Health project at the CRC, and the training she has undertaken with Book Conservator Caroline Scharfenberg (ACR).
In August, I started a new role as the Project Conservator for the One Health project within the Heritage Collections team. One Health brings together three archival collections which chart the development of animal health and welfare in Scotland. The collections in question are from OneKind, an animal welfare charity; the Royal Zoological Society of Scotland (RSZZ); and the University of Edinburgh’s Royal Dick School of Veterinary Studies (R(D)SVS).
One of the challenges of this project is the variety of material I am working with. Whilst most of the material is loose leaf archival papers and photographs, we also have many bound volumes. On the opposite end of the spectrum, we have chicken skeletons, animal medicines, vet tools, and graduation robes. In these cases, I will stick to preventive measures such as handling instructions and appropriate rehousing to enable ease of access and prevent any further damage.
The bound volumes held within the three archives present an opportunity for me to expand upon my book conservation skills. In terms of conservation training, book and paper conservation are usually separated into separate MA courses. Training as a book conservator requires different skills and knowledge, such as bookbinding skills and knowledge of different historic bindings and book structures.
As a paper conservator, I undertake simple in-situ book conservation repairs, but do not attempt more interventive measures such as resewing binding structures or re-backing damaged book covers with leather.
Because books are 3D objects with moving parts, there are common subsets of damage which occur due to poor handling; repetitive strain caused by turning pages; and poor-quality sewing/heavy text blocks. In my previous conservation role at the CRC, I learned how to repair cracked book boards and consolidate damaged book corners. I have managed to conserve 52 volumes so far using these techniques.
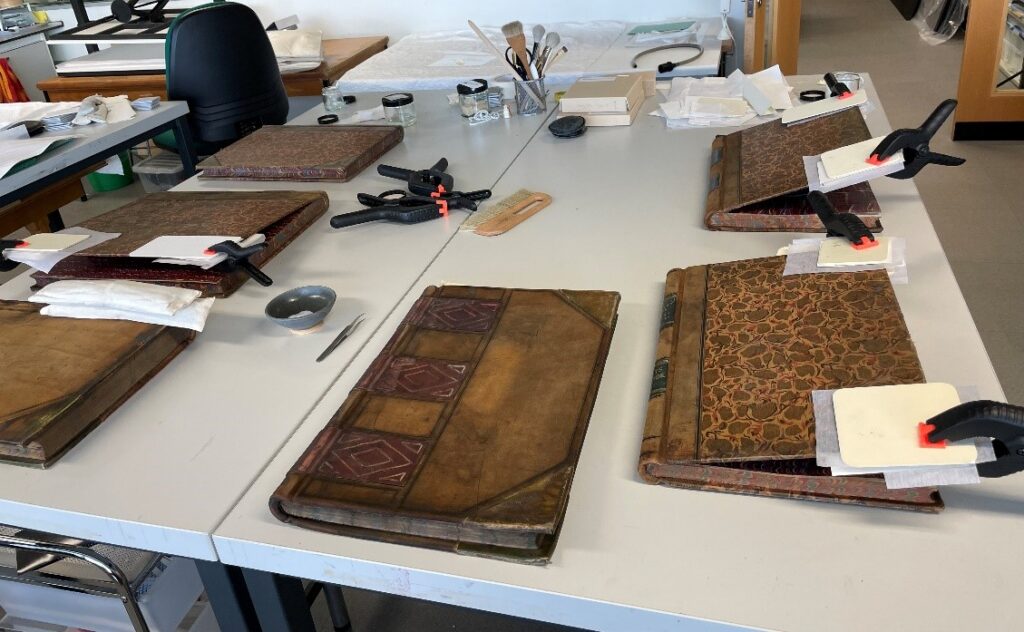
Books from the R(D)SVS collection in multiple stages of repair.
There are, however, some volumes which require more complex repairs. Some volumes from the OneKind collection have extensive Sellotape attached to them, holding together the damaged boards and spines of the books. In some cases, the degraded Sellotape is fully adhered to the leather, whereas in others the adhesive has hardened, and the plastic tape carrier can be mechanically removed.
In the R(D)SVS collection, a couple of volumes have cracked or fully detached boards and spines. Thankfully, there is no Sellotape to contend with on the outside structure of the books.
Keen to learn more in-situ book repair techniques, I took this as an opportunity to get some on-the-job training. I have been working with Caroline Scharfenberg, an Accredited book conservator whose independent business Book and Archive Conservation Services Ltd. operates from within the CRC’s Conservation Studio. Caroline has been showing me how to restore function to volumes whose spines and boards are fully detached.
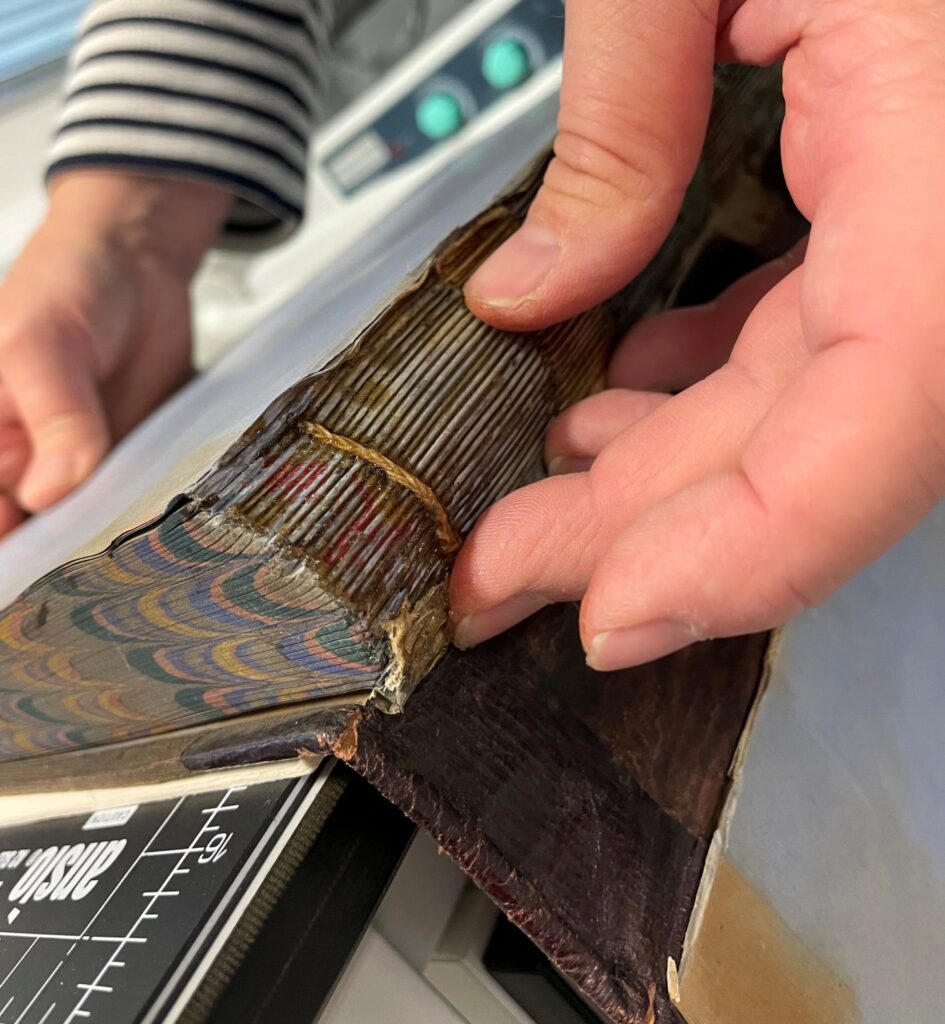
Firstly, Caroline and I identified some volumes appropriate for the training sessions. We examined the volumes and Caroline explained to me how and why such damage occurs. Often the text block of volumes is too heavy for the boards and spine, and when the book is stored upright, the weight of the text block causes it to detach from the spine partially or fully. This can also cause the boards of the book to come loose. She also pointed out that damage often occurs to the front of the textblock, as this is where a person commonly begins flicking through a book.
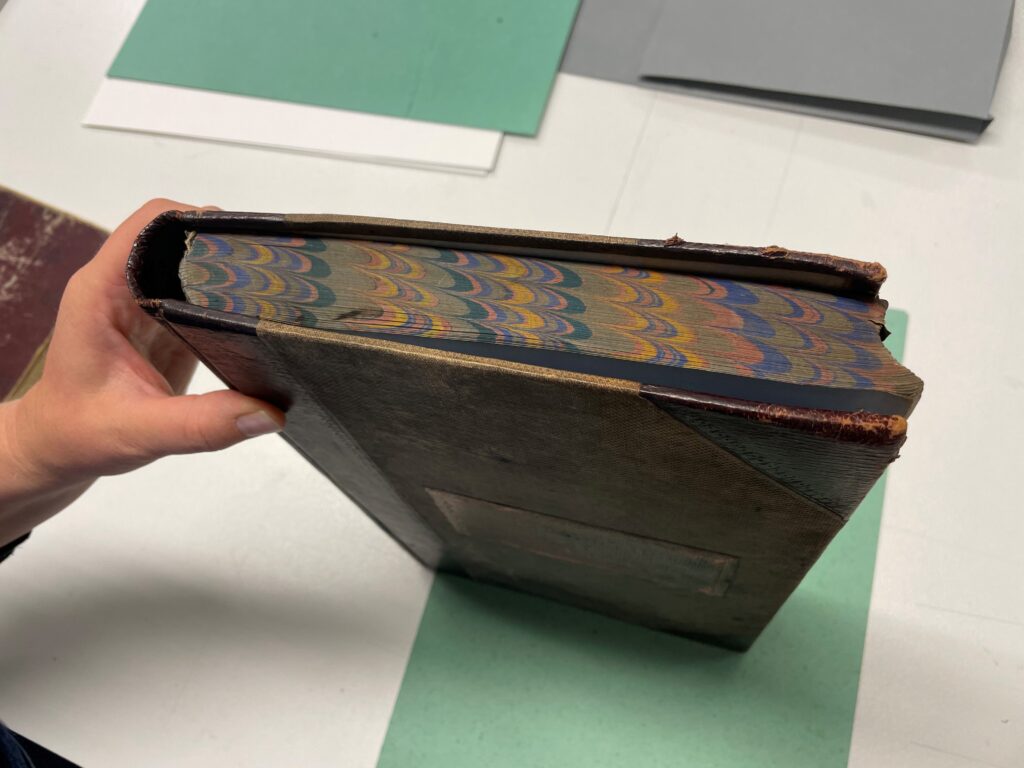
Caroline demonstrating how the textblock can strain and eventually detach from the spine and covers of a book.
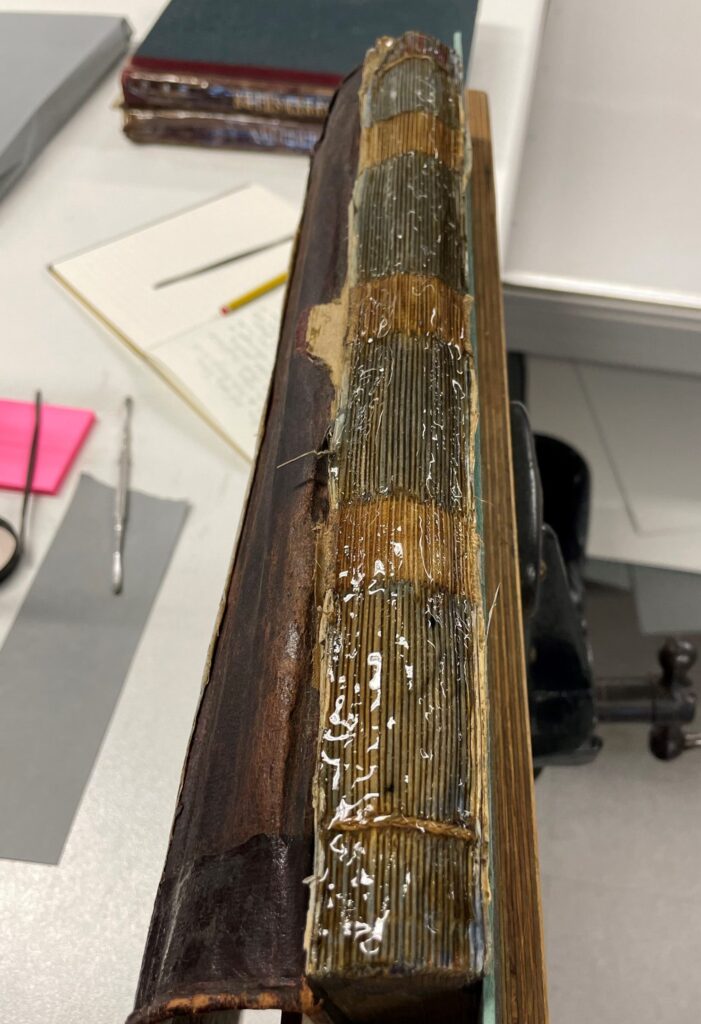
A methyl cellulose poultice softens the hardened and yellowed adhesive, making the spine more flexible and easier to reshape.
After examination, we moved onto adhesive removal. Often the adhesives used to attach spine linings and spines to the textblock of a book do not age well. They become browned and brittle, rendering the book less flexible. We used a gel poultice of 4%w/v methyl cellulose to soften the adhesive in a controlled manner, making it easier to mechanically remove with metal tools.
Once the adhesive was removed, Caroline demonstrated to me how to manually re-shape the spine before applying a spine lining.
Caroline demonstrating how to reshape a spine.
After the spine was re-shaped, we applied wheat starch paste, and applied the first of two Japanese tissue linings. The first lining was composed of two pieces of Japanese paper which overlapped in the middle. This will help the spine retain its shape, as well as provide a protective layer.
The second lining was applied once this dried. It was measured to be intentionally wider than the spine: this lining will act as a release layer, which will wrap around the new spine hollow. A hollow is a hollow tube of paper – once attached to the lined spine, the Japanese paper wings will attach around it. This will create a structure which enables the book to open and close properly once again whilst giving extra support to the spine. If the hollow ever needs replaced in the future, it can be removed without interfering with the spine or lining.
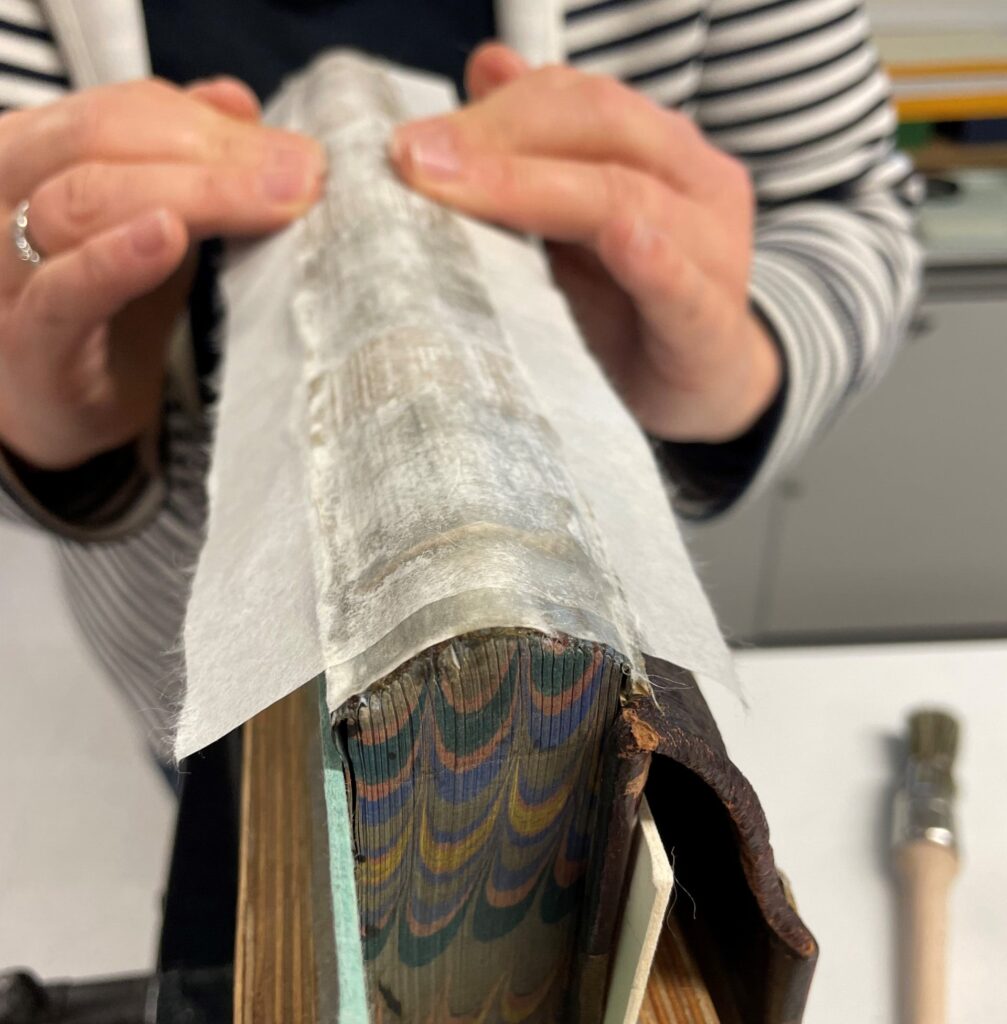
Both linings are now attached. The second lining is wider than the book spine and will attach to a new spine hollow.
After working with Caroline to line one spine, I put my learning to the test and lined the spine of another volume. It worked like a dream! In our next session, we will focus on making a hollow and reattaching the spines and boards of the volumes.
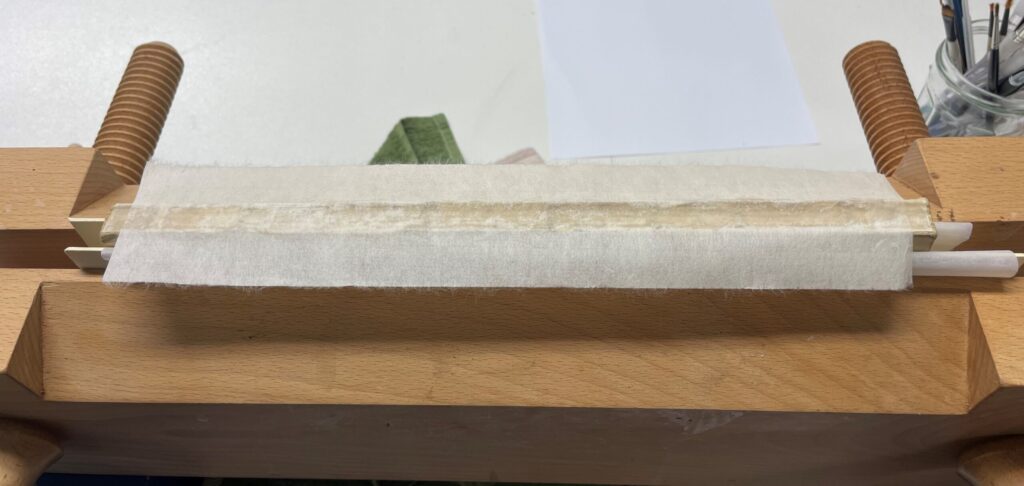
My first solo spine lining!