Today we have the final instalment of a two-part series from Collections Care Assistant, Sarah Partington. In this post, she talks about cleaning and rehousing a collection of works by the Gaelic Baptist preacher and hymn writer, Padruig Grannd. Sarah has just completed a government-funded Kickstart placement and has now started a new role working with our collections at the University Collections Facility.
The Peter Grant Collection comprises volumes of works by the Gaelic Baptist preacher and hymn writer, Padruig Grannd. These were stored together in a box, along with other printed works, manuscript sermon notebooks, and items pertaining to one of his descendants, Daniel Grannd. The material was put together in the 50s and it had unfortunately experienced the effects of unsuitable storage conditions over the years prior to it coming into the care of the Centre for Research Collections. This was obvious from its condition: in addition to the more common issues with older books, such as surface dirt, loose boards, text blocks and spines, most of the items in the box also showed serious signs of mould, residual staining, and warping from damp conditions in past storage. Conservators and archivists alike will get shudders when they hear whispers of attics, basements or garages…the likely former home of this collection.
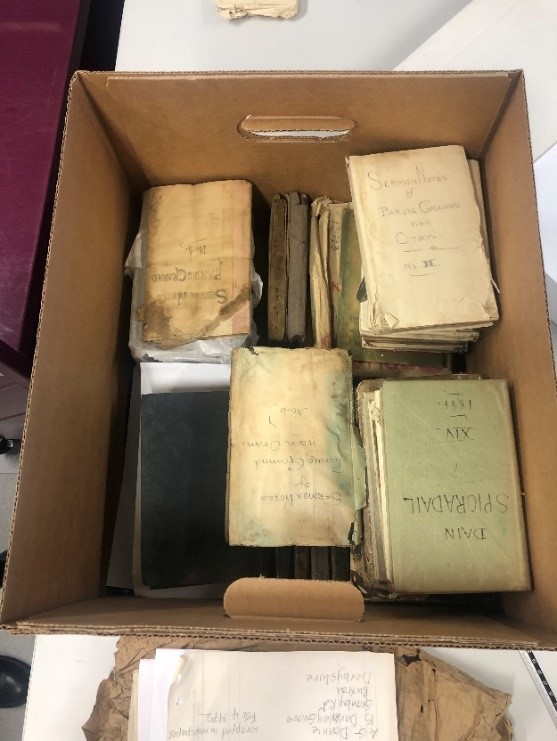
The collection in its original housing
Although collated in the 1950s, the collection didn’t actually arrive to The School of Scottish Studies until the 90s. After 20-odd years under the University’s care, it was about time that this incredibly special collection got the in-depth treatment and rehousing it deserves– as Collections Care Assistant, that’s where I came in!
I began by checking each item thoroughly in order to wheedle out the items showing signs of inactive or worse, active mould, which could spread if left untreated. I breathed a big sigh of relief when I didn’t find any active mould, but as a precaution I still placed the items with past mould damage to the side to avoid any potential cross-contamination. After this, cleaning work could begin on the items that I had identified as being free from the clutches of mould spores.
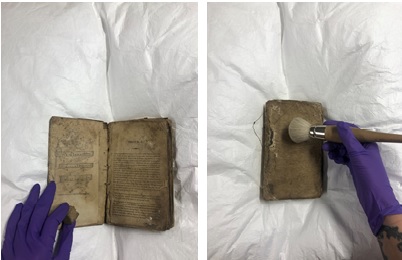
Left: removing ingrained dirt with a smoke sponge. Right: brushing away dust with a soft brush
I carefully brushed away the dust from the covers, fore-edge and top-edge of each book, after which I used a smoke sponge to remove ingrained surface dirt from the covers, end papers and text blocks. I repeated the same process on the notebooks and loose leaf material, but I was careful to avoid rubbing off any handwritten text or drawings, cleaning around these parts.
FYI, you will notice from the photos that I wore nitrile gloves when I was cleaning the items. This was just in case I came across any mould that I had missed when checking the books initially. Generally, books should be handled with clean, dry hands unless a health hazard is suspected or they have parts made from another material that requires gloves when handling, i.e. metal.
Any books that were structurally unstable and had loose text blocks, spines or covers, were then identified for further attention. In mild cases two cotton tape ties sufficed for securing the covers and spines, but in a large number of cases the books were in such a fragile condition that they needed a custom-made box to stop loose or friable (not the yummy kind) parts falling off. I put these items to the side to return to later.
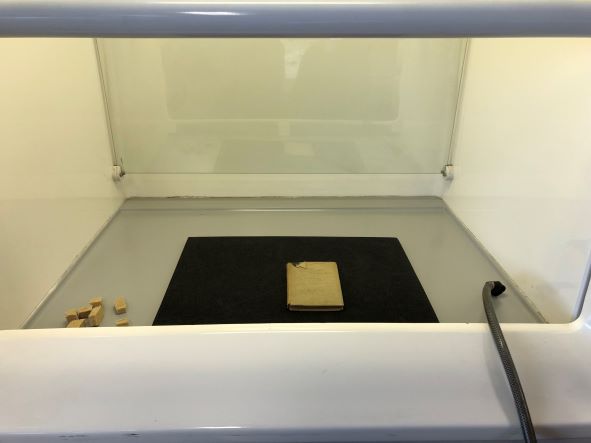
Cleaning in the fume cupboard
Meanwhile, I began tackling the mouldy items. I put a protective and very stylish FFP3 mask on to protect myself from breathing in the mould spores, and placed the contaminated items in the fume cupboard. I combed each item for mould deposits, and used a museum vacuum on a low-suction setting to then remove them. After they were free from mould, I followed the same process that I had applied to the other items, brushing dust away and using a smoke sponge for ingrained dirt.
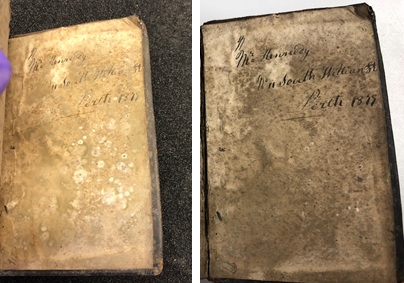
Inactive mould before and after cleaning. The reduction in mould spores is visible in the image on the right.
Now that everything was clean and mould-free, it was time to return to the fragile volumes that still needed some TLC. I measured them all, adding a couple of millimetres buffer room to my measurements to allow space for the folds of the rehousing material. I then created individual housing using a cutting board, scalpel and guillotine; I made phase boxes – four flap enclosures designed to protect delicate or damaged books – from museum-grade box board, which is a tough acid-free paper board, casings with spine support for smaller notebooks, and four flap folders for loose leaf material.
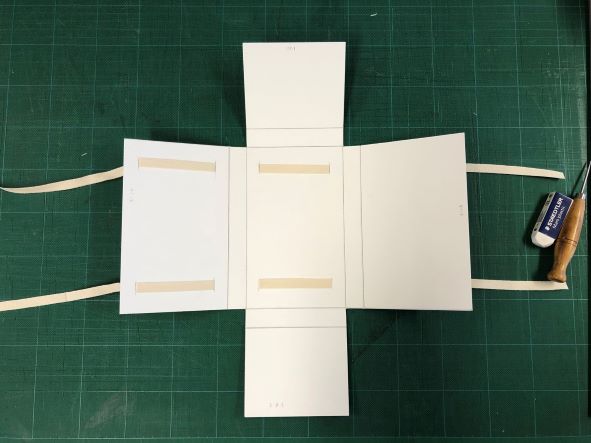
Making a custom phase box
I had to do a bit of problem solving here, as it wasn’t always obvious which rehousing solution would be best for a particular item. For example, a collection of printing proofs proved pretty hard to store. They had previously been stored folded up, causing the paper to bend. I consulted our paper conservator, Mhairi Boyle, and she suggested housing them in such a way that they could be made to lie more flat, without the need for further interventive treatment at this stage.
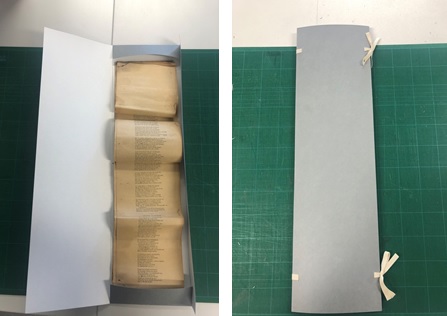
Left: printing proofs in custom folder. Right: printing proofs in custom phase box
Initially, I thought that a folder would work best for this, but the proofs didn’t fit in my custom folder, even though it had been measured to the correct size. The folder didn’t allow the necessary wiggle room for the 2.5cm bends, and it certainly wasn’t strong enough to coerce the paper into a flatter shape. In order to tackle this problem, I resorted to the largest ruler and cutting mat the conservation studio had to offer and I made another custom box for it instead. In the end I had housing that was long enough for the proofs, whilst allowing them 1.5cm depth so that the bends could be flattened out slightly.
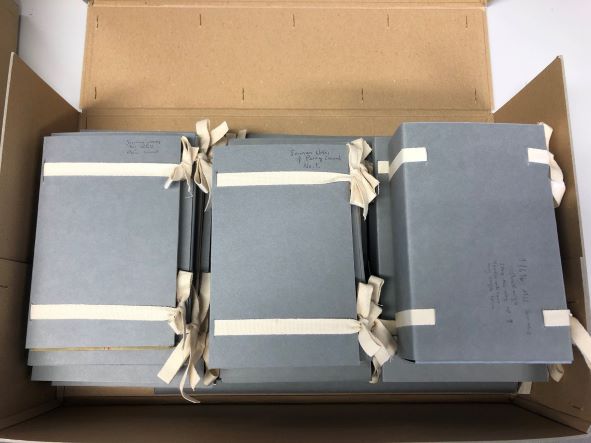
The rehousing solution: archival box with fragile volumes in phase boxes
The last step in the Peter Grant saga was separating out the material into archival boxes in a coherent way. I put the items in three categorised archival boxes: printed works by Peter Grant in order of volume, other works, and pre-print items. If you like organisation and tidiness like I do, I think you’ll agree that the end result is very satisfying. More importantly, the collection is now more secure, and its future more certain.

Very nice, thank you for sharing…