It has been a long–held desire for the CHDS to offer a 3D Digitisation service, and although not 100% there yet, we are several steps closer. Back in 2021, Connor Wimblett did an internship with us looking into the feasibility of offering 3D for the Heritage Collections. You can find out more by reading his blog here.
With the fantastic uCreate facilities located in the same building, it seemed sensible to see how we could make best use of their equipment, particularly after they purchased a Rigster Arago back in 2022. However, the uCreate MakerSpace is located in a student facing area of the building, and in order to be able to have Collections material in this space, we had to get an agreed set of Conservation & Security arrangements in place first. This required collaboration between the Senior Management Team, Conservation, uCreate Team and the CHDS. Once we had documented the procedures, we then organised training for the Photography team with Conservation for the packing and transportation through the building, as well as best practice handling when working in the room & what collections had been cleared for use in the space (based on environmental readings for the room).
Next, which collection to start with? As luck would have it, we were coming to the end of a major project digitising the Lyell Notebooks, and as we had finished ahead of schedule, had some budget remaining to work on his Geology specimen collection. Working with the Project Curator, Pamela McIntyre, we identified a selection of specimens that we could use for training with the Photographers in the new kit and software, and testing the new workflows. We block booked the room for 3 days and started on our first small 3D project.
We hope to be able to offer a 3D service for our Heritage Collections very soon, and if interested, please email digitisation@ed.ac.uk
I will hand over to Juliette Lichman to discuss the experience of the 3D training and getting up to speed with new equipment and software…
Susan Pettigrew, Digitisation Studio Manager
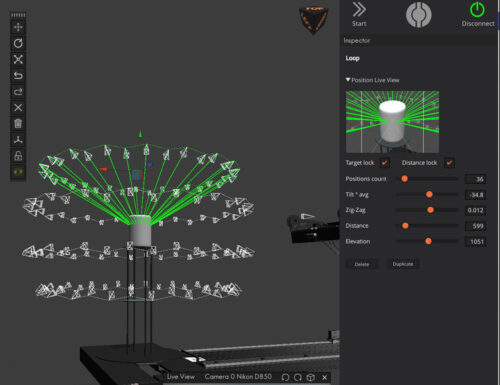
With our training in packing and transportation of the collections in mind, Malcolm, George and I set to work bringing the first batch of geology specimens (and additional studio equipment) down to Makerspace on the first floor of the Main Library. For this project we were working with the Arago Rigster, a piece of kit which aids in the creation of photogrammetry models by automating the process and mapping out the capture area on the software. This enables the photographer to easily specify which parts of the object they would like to capture, and identify areas with any issues to be adjusted and re-captured. You can see the Rigster in action here.
We ensured that the kit and software was correctly launched and proceeded to carefully manipulate the space, moving the stationary lights into the correct positions and using the larger turntable plate for our geology specimens.
For the purpose of creating the clearest images of the geology specimens, we hit them with as much light as possible from continuous light units on both sides of the object as well as on-camera flash. The latter moved with the Rigster’s robotic arm, ensuring that tricky areas such as the space above and below the object were lit well – particularly useful for the irregular spaces and crevices on the edges and undersides of the objects. For the shinier objects we did not use the flash to try and mitigate the specular reflections, as this could cause issues further down the line.
To create a full 3D model we would need to photograph the top and the bottom of the object as two separate parts called “chunks” (or components), then manually combine them in 3D modelling software later.
We soon discovered that there were many variables that could be adjusted via the Rigster’s capture software. For a good starting point we set the Rigster to shoot four ‘loops’ around the object at varying elevations, to capture as many angles as possible of the object. This would help us later, when it came to manually building the 3D models. On a few occasions the camera’s focus had missed its target and certain spots had to be captured again, but generally the automated system worked very well. We currently don’t have the pre–scan option enabled but hope to in future as this will help to identify depth of field issues. Some tricky areas required additional shots to make sure we had everything in focus.
When we had completed both sides of the geology specimen, we exported our files as RAWs, and then made Tiffs and JPGs after image QA checks and any required adjustments. The next step was to create a 3D model with all the data we had captured. For this we used Reality Capture.
This was a complex piece of software but with an excellent workflow produced by Susan we managed to get several finished models created. We imported the 2D photographs and aligned the images creating a ‘Point Cloud’. Next we created the ‘Mesh’, which is a polygon rendering. After that you create a ‘Texture’ which is the photographic overlay.

The turntable plate with the markers was very important in this process as we can accurately determine the distance between the points, thus allowing the software to calculate the size of the model. This step was crucial for us to be able to place the two halves together at the end correctly. We encountered some models towards the end of the project that had issues with this step, so we came up with alternative ways of defining distance, however these were not nearly as accurate. A final step was to add a texture to the model before saving and exporting.
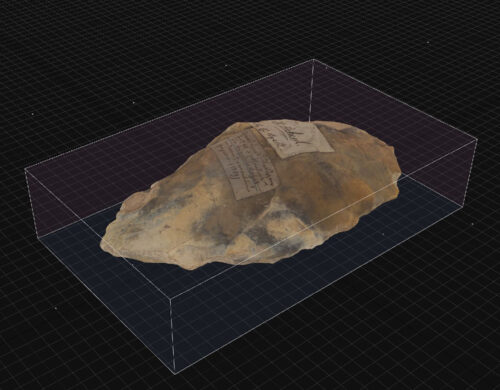
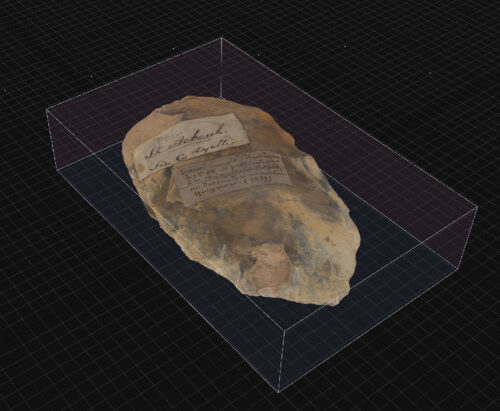
Once the two halves were combined in the software, it was very satisfying (and surreal) to see a digitised version of a physical item we had handled not long ago. The finished 3D models were uploaded to SketchFab, where they can be enjoyed by all! Click here to view all our SketchFab models.

It was very interesting to step through this process using equipment and software new to us, especially since the world of 3D imaging continues to rapidly advance. It will be fascinating to see how we’ll make use this kit in the future, and what kinds of collections will have 3D model counterparts. Sharing models like this certainly opens up our heritage collections to be used more in collaborative, research and engagement projects across the university and beyond.
Juliette Lichman, Photographer
Be First to Comment