A Heavenly Rehousing Project!

Today we have the final instalment of a two-part series from Collections Care Assistant, Sarah Partington. In this post, she talks about cleaning and  rehousing a collection of works by the Gaelic Baptist preacher and hymn writer, Padruig Grannd. Sarah has just completed a government-funded Kickstart placement and has now started a new role working with our collections at the University Collections Facility.


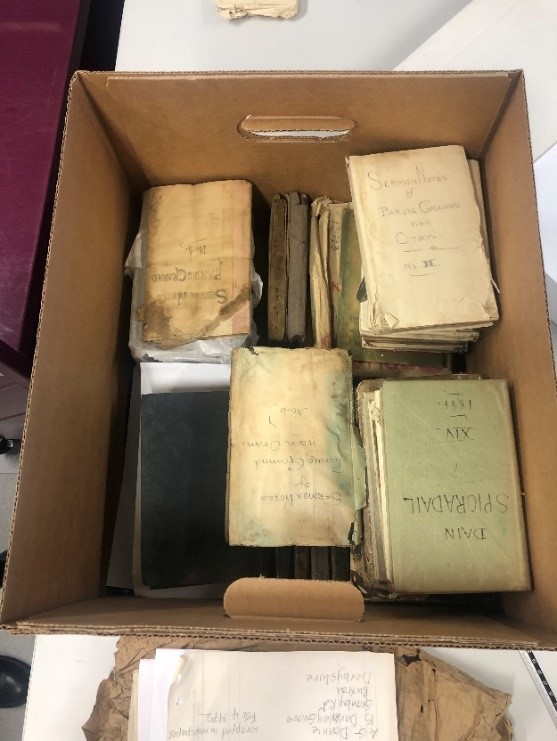
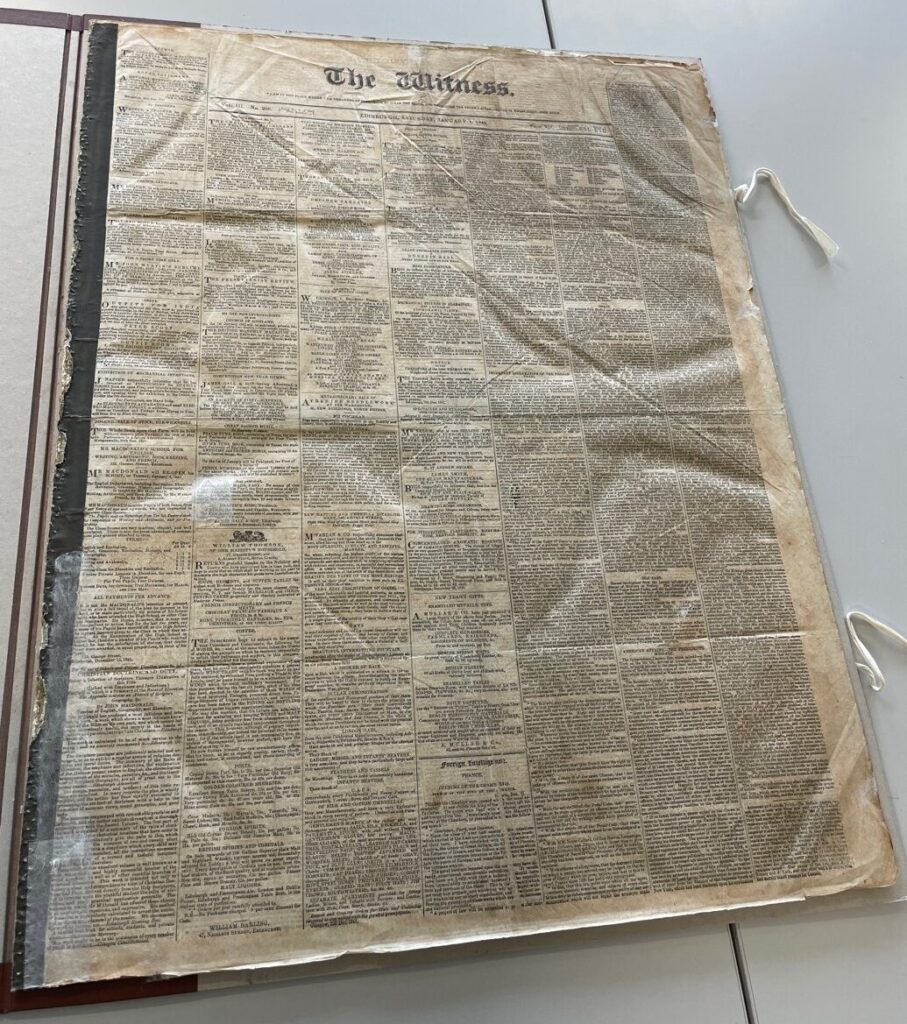
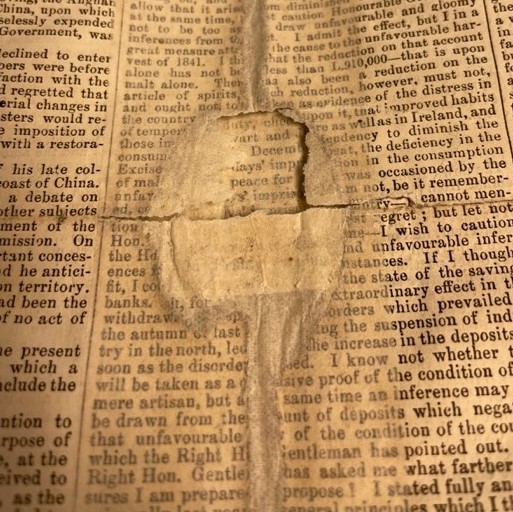
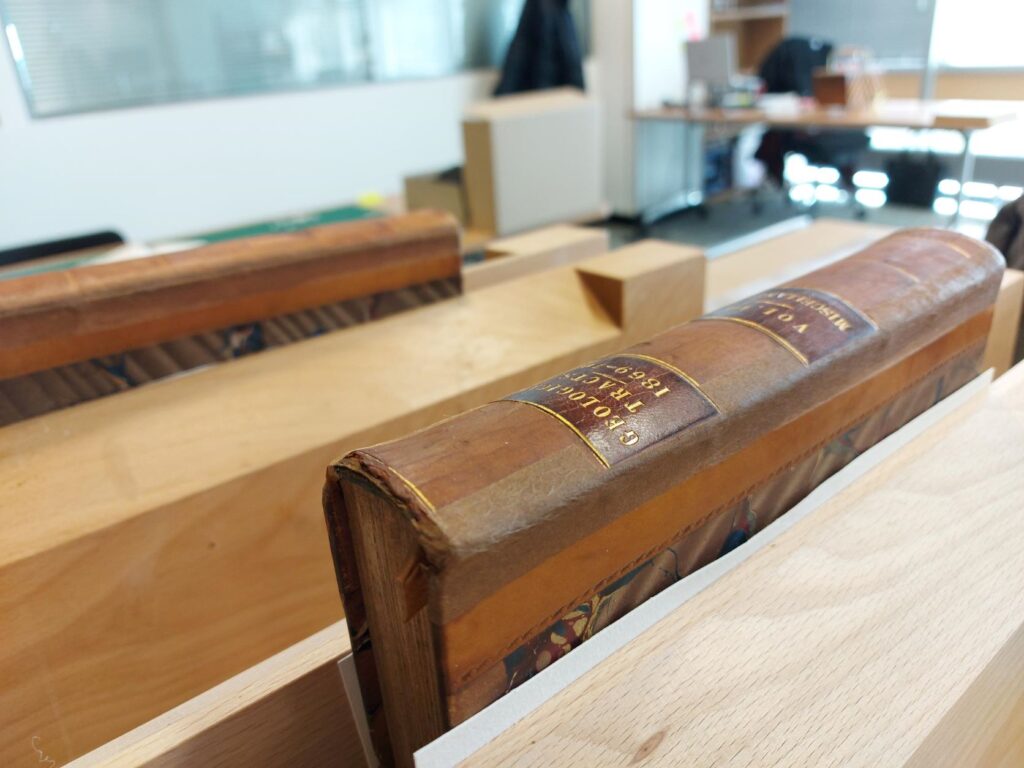
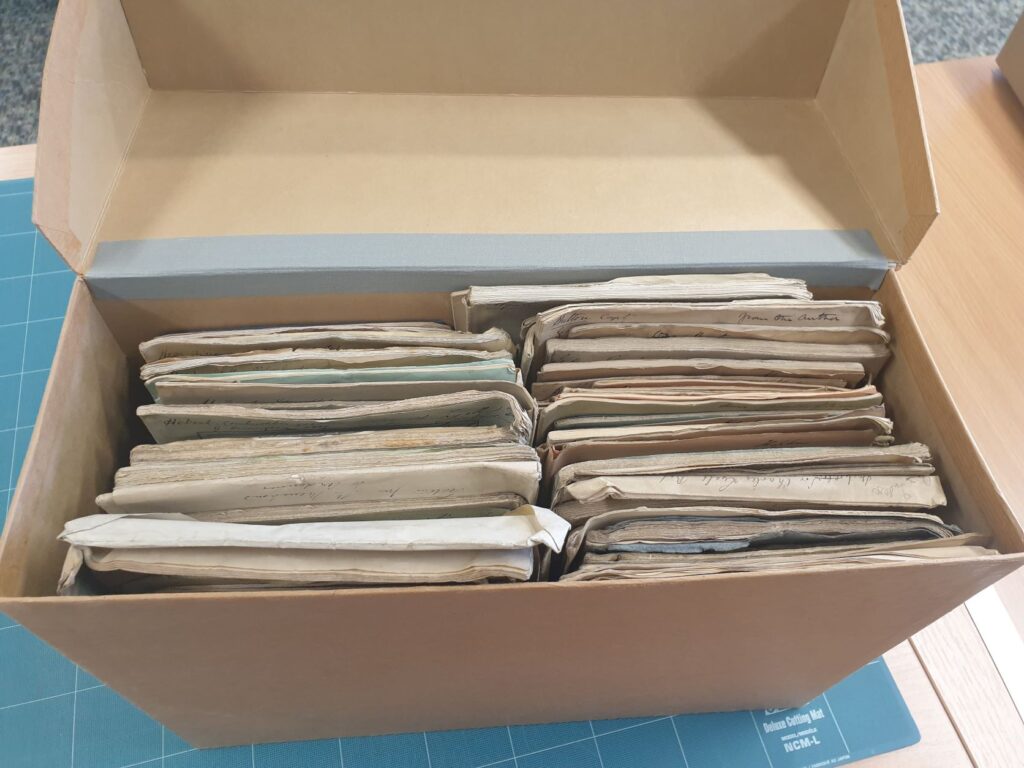
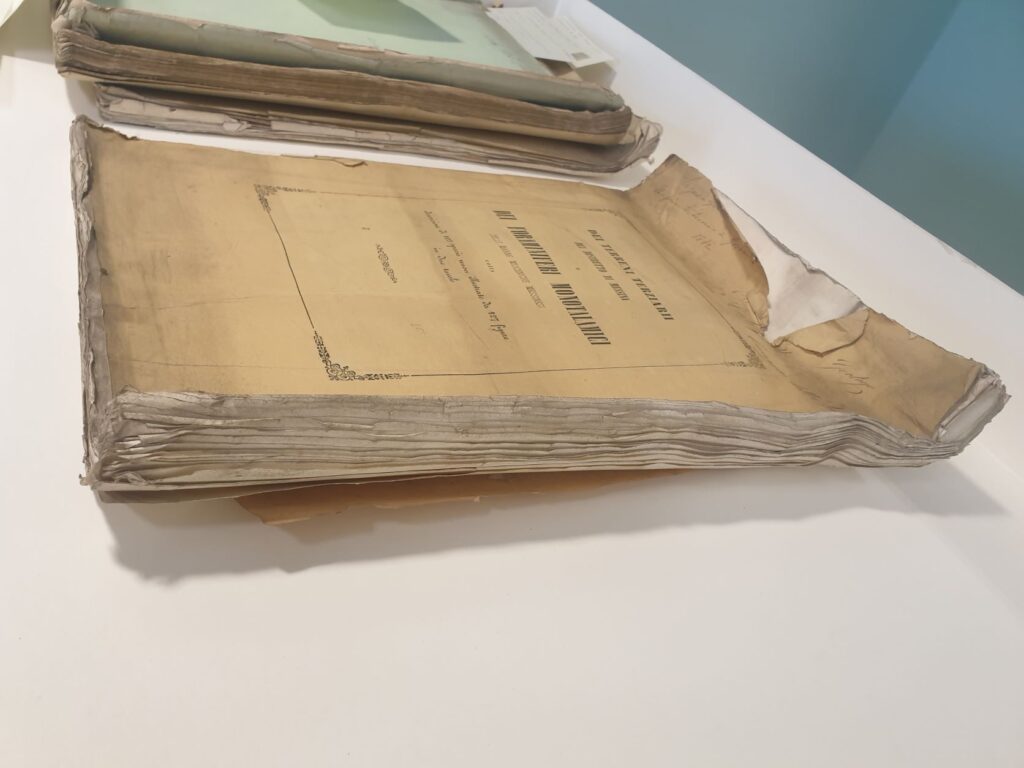
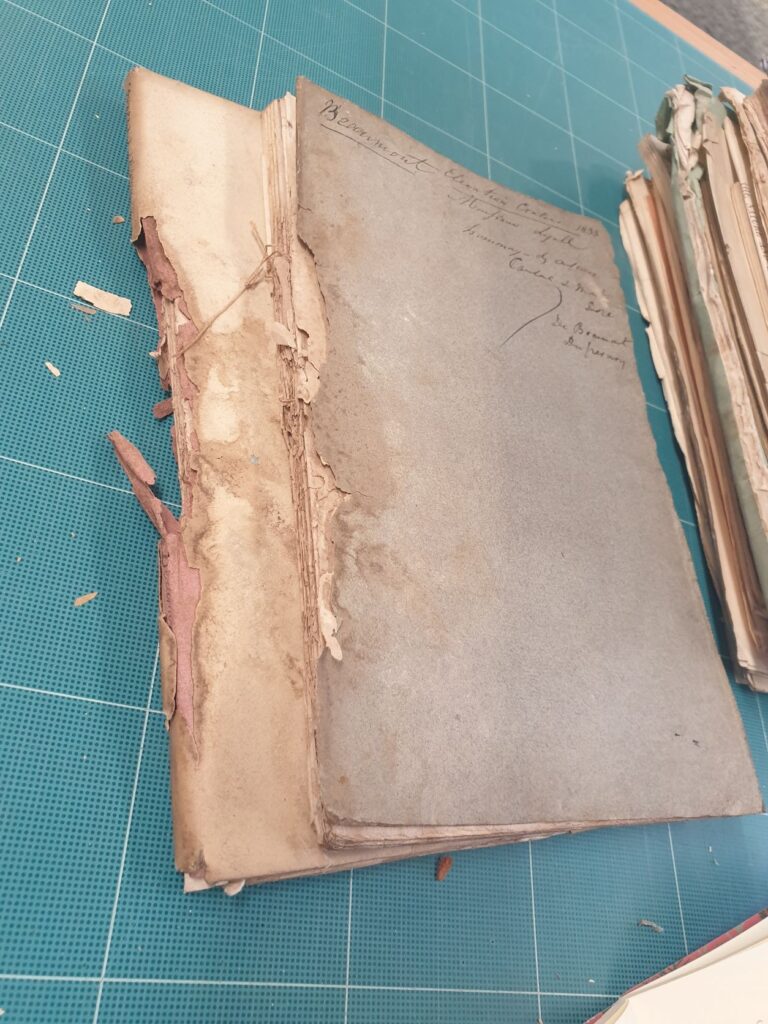
The Peter Grant Collection comprises volumes of works by the Gaelic Baptist preacher and hymn writer, Padruig Grannd. These were stored together in a box, along with other printed works, manuscript sermon notebooks, and items pertaining to one of his descendants, Daniel Grannd. The material was put together in the 50s and it had unfortunately experienced the effects of unsuitable storage conditions over the years prior to it coming into the care of the Centre for Research Collections. This was obvious from its condition: in addition to the more common issues with older books, such as surface dirt, loose boards, text blocks and spines, most of the items in the box also showed serious signs of mould, residual staining, and warping from damp conditions in past storage. Conservators and archivists alike will get shudders when they hear whispers of attics, basements or garages…the likely former home of this collection.

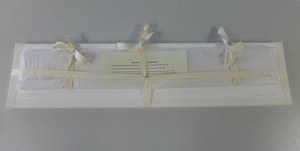
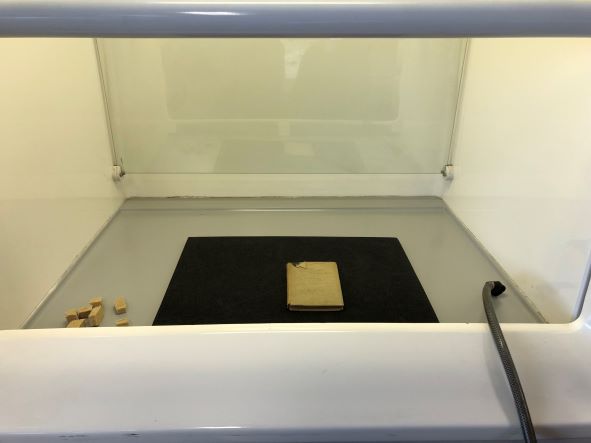
The collection in its original housing

Although collated in the 1950s, the collection didn’t actually arrive to The School of Scottish Studies until the 90s. After 20-odd years under the University’s care, it was about  time that this incredibly special collection got the in-depth treatment and rehousing it deserves– as Collections Care Assistant, that’s where I came in!

I began by checking each item thoroughly in order to wheedle out the items showing signs of inactive or worse, active mould, which could spread if left untreated. I breathed a big sigh of relief when I didn’t find any active mould, but as a precaution I still placed the items with past mould damage to the side to avoid any potential cross-contamination. After this, cleaning work could begin on the items that I had identified as being free from the clutches of mould spores.

Left: removing ingrained dirt with a smoke sponge. Right: brushing away dust with a soft brush

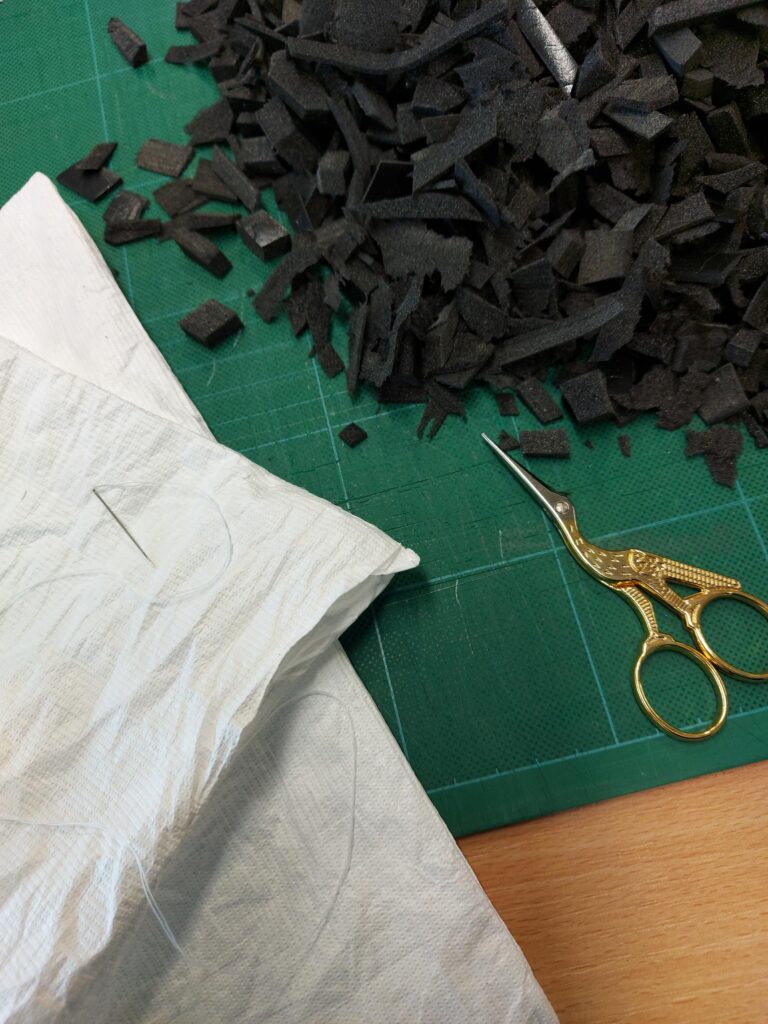
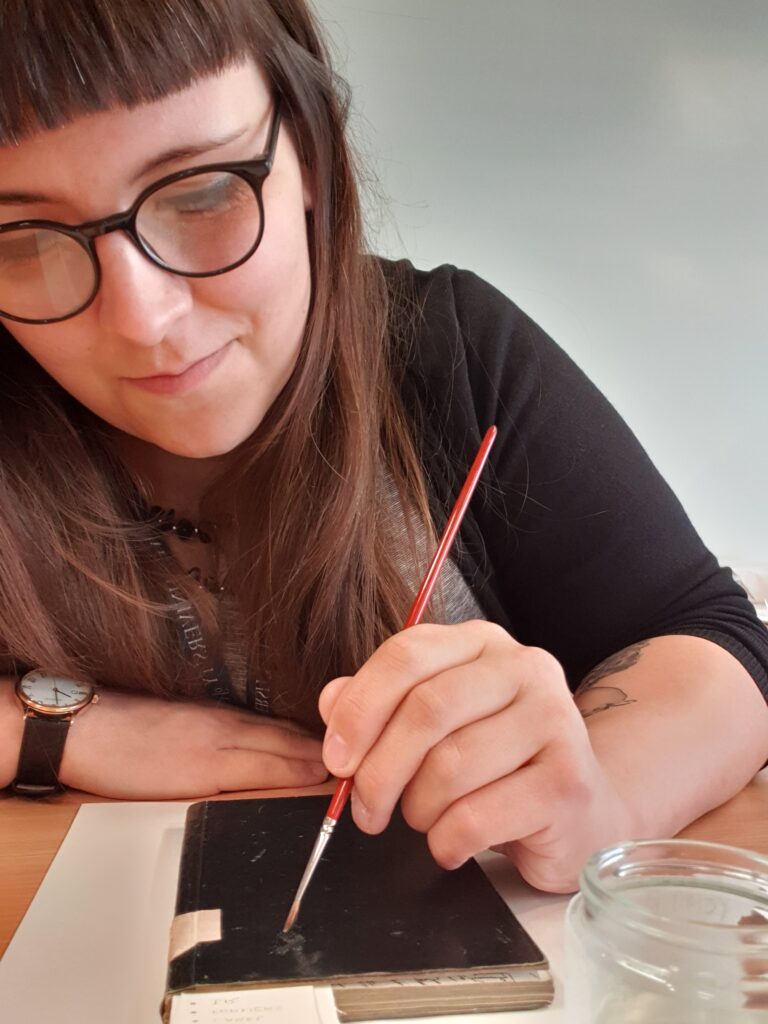
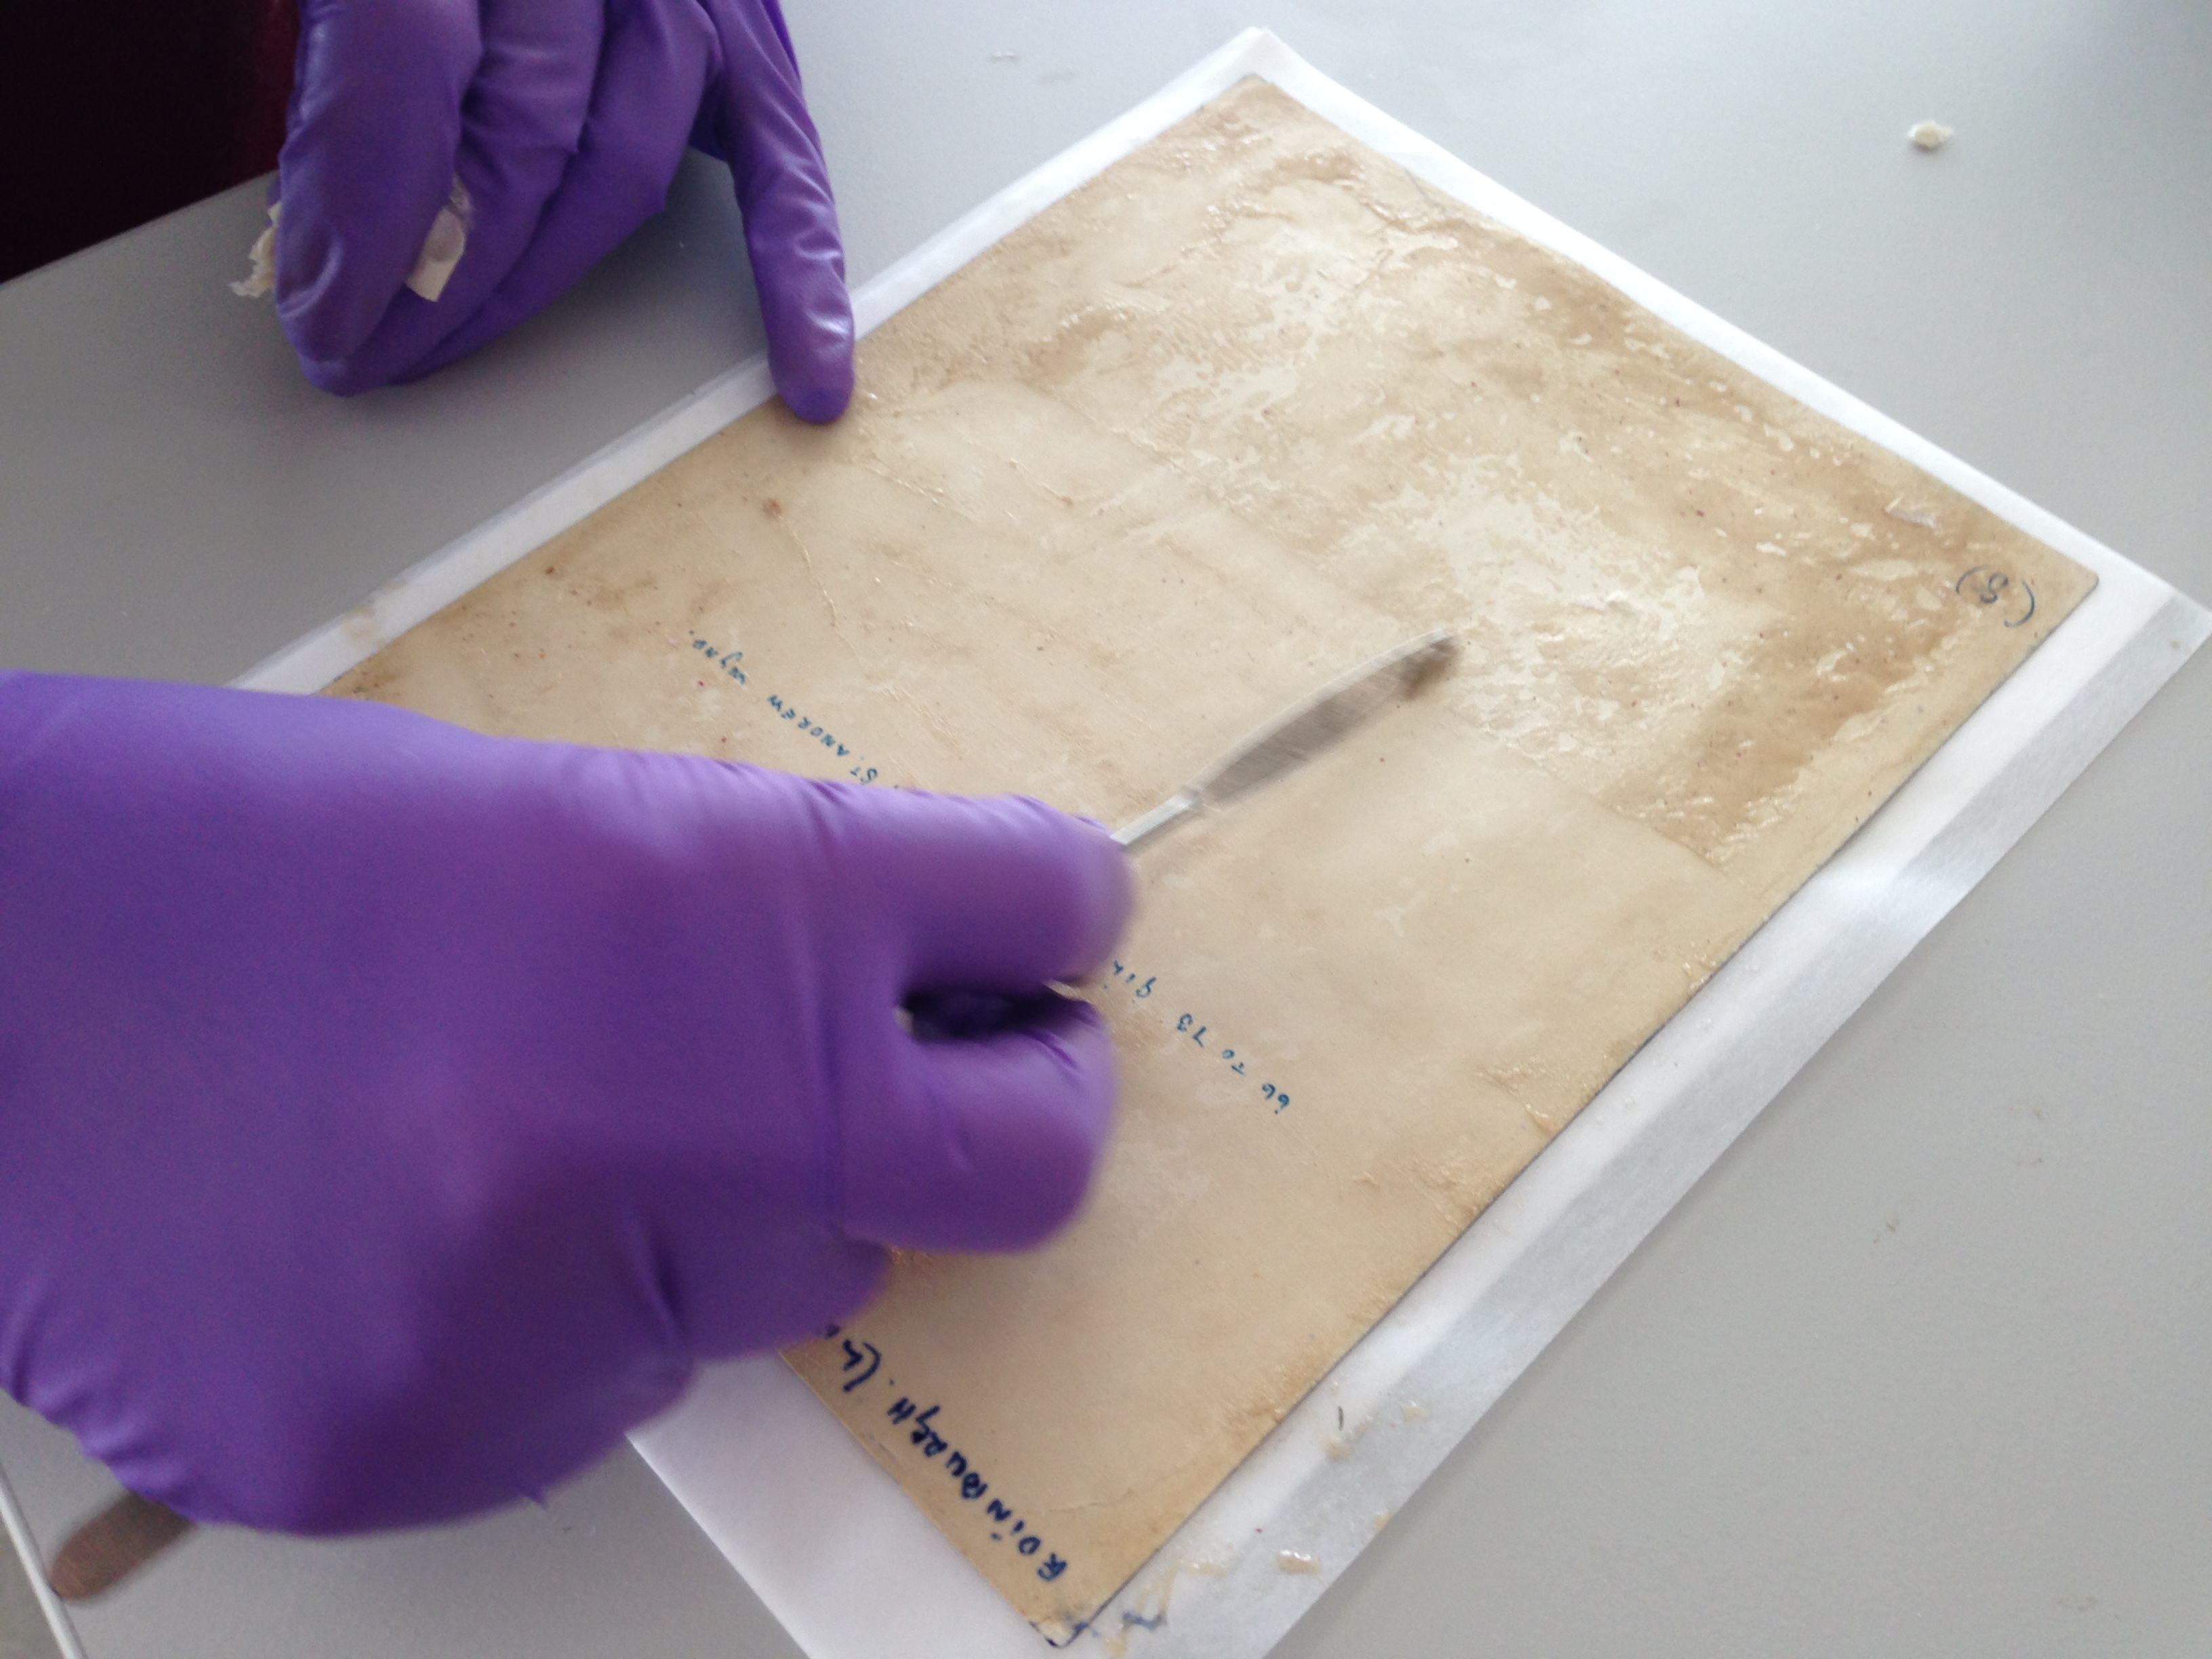
I carefully brushed away the dust from the covers, fore-edge and top-edge of each book, after which I used a smoke sponge to remove ingrained surface dirt from the covers, end papers and text blocks. I repeated the same process on the notebooks and loose leaf material, but I was careful to avoid rubbing off any handwritten text or drawings, cleaning around these parts.

FYI, you will notice from the photos that I wore nitrile gloves when I was cleaning the items. This was just in case I came across any mould that I had missed when checking the books initially. Generally, books should be handled with clean, dry hands unless a health hazard is suspected or they have parts made from another material that requires gloves when handling, i.e. metal.

Any books that were structurally unstable and had loose text blocks, spines or covers, were then identified for further attention. In mild cases two cotton tape ties sufficed for securing the covers and spines, but in a large number of cases the books were in such a fragile condition that they needed a custom-made box to stop loose or friable (not the yummy kind) parts falling off. I put these items to the side to return to later.

Cleaning in the fume cupboard

Meanwhile, I began tackling the mouldy items. I put a protective and very stylish FFP3 mask on to protect myself from breathing in the mould spores, and placed the contaminated items in the fume cupboard. I combed each item for mould deposits, and used a museum vacuum on a low-suction setting to then remove them. After they were free from mould, I followed the same process that I had applied to the other items, brushing dust away and using a smoke sponge for ingrained dirt.

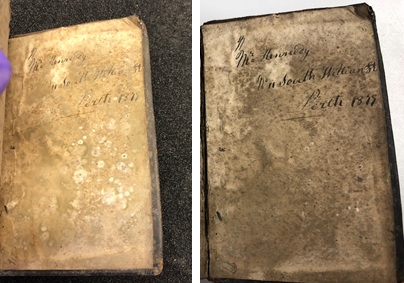
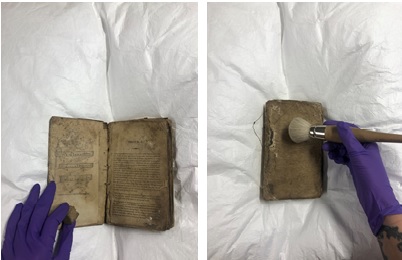
Inactive mould before and after cleaning. The reduction in mould spores is visible in the image on the right.

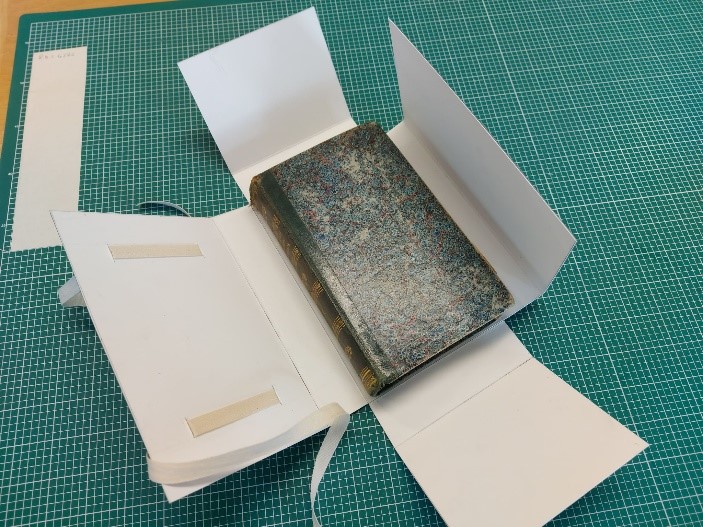
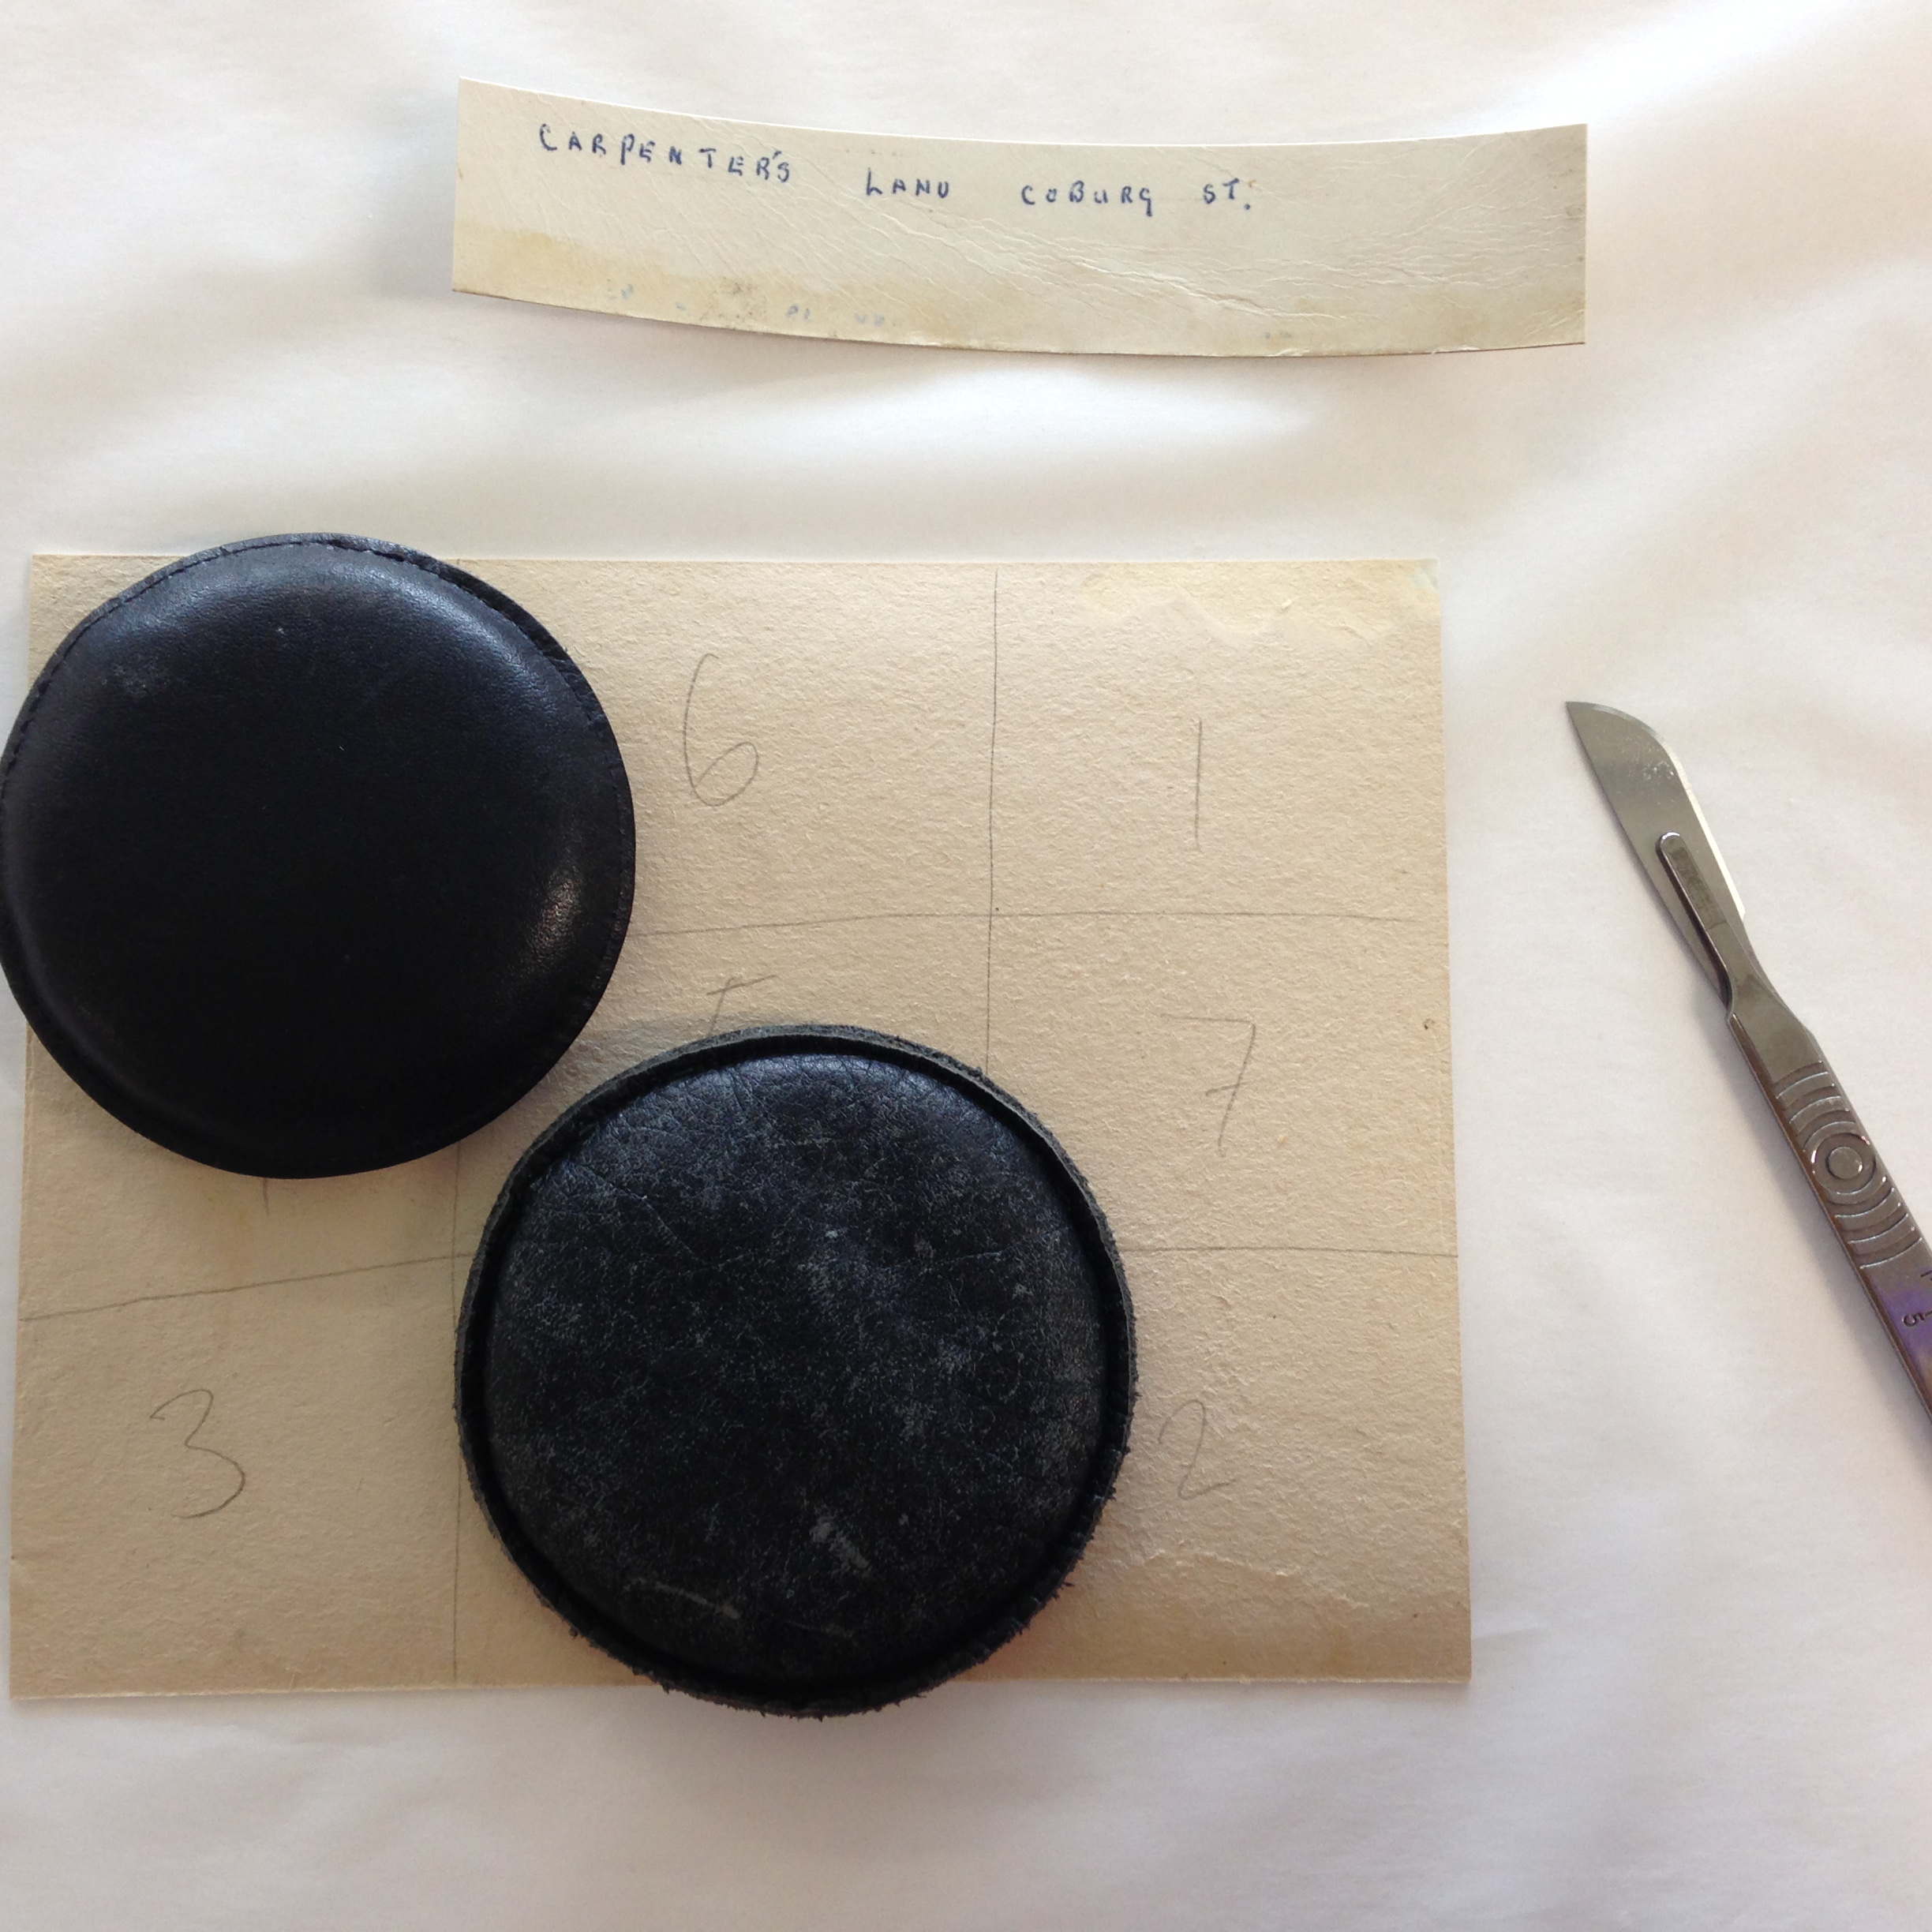
Now that everything was clean and mould-free, it was time to return to the fragile volumes that still needed some TLC. I measured them all, adding a couple of millimetres buffer room to my measurements to allow space for the folds of the rehousing material. I then created individual housing using a cutting board, scalpel and guillotine; I made phase boxes – four flap enclosures designed to protect delicate or damaged books – from museum-grade box board, which is a tough acid-free paper board, casings with spine support for smaller notebooks, and four flap folders for loose leaf material.

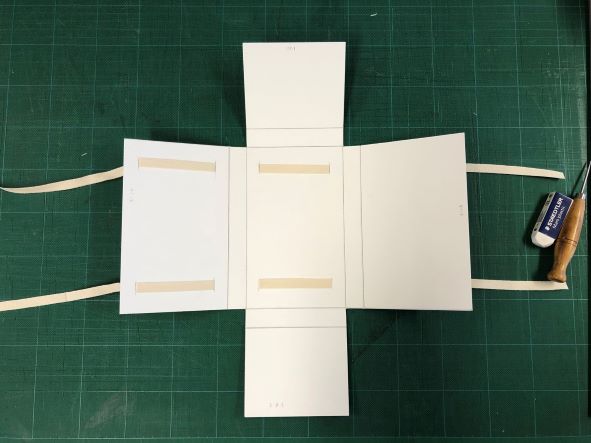
Making a custom phase box

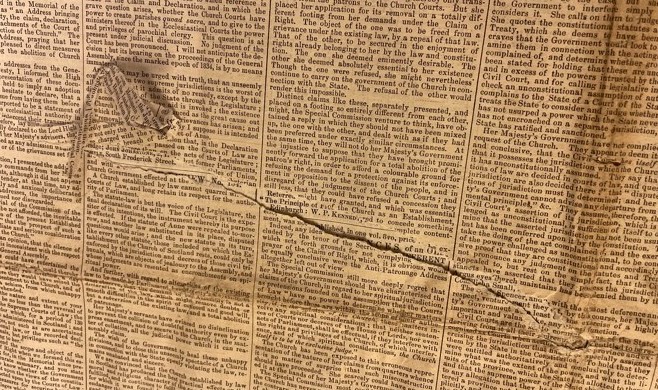
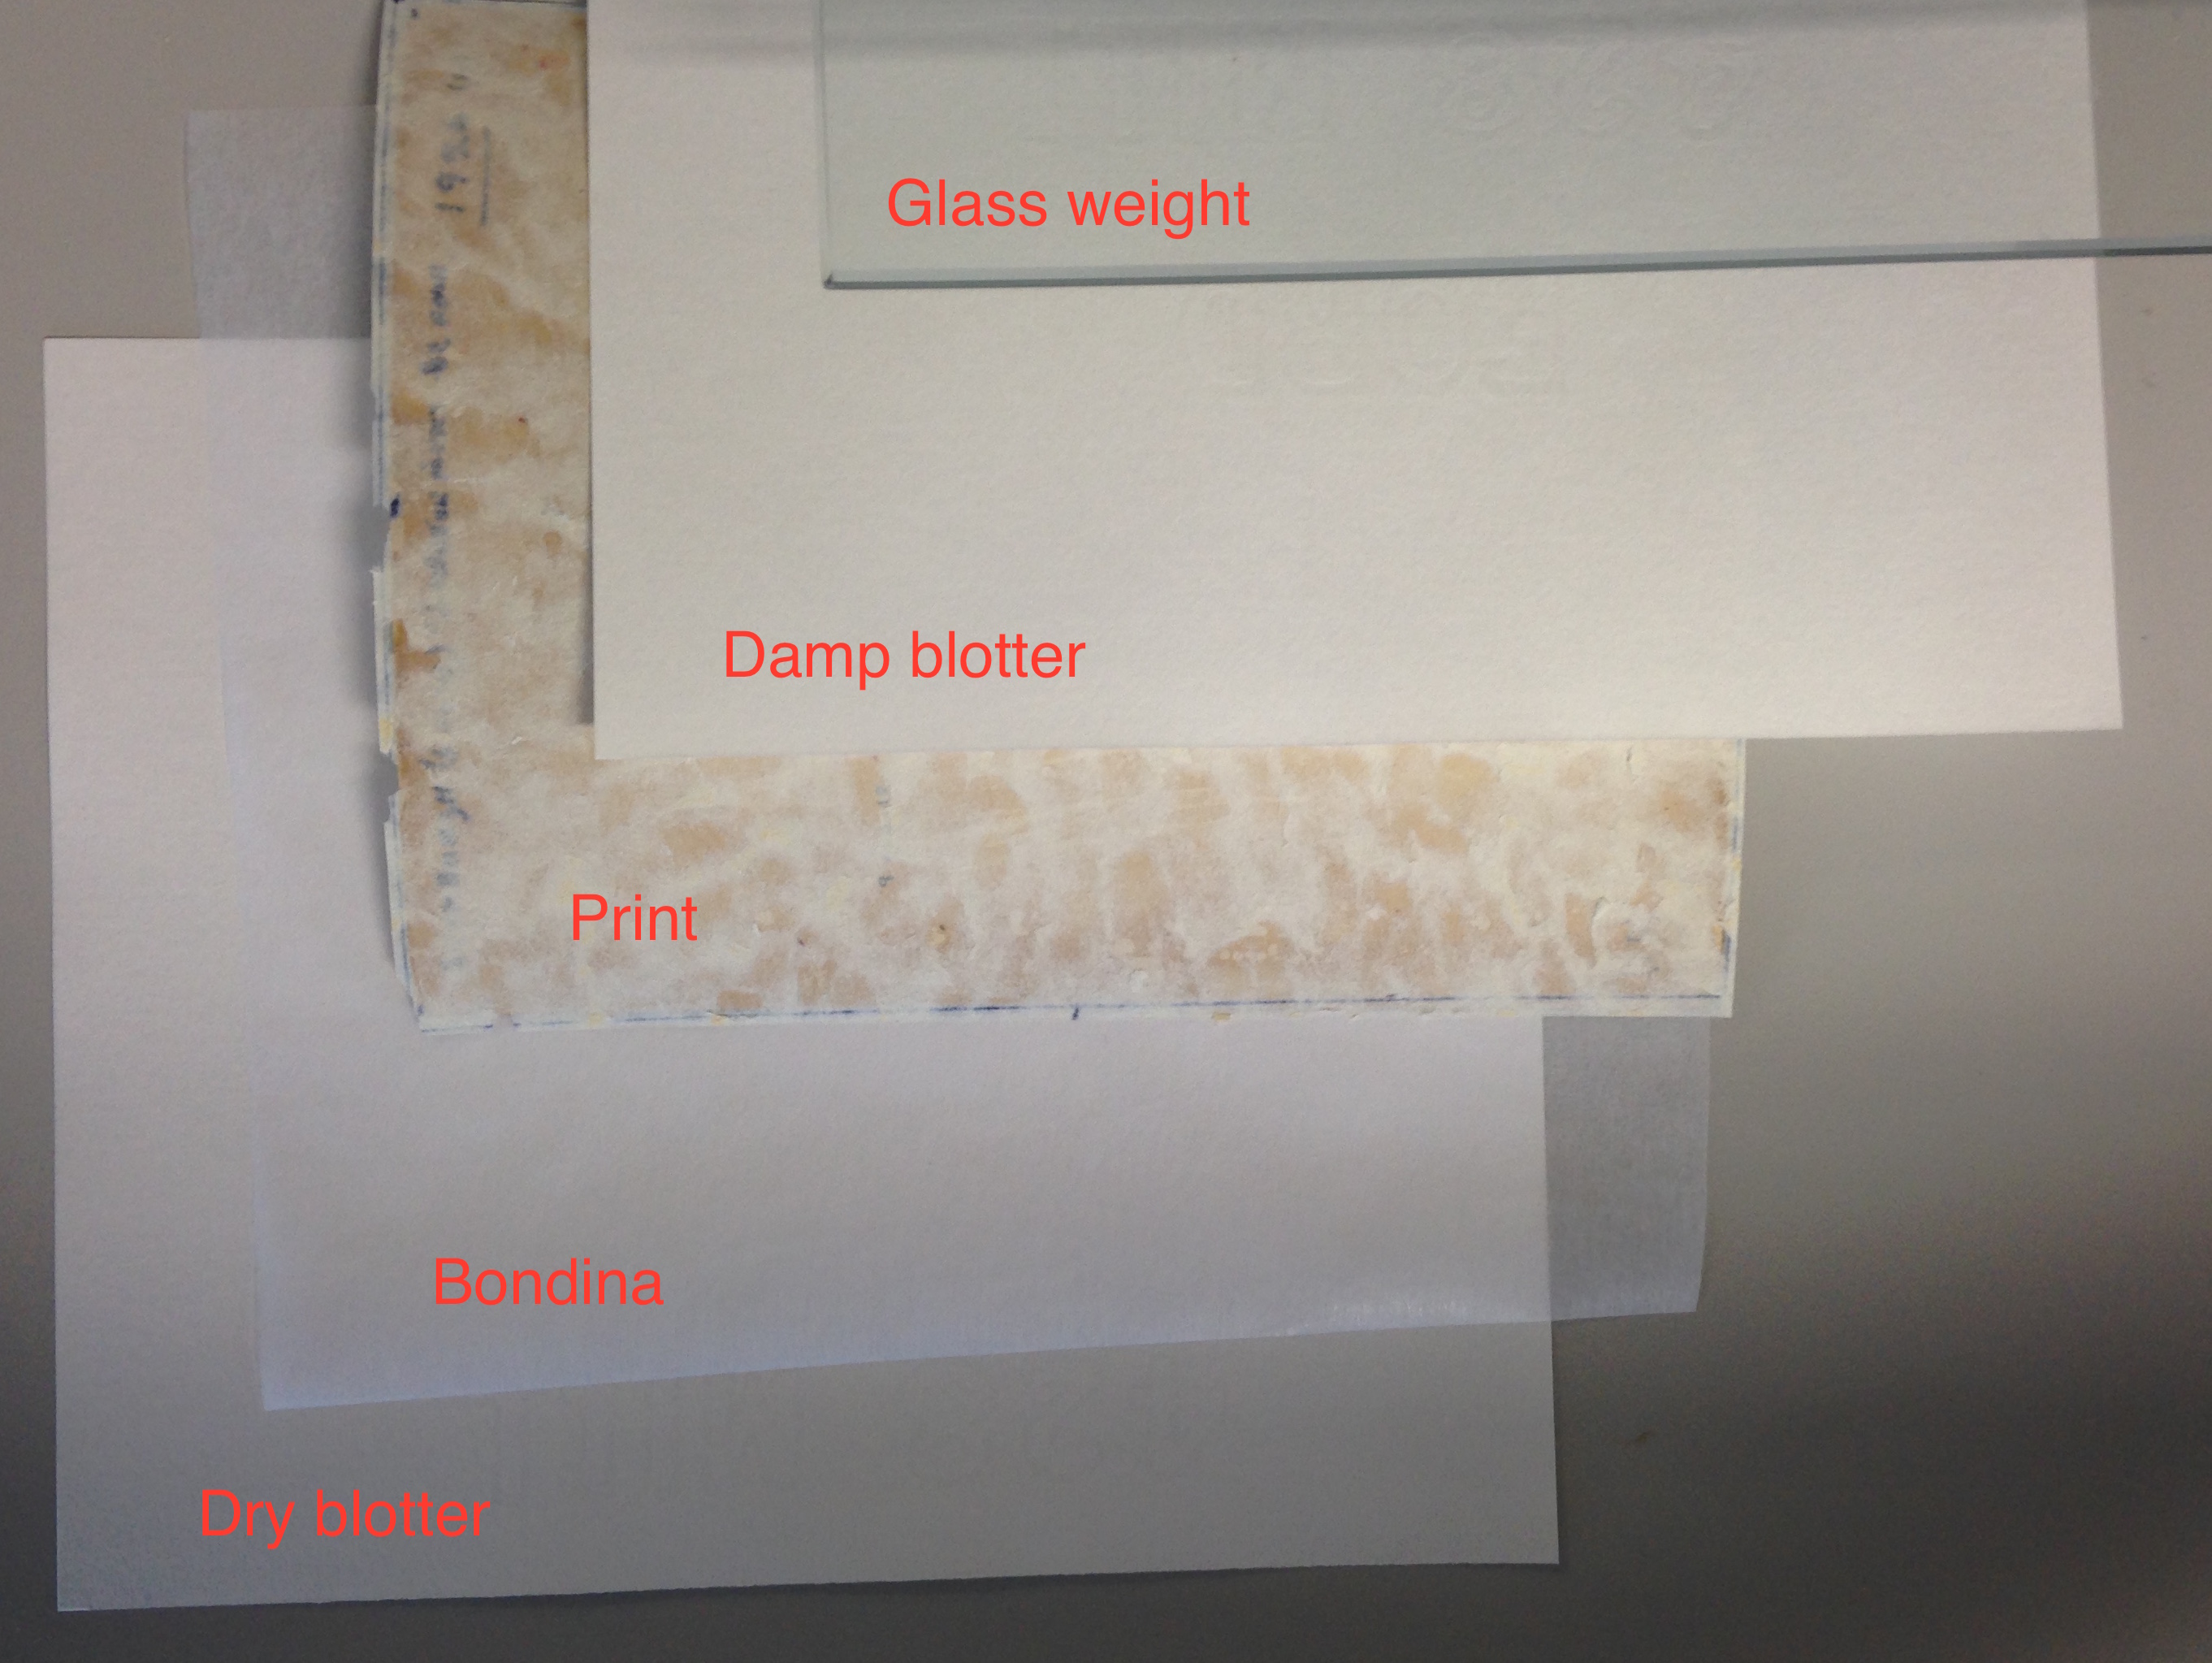
I had to do a bit of problem solving here, as it wasn’t always obvious which rehousing solution would be best for a particular item. For example, a collection of printing proofs proved pretty hard to store. They had previously been stored folded up, causing the paper to bend. I consulted our paper conservator, Mhairi Boyle, and she suggested housing them in such a way that they could be made to lie more flat, without the need for further interventive treatment at this stage.

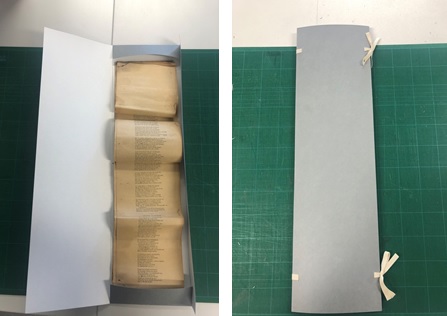
Left: printing proofs in custom folder. Right: printing proofs in custom phase box

Initially, I thought that a folder would work best for this, but the proofs didn’t fit in my custom folder, even though it had been measured to the correct size. The folder didn’t allow the necessary wiggle room for the 2.5cm bends, and it certainly wasn’t strong enough to coerce the paper into a flatter shape. In order to tackle this problem, I resorted to the largest ruler and cutting mat the conservation studio had to offer and I made another custom box for it instead. In the end I had housing that was long enough for the proofs, whilst allowing them 1.5cm depth so that the bends could be flattened out slightly.

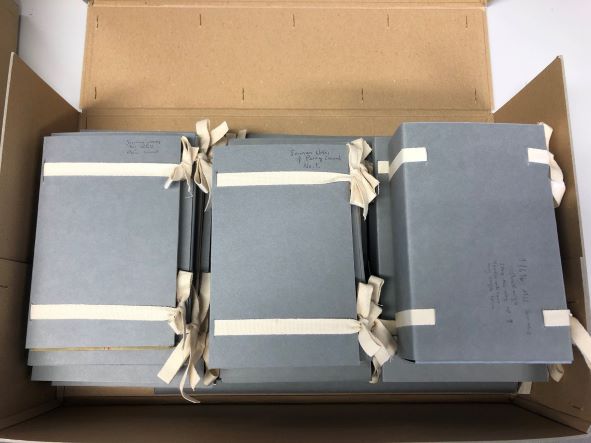
The rehousing solution: archival box with fragile volumes in phase boxes

The last step in the Peter Grant saga was separating out the material into archival boxes in a coherent way. I put the items in three categorised archival boxes: printed works by Peter Grant in order of volume, other works, and pre-print items. If you like organisation and tidiness like I do, I think you’ll agree that the end result is very satisfying. More importantly, the collection is now more secure, and its future more certain.

Bearing Witness: The Pre-Digitisation Conservation Treatment of The Witness, Part 1

This week we have the first instalment of a two-part series by Projects Conservator Mhairi Boyle. Mhairi spent April 2022 working on The Witness, a collection of Edinburgh-based newspapers held by New College Library.


As a child I remember the local tabloid newspaper being delivered every morning, and my dad examining the daily happenings over his morning coffee before heading off to work. At the time I was more interested in the horoscopes and agony aunt sections. Weekends were a more relaxed affair, with a much larger (and more sophisticated) newspaper that barely fit onto the kitchen table. Considered ephemera, the newspaper was read once then discarded, with little thought lent to the matter.

The January 1842 copy of The Witness.

These days I rarely, if ever, purchase a physical newspaper. With the reign of the Digital Age, the news is accessible through the swipe of a fingertip via various apps and videos all shown on a tiny cellular screen. Critical stories are updated by the second with live news feeds, which means you can scroll to your hearts content on a regular basis.

I hadn’t given the modern consumption of news much thought until I was asked to assess the condition of a collection of newspapers belonging to the School of Scottish Studies. The Witness collection comes in two formats: there are 23 folders of partially loose issues which appear to have been removed from bound book volumes, and 26 much larger volumes. As part of a larger digitisation project which aims to make The Witness accessible online, I was asked to assess the condition of the loose monthly volumes prior to them being sent off to an external company to be scanned. Because they are so large, it takes two people to produce one item at the New College Library. Digitising The Witness will enable ease of access to all readers and reduce the need for handling such large items. I met Senior Collections Manager Katharine Richardson at the University Collections Facility to assess the newspapers.

Newspapers are also great forums for practising cursive.

Why is the preservation of these newspapers important? Historic newspapers are physical encapsulations of everything from historic world-changing events to opinion columns which echo the thoughts and feelings of communities from different eras. The Witness is an Evangelical Christian newspaper which was issued twice-thrice weekly from January 1840-February 1864.

The 23 loose monthly items vary from poor to excellent condition. The dates of the newspapers range from January 1842 to October 1843. During this period, a transition was being made from using cotton rags to make paper to using wood pulp, an inexpensive alternative. Wood pulp paper tends to become yellowed, brittle, and crumbly over time, whereas cotton rag paper tends to be strong and better-preserved. Thankfully The Witness was printed on a good quality cotton rag paper, which means that despite the wear and tear incurred through a century of use, the paper is still of a good and sturdy quality.

A large tear obscuring the text block, and some split areas where the paper has previously been folded.

The most concerning issues with the newspapers were tears encroaching into the text block, areas of weakness due to being folded, and fragile pages where the papers had previously been bound together into one area.

A failed historic repair.

An interesting (and challenging) aspect of the condition of the collection is the damage caused by historic repairs. Conservation is a constantly evolving profession with new techniques and adhesives being produced every year, which means that occasionally my job involves removing historic repairs if they are causing damage to objects. Many of the newspapers had old repairs administered with an unknown adhesive, which had failed and split over time.

Two layers of binding: the original adhesive is yellowed and hardened, and the single thread was added later on.

In addition to this, a well-meaning repairer had also taken the time to painstakingly individually ‘bind’ each disbound newspaper with a single piece of thread. Unfortunately, this thread has caused issues regarding the structural stability of the newspapers, causing areas of tension and fragmentation throughout.

After surveying the newspapers, I formulated an action plan, which included a few ethical dilemmas and consultations along the way. Digitising the newspapers involves pressing them under flat scanners, which meant that they required stabilisation through remedial conservation treatment. The ethical questions involved, and the remedial treatment of the newspapers, will be discussed further in Part 2 of this blog series: coming to an online news outlet near you soon!

Putting the Pieces Together: The Challenges of Working on Architectural Models (Part 2)

This week we have the final part of Project Conservator Mhairi Boyle’s series on the conservation treatment of three Percy Johnson-Marshall architectural models. The first part can be read  here.

Putting the Pieces Together: The Challenges of Working on Architectural Models (Part 2)

In my last blog, I introduced the Percy Johnson-Marshall architectural models, and the challenges faced when designing a treatment plan for them. In this week’s blog, I am going to tackle the topic of different adhesives and treatment methods used in this project.

In the field of paper conservation, there are a few gold-standard adhesives. The most ubiquitous adhesive that almost all paper conservators use is wheat starch paste. Though most conservators associate starch-based adhesives with East Asian conservation practices, one of the earliest recorded uses for starch was recorded in Ancient Egypt, where it was used to adhere pieces of papyrus together.

Powdered wheat starch mixed with water over heat forms a gelatinous paste, which can be tailored to suit different purposes. It can be kept thick (‘dry’), or thinned out with more water. Dry paste is often used to mend thicker paper-based objects or objects which cannot tolerate a lot of moisture, and thinned out paste is used when more flexibility is required. I decided to use a very dry paste to attempt to re-adhere lifting areas of the models, with varying degrees of success. Wheat starch paste requires at least 10-15 minutes to dry, meaning that the part of the object being repaired with paste needs weighted down. Although wheat starch paste is a strong and reliable adhesive, the extent of the water damage and the embrittlement of the card used in areas of the model meant that it was not strong enough to re-adhere parts of the model.

Collections Care Assistant Sarah Partington and I then moved onto using EVA glue. EVA stands for ethylene-vinyl acetate. It is a synthetic adhesive that was adopted by conservators in the 1980’s as a more reversible (but still challenging to remove) alternative to the completely irreversible PVA (poly-vinyl acetate). EVA is commonly used

Loose and lifting areas of one of the models.

in book conservation and artefact conservation. It’s stronger than wheat starch paste, but also has a longer ‘curing’ time. Rather than ‘drying’, adhesives like EVA and PVA react with the environment and form flexible solids.

Using EVA worked in some cases, but again, the drying time was not quick enough for the thicker cards used on the model. We also found that the weights we were using during the drying process were not quite the right size. At this stage, I turned to our Musical Instruments Conservator Jonathan Santa Maria Bouquet for some assistance.

Jonathan has experience dealing with an incredibly dynamic collection of 3D objects, chiefly musical instruments, and his workshop reflects this. Whereas paper conservators often have nimble and petite tools in their arsenal, Jonathan has saws, drills, clamps, and hammers.

Custom acrylic weights made by Jonathan Santa Maria Bouquet.

He very kindly lent Sarah and I some clamps to hold areas of the models in place while drying and created some custom-shape acrylic weights for us to use.

In addition to this, Jonathan suggested we try the adhesive Paraloid B72. B72 is an acrylic resin which has been used in conservation for over 25 years, and is commonly associated with archaeological and objects conservation. It is manufactured as small hard pellets which are then dissolved in a solvent of choice. Solvents are chosen based on how quickly they evaporate and their compatibility with the object – the quicker a solvent dissolves/dries, the quicker the adhesive will dry. Jonathan recommended a 50/50 mix of acetone and isopropanol, to give a medium-fast drying time.

From left to right: wheat starch paste, EVA, and Paraloid B72.

The B72 was a success – in conjunction with the custom weights and clamps, Sarah and I managed to successfully adhere all loose components of the models. It dried quickly, and the clamps and custom weights allowed us to apply a stronger and more precise amount of pressure to drying areas.

Clamping an area of the model to allow the Paraloid B72 to dry.

Successfully re-adhered components.

Acid-free tissue was built up to create an even plane, reducing the risk of pieces coming loose.

After the models were made secure, Senior Collections Manager Katharine Richardson and I met to discuss the safe packing and moving of them. Sarah and I prepared for their move by covering them in acid free tissue, filling in any gaps between built-up areas so that they wouldn’t come loose and knock against each other. The external removals contractors then arrived, and we discussed the safest method of moving the models. Large plastic bags were used to cover the models and tissue, and everyone held their breath as the largest model was tipped on its side to fit through the door.

Everything remained secure, and the models made it safely to the University Collections Facility. This project demonstrated the importance of cross-disciplinary collaboration and wouldn’t have been possible without the whole team mucking in to put the pieces together.

Sarah and one of the models, all in one piece!

Further Reading:

Whitten, J., Buckley, B., Houp, H., Vagts, L., Irgang, H., van Gelder, M., Blakney, S., Roth-Wells, N., & Pocobene, G. 1997, Varnishes and Surface Coatings: Polymeric Varnishes, https://www.conservation-wiki.com/wiki/Varnishes_and_Surface_Coatings:_Polymeric_Varnishes

Koob, SP. 2009, ‘Paraloid B-72: 25 Years of Use as a Consolidant and Adhesive for Ceramics and Glass.’, in Ambers, J., Higgitt, C., Harrison, L., & Saunders, D. (eds) Holding It All Together: Ancient and Modern Approaches to Joining, Repair and Consolidation, London: Archetype Publishing, Ltd., pp. 113-119.

Menei, E. 2017, ‘Use of East Asian materials and techniques on papyrus: Inspiration and adaptation’ in Adapt & Evolve 2015: East Asian Materials and Techniques in Western Conservation, pp. 118–27.

Rock, Paper, Scissors – Conserving the Lyell Collection

Today’s blog post concludes Lyell Intern Joanne Fulton’s two-part series on the Lyell Project. Joanne discusses the variety of work she carried out over the last few weeks of her internship at the CRC.


As my internship at the CRC draws to a close, I can reflect on the many exciting opportunities I’ve had to experience all aspects of the work involved in conserving the Lyell Collection. As I shall discuss further in this second blog, my responsibilities have not solely covered the rehousing of the specimens in the geological collection which was explained in my first blog.

In my last blog, I spoke of the labels on the Lyell Geological specimens, some of which were more fragile than others. In twelve cases, these labels needed to be conserved and re-attached. To do so, I needed an adhesive. While I tested both gelatine mousse and EVA, a co-polymer adhesive commonly used in bookbinding. I chose to use gelatine mousse as I found it to have the strength required and was more historically appropriate than EVA, as the labels had previously been attached with an animal glue.

The labels offered a few different challenges and solutions. Following the discovery that white tack was attached to one of the rocks previously, upon closer look at the labels I found one of these labels had used blue tack to be secured to the specimen. Once I had carefully removed both the blue tack from the specimen and label, I made the decision not to reattach the label but to slip it into a Melinex pocket, which I then housed with the specimen in its box.

A specimen of grey and red laminated sandstone had an awkward placement of its label, meaning the label had suffered more damage than others being only half attached to the specimen. Here, I had to piece together the small parts of paper broken from the label, not dissimilar to a jigsaw, then use a lining to attach this with the remaining half of the label still on the specimen using a thin Japanese paper and the gelatine mousse. As this still meant half the label was not attached to the specimen, as originally intended, I created a little Melinex protective box, so the label could not be accidentally torn in the future.

Before, During and After rehousing and conservation of specimen EUCM.0167.2013

On two other occasions I used a lining to reassemble torn and broken pieces of the labels back together. Some were harder to correctly position together due to the nature of each piece and/or some parts being missing.

Applying the jigsaw-like pieces of a label to a lining

The rehousing and conservation of the Lyell Geological specimens was finished by the end of week six of my internship. With the rehousing finished, I hand-made two book cushions with Tyvek and the excess Plastazote scraps and offcuts. This created a sustainable solution with the waste material, all I needed was a needle and thread.

Book cushions proved to be a simple and sustainable solution to all the waste Plastazote offcuts

My attention then turned to Lyell’s personal notebooks and volumes. Here my aim was to rehouse them whilst gaining new skills in book conservation, skills I was very eager and grateful to learn.

The main aim with the notebooks was to finish their rehousing, not a small feat as 294 book shoes needed to be made in total. However, as this was a task completed progressively throughout the project by all those involved, all book shoes were made by the end of my week seven. As well as this rehousing, I conserved three of Lyell’s notebooks. This consisted of surface cleaning, consolidation of red rot (a degradation process found in vegetable-tanned leather), label repair, corner repair, and repairing inner joints.

Finally, the volumes needed new housing in the form of phase boxes, which provide an additional layer of support and protection to the series. Then, depending on each volume, I surface cleaned, consolidated red rot, and repaired the outer joints. For the outer joints, I used a lightweight paper which I had toned using acrylic paints to match the colour of the volume. Unfortunately, the spine and the leather on the covers were different shades, so I matched my repair paper to a mid-tone. The darker spine is unusual, as usually you see the spine is lighter because of light damage. However, in this case, I believe the spine had previously been consolidated or brushed with a substance that has darkened over time.

Example of a phase box

Having applied the repair paper to the outer joints with EVA, they were left to dry before being trimmed.

My experience at the CRC has improved my skills as a conservator immeasurably, and, boosted my confidence. The highlight for me has been rehousing the Geological collection which was a new experience and challenge, and I leave happy in the knowledge that each specimen is now preserved for the future in its own uniquely carved housing.


Prints Gone Off – Conserving the Lyell Collection

Today’s blog post concludes Lyell Intern Sarah MacLeans’s two-part series on the Lyell Project. Sarah discusses the variety of work she carried out over the last few weeks of her internship at the CRC.


With my conservation work on Lyell’s correspondence finally being successfully completed in the sixth week of my time at the CRC, I’ve been able to devote the final fortnight fully to – well – to everything else!

My time in this internship has not, of course, been devoted to Lyell’s letters alone. In fact, I have had ample opportunity to pursue work in many other areas of this exciting collection.

Here I am applying Klucel G in IMS to areas of a notebook cover affected by red rot.

I’ve made the journey out to the King’s Buildings Campus to handle the packing and transport of geological specimens. I’ve made innumerable journeys elsewhere too, gaining insight into the work ongoing at institutes like Historic Environment Scotland as well as the National Library, Museums, and Galleries of Scotland, and forged professional connections with the wonderful staff members there. I’ve boosted my technical skill immeasurably in book conservation, assessing and conserving three of Lyell’s personal notebooks as pictured here. And I’ve rehoused vast quantities of these notebooks by creating book shoes, a bespoke enclosure which protects the notebook but leaves the spine exposed.

After all that excitement, the last big task for me to complete during my time at the CRC has been a comprehensive survey of Lyell’s expansive collection of offprints – a very big task indeed!

An offprint is a separate printing of a work that has originally appeared as part of a larger publication, usually one created by multiple authors – like a magazine, an academic journal, or an edited book. Sir Charles Lyell understandably picked a lot of these up throughout his life, and they range far and wide in subject matter from treatises on the molluscs of Algeria to ruminations on the temperaments of the citizens of 19th Century Reykjavik.

A selection of Lyell’s Offprints in their original state prior to survey and rehousing.

The Offprints also range in physical size from folio (approximate to A4) down to manuscript (more or less A5), a fact that caused initial confusion as the two sizes were alphabetized and housed separately as two different series. And finally, the Offprints range considerably in overall physical condition.

On the whole, they have held up well over the last two hundred years with 12 of the 18 boxes surveyed rating as Grade Two – Fair Condition. The majority of Offprints within this category are reasonably stable, can be handled safely with just a little extra care and attention, and, by and large, show mainly cosmetic or minimal structural damage at worst.

An oversized item that has suffered damage and planar distortion as a result of insufficiently large housing

However, this is not the case across the board.

One issue that I have encountered already in my survey is the issue of size, finding oversized items to be much more common within this series of the collection than initially anticipated. Oversized bound works like that pictured in figure 3 have become distorted and damaged when forced to fit unsuitable housings. Even with time-consuming flattening and other conservation treatment, they will remain too large to fit comfortably within their new housings – so alternatives must be found. As is the case with other oversized flat works like maps and geological diagrams, such items require a great deal of thought and collaboration, leading to a great many conversations with other departments within the CRC to negotiate alternative storage space within available plan chests.

A group of offprints severely affected and embrittled from damage caused by mould.

Another issue that has arisen within this survey is that of the damage caused by mould which, unfortunately, I have discovered within 11 of the 18 boxes surveyed.

I should stress, first and foremost, that the mould I’ve found is historic and entirely inactive. Environmental controls in place within CRC stores have successfully stopped the historic mould in its tracks, depriving it of the warm, humid conditions in which it likes to spread, and ensuring that it can cause no more bother than it already has.

The main challenge that the mould poses now in terms of interventive conservation treatment is the time-consuming surface cleaning process that is now necessary to safely remove it. The mould, although inactive, can appear gritty and is potentially abrasive, so it needs to be removed along with surface dirt in order for the weakened paper substrate underneath to be repaired properly. This, unfortunately, lengthens overall treatment time and potentially complicates the recommendations that I would make about the treatment and care of this part of the Lyell Collection in the future.

Surveying Lyell’s Offprints has been a pleasure not in spite of these unexpected challenges but because of them. The unexpected is something that all archives, libraries and other institutions have to contend with often – as collections grow and become more varied, it can be increasingly difficult just to figure out the extent of what you have, let alone how to handle, and treat it all! The unexpected is also something that I will encounter on a personal level, having now completed my internship and looking to make my next career step as a paper conservator. I’ve gained such invaluable and varied experience throughout my time at the CRC, the challenge of the unexpected is one that I’m now more than ready to meet head on


Homes for Rocks – Rehousing the Lyell Geological Specimen Collection

Today we have the first installment of a two-part series from Joanne Fulton. Joanne is here on an 8-week internship funded by the John R. Murray Charitable Trust to help with the conservation of the collection of Sir Charles Lyell (1797 – 1875).


It is a privilege to handle objects that have been worked on by people in the past, to experience the connection and witness their working and learning processes. Therefore, it has been a fascinating opportunity to work on the rehousing of the Lyell Geological Specimen Collection which consists of various specimens from flint implements and axe heads, to shells and raindrop traces.

As previously outlined in these blogs, Sir Charles Lyell (1797-1875) was a hugely significant scientific figure in the 19th century. Amongst others, Lyell corresponded and was a close friend of another well known figure, Charles Darwin, a name closely linked to a number of the shell specimens within the collection I’m rehousing.

These specimens were collected or given to Charles Lyell on his many geological excursions. They were then used to inform his geological research, and they continue to inform learning and research within the University of Edinburgh today. When observing the many documents in the Lyell collection, I’ve found drawings of the same specimens I’m rehousing, illustrated by Lyell in his papers and notebooks.

In the first week I calculated I should be aiming to complete at least 5 objects per day to finish within the 8 weeks of my internship, as I had to bear in mind that within the 168 objects to be rehoused there are groups of items – here I’m largely referring to the shells – that make up a single object. However, as I reach the end of week 4, I’ve found I’m now completing over 10 a day due to more efficient preparation.

The materials I have been using to rehouse the specimens includes card tray compartments and plastazote, a type of foam used in archival repackaging. I have several sizes of trays, however there are 6 specimens which are too large for the largest of trays and need their own custom boxes. I’ve made these myself with card and corrugated card.

My process for rehousing a specimen begins having prepared the tray and two layers of plastazote to fit within. I then cut into the plastazote as appropriate to the rock. Using a white pencil I mark out where I need to cut through the top layer of plastazote, and then using a sharp scalpel, I carve into the thicker bottom layer. This carving is continued until the specimen sits tight and will continue to do so in the future when the specimens are returned to their storage.

A sharp scalpel is needed to create a neatly cut support for each specimen (EUCM.0204.2013)

All this cutting creates a lot of off-cuts from the plastazote. Rather than wasting them, I shall be reusing them as padding for a Tyvek book cushion in order to make my project more sustainable.

Previous to my rehousing, some of the rocks were held in small green trays of a standard size, often not suited to the actual size of the specimens and offering no added protection. The shells, which I shall be rehousing next week, are in small red boxes.

Included with many of the specimens are extra notes and labels of various origins – some of Lyell’s own handwriting –  which also need to be housed with the object as part of their history. When this is the case, I create a third layer of plastazote to house this paper note slipped in a melinex sleeve, carving a little recess for it to sit flat. I then attach cotton tape to the middle layer so the user can lift the object to see the paper note when needed.

Shells after rehousing: A note stating these shells were collected by Darwin is stored underneath (EUCM.0180.2013)

The majority of these specimens are in good condition – they are rocks and so robust by their composition- the labels, many handwritten by Lyell, and other attachments to the object are less so. Many are in need of repair having suffered losses, crumpling, and have become detached from the specimen. This is a problem I shall be tackling in the second half of my internship; repairing the tears and losses, as well as reattaching the labels with an adhesive.

There have also been a few messy surprises and oddities in the collection, with one rock having a large amount of white tack attached, unfortunately this was also stuck to the rock’s labels. This white tack was removed, and the same tack was used to remove the tiny amounts left in the small crevices on the rock surface. I carefully removed the labels from the rock and the tack, removing the unwanted and potentially damaging tack mechanically from the paper labels.

Photo during and after removing white tack from one of the specimens (EUCM.0003.2013)

Having recently graduated from the paper conservation course at Northumbria University, its been a rich learning curve working with objects such as the geological specimens. In my second blog, I plan to examine the method of reattaching the loose labels to the specimens as well as the finalisation of the rehousing within the second half of my internship.

Conserving the Mackinnon Collection

This week, Claire Hutchison describes the start of her eight-week internship working to conserve the Mackinnon collection…

I am four weeks into my internship at the CRC and absolutely loving it! I have been given the task of conserving and rehousing the Mackinnon collection. This project has been generously funded by the National Manuscripts Conservation Trust. This collection comprises of the lecture notes, learning materials and other such scribbles of Professor Donald Mackinnon, the first Chair in Celtic at the University of Edinburgh. He made quite the mark during his professional life by translating many Gaelic texts that include poetry, medieval manuscripts and religious texts. Through his work, primary sources of Gaelic language and literature could finally be shared.

Continue reading

Icky Sticky Tape

This week’s blog has been written by Lisa Behrens, a book and paper conservation student from Stuttgart in Germany, who spent four weeks at CRC’s conservation studio earlier this summer. In this post, Lisa describes a treatment she carried out on a bound volume in the Margaret Morris collection from the Fergusson Gallery in Perth. This collection is being catalogued and conserved at the CRC as a part of a collaborative Wellcome Trust-funded project entitled ‘Body Language’

If you don’t know the first thing about paper conservation, let me help you out: Do not, under any circumstances, use sticky tape. There you go, you now know the first thing.
I understand it’s tempting. When you first put it on, it looks neat. It mends that tear, it is easy to use and readily available. The problems start when it begins to age. Even if stored in optimal conditions, certain chemical reactions will inevitably take place. These will lead to discolouration of the adhesive, making the tape brittle and, worst of all, damaging and discolouring the object itself. Adhesive can also sink into the paper matrix and become so hardened that it’s almost impossible to remove.

During my three years of working and studying in this field I have come across a lot of adhesive tape, mostly used for tear repairs by well-meaning individuals over the last few decades. For example, this volume of sheet music from the Margaret Morris Collection, namely a ballet called The Forsaken Mermaid, had been repaired at least twice before, which is apparent from the use of different types of adhesive tape and kinds of thread for resewing.

The Forsaken Mermaid, before treatment

Continue reading

Student Placement – Joey Shuker

Joey Shuker, conservation placement student from Camberwell College of Art describes her experience of working at the CRC in this week’s blog post…

I have been very fortunate to have spent the last four weeks in the CRC as part of my summer placement for my masters degree in Conservation of Paper. I have just finished the first year of a two-year masters at Camberwell College of Art, part of the University of Arts London.

I have been working mostly in the studio with Emily Hick, but my placement here has also taken me to the National Library of Scotland conservation studios, The Scottish Conservation Studio (private studio) and I have spent days working at the Annexe (the CRC’s of site facility) with Katharine Richardson.

One of the projects I spent most time working on was conserving a collection of photographs of Leith in the 1920s.The condition in which the photographs arrived in meant they where not able to be digitised. The prints were mounted on thick card that had distorted due to past environmental and storage conditions. The distortion of the card mount was pulling and creasing the photograph. Being so distorted meant that any pressure to put them under glass during the digitisation process would have caused more damage to the print. The decision was made (before I arrived) to remove the mount backing which would allow the prints to relax and flatten.

Days were spent removing the backing down to the layer just above the back of the print. A scalpel with a no.22 blade was used to remove the backing layer by layer and a pencil grid was drawn on each layer to ensure even removal which would support the print during this process.

Macintosh HD:Users:joannashuker:Desktop:Edinburgh Placement 2016:Day 7:IMG_3844.JPG

Curved photograph and mount

Macintosh HD:Users:joannashuker:Desktop:Edinburgh Placement 2016:Day 7:IMG_3848.JPG

Grid on back to aid even removal of card

After the majority of the backing mount had been removed and the prints began to relax and could be pressed under glass overnight. Backing removal was something I had learnt on my course but I had only ever done it on large prints rather than a collection of small ones.

Doing aqueous treatments on photographs was something I had not yet covered on my course. Emily showed me a humidification method that allowed enough moisture to soften the paste holding the last backing layer on, but didn’t affect the print. We used fords gold medal blotter, which was recommended for use with photographs as it is thinner and holds less water. We used a blotter sandwich for humidification, the print were humidified for 30 minutes. After this time, the last layer of backing could be easily peeled away and the paste could be removed with a spatula.

Macintosh HD:Users:joannashuker:Desktop:Edinburgh Placement 2016:Day 14. 15.07:IMG_4033.JPG

Blotter sandwich for humidification

Macintosh HD:Users:joannashuker:Desktop:Edinburgh Placement 2016:Day 12 13.07:IMG_4002.JPG

Removing the paste

After this treatment and being put into a press for a couple of days, the box of photographs that arrived at CRC curved and stiff are now relaxed and flattened and ready to be sent to the photography lab for digitisation. This was a great project to work on as I could follow the project almost from start to finish.

I have learnt many new skills and I have been introduced to new treatment methods throughout my time here. Alongside working with Emily and the conservation team in the studio, I have also had introductions to other members of staff who have taken time to show me their role in the wider CRC such as the Archives, Photography Lab, Exhibitions, Rare Books and the Musical Instruments Conservation studio.

This placement has been highly valuable to my studies and preparing for work after university. Many thanks to everyone at the CRC that I have met during my time here.

Joey Shuker

Conservation Student Placement

The Gloves Are Off!

I was recently asked to rehouse a new accession to the CRC special collections; a beautiful belt previously belonging to a Scottish Suffragette made from a strip of ribbon, embroidered with enamelled motifs, with a metal buckle. You can find out more about this belt in this blog post.

belt

Suffragette Belt

Due to the huge amount of attention this item received on social media, I knew that it would be very popular, and likely to be requested multiple times for seminars, tours and researchers. As such, I wanted to create a housing solution that would reduce the handling of this item, as well as protect it whilst in storage.

Repeated handling can be very damaging to objects as the bending and flexing causes mechanical stress, which can lead to fractures at stress points. It is often assumed that white cotton gloves are worn when moving all archival collections. But that is not the case. Cotton gloves tend to reduce manual dexterity, and can get caught on tears on paper. Here is an excellent article on the misperceptions of wearing white gloves.

Handling certain objects, such as gilt frames, photographs and bronze sculptures without gloves, however, can be detrimental as the salts and oils on our fingertips can cause metals in corrode and leave marks on photographs. Normally nitrile gloves are worn when touching these items. Clean, dry hands that are free of creams and lotions are usually the best for most other objects, but ideally they should be handled as little as possible.

To reduce handling of the belt, I made a box with from unbuffered card and two rigid base boards that were padded with domett wadding and calico cotton. One base board can be used to lift out the belt from the box. The other can be placed on top and used to flip the belt over, so that the reverse can be viewed without touching it at all.

Box for Suffragette Belt
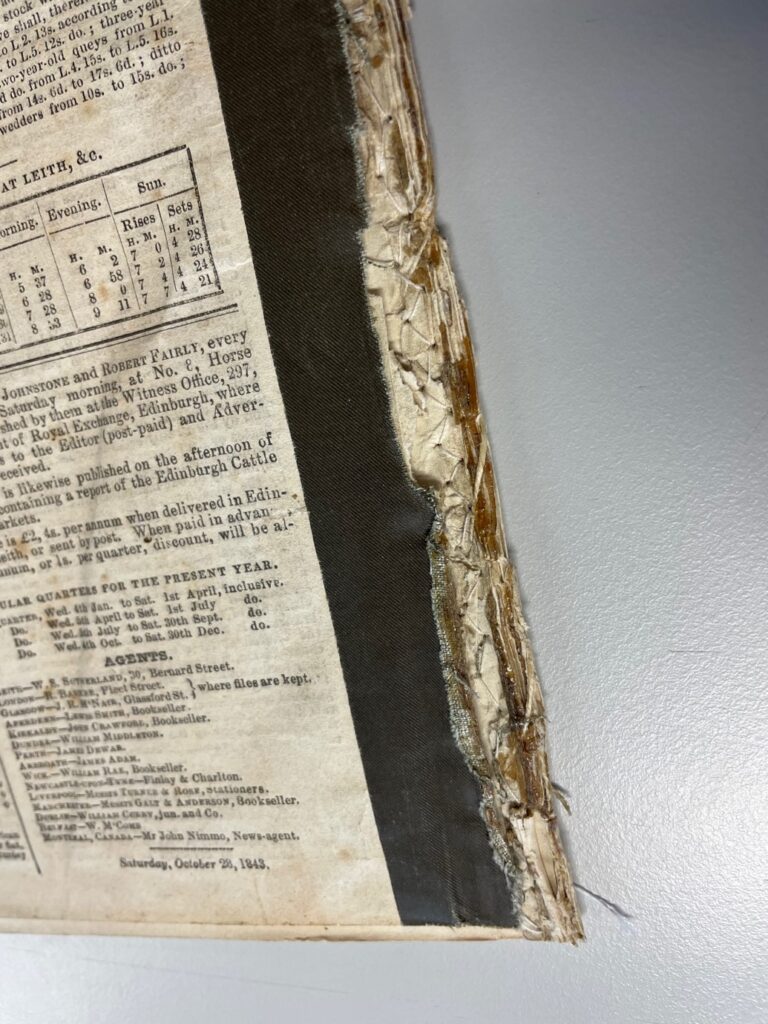
The slide show below shows the stages of taking the belt out of the box.

http://picasion.com/

This new storage will allow the Suffragette belt to be safely consulted for years to come.

Emily Hick

Special Collections Conservator